Thursday, December 26, 2019
December Documented with Nathalie
Hi there!
Nathalie with you today to share with you a few more entries of my December Life Crafted album. I hope you all spent a peaceful Christmas, and have lots of memories to document. Our December is filled with lots of activities, so lots to document. Having the Life Crafted and all the kits and stamps has come in so handy - I have added a few extras from my stash,too- but i am loving putting it all together. Let me show you:
The cute little ephemera bear came in handy to complete this page about my kids advent calendars. Plus the shaker pocket was a great way to tie in the two sides of the spread.
I chose a hybrid approach for this entry, and used this month's THIS IS LIFE Digital Stamp set to create the journal page of this layout.
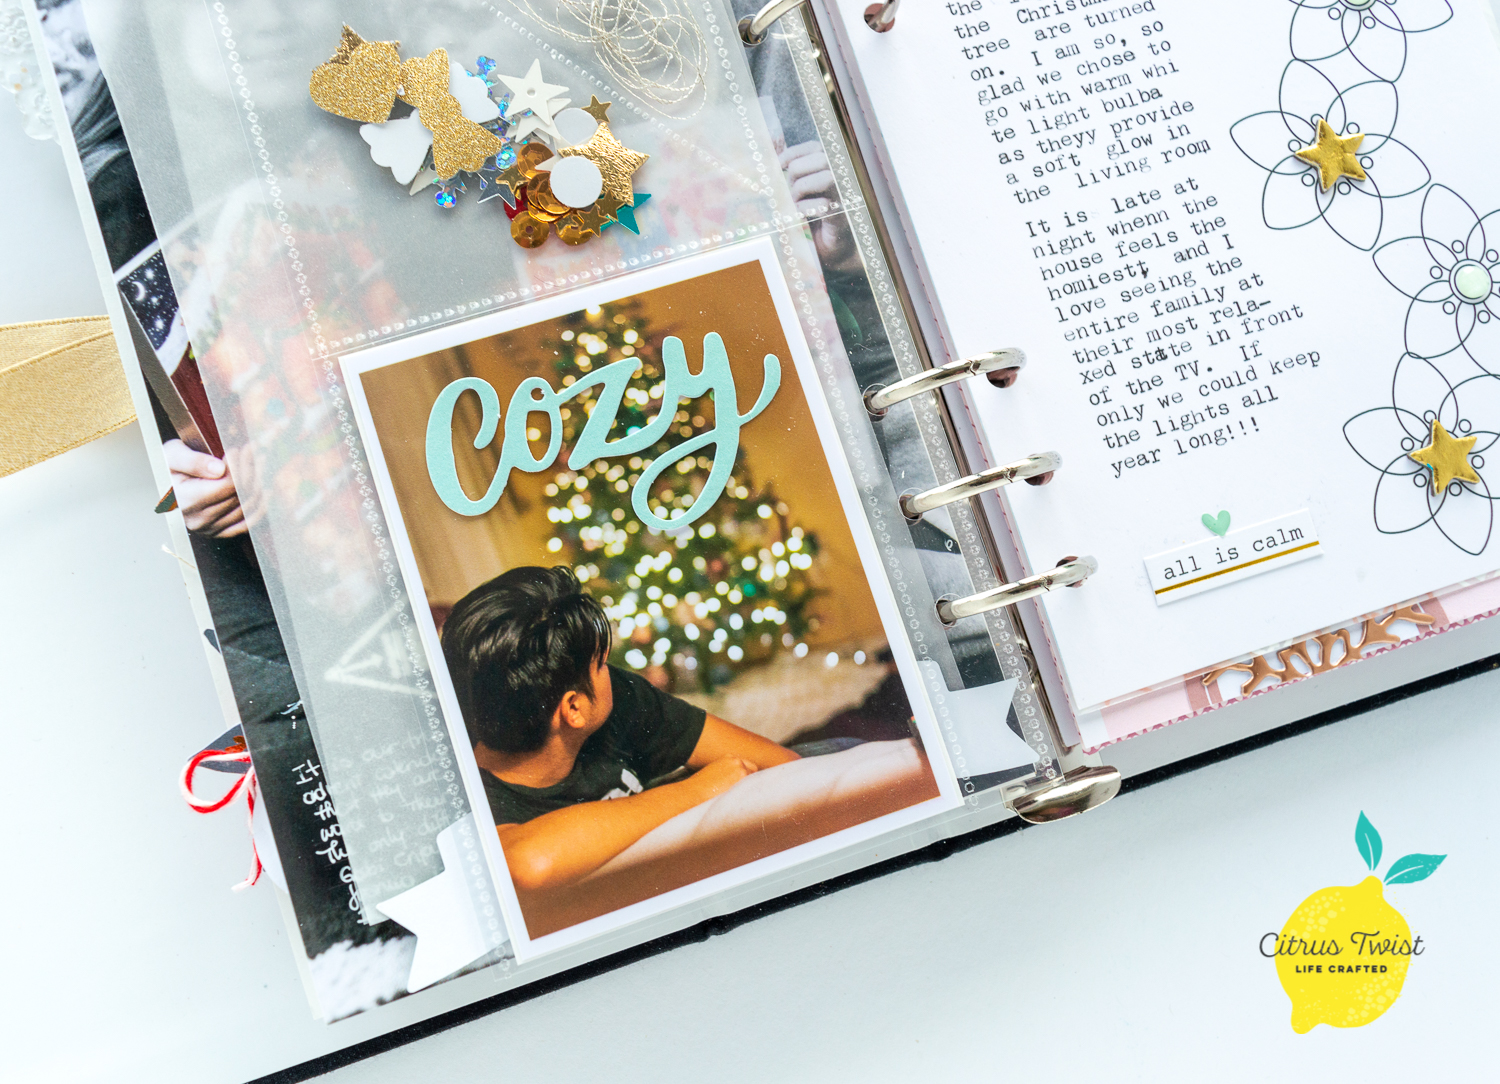
I used the This is Life:HUSTLE & HEART stamp to create the small star in the shaker pocket, and then trimmed one of the word stickers to complete the sentiment. Then used one of the embellishments from the Pink Paislee Together for Christmas (available at the CTK shop) to add the sentiment to the picture.
The beautiful chipboard stars from this month's Life Crafted kit were the perfect size to embellish the snowflakes on this page. I used an older This is Life stamp set to create the title and added a few more embellishments from my stash to complete the page.
For my next page, once again, i used a hybrid approach by creating my large journal page by printing the same card together (December PL Digital cards).
I used the This is Life Stamp set to create the background of this page. I heat embossed with white powder the frame image so that it formed a pattern on the piece of vellum. Then, i used the snowflake image to heat embossed -with rose gold embossing powder- the design in the center of each frame. All that was left to do was add the picture and a few embellishments ( Life Crafted kit and Add On kit)
For the other side of the page, i used a combination of embellishments from both kits to decorate the page. The small doggie embellishment comes from the Heidi Swapp's Honey and Spice collection ephemera pack -available at the CTK shop-.
This year,i have created lots of pages with pockets in them as i have lots of pictures to document.
I used ephemera from the Add On Kit to embellish the large pocket in this page, plus used one of the MME's Yuletide collection card -available at the shop- to create the journal for the page.
To create this pocket, i used a cut file from last year's Christmas kit and cut the bow design from white cardstock a bit smaller than the entire width of the page. The bows were backed with vellum, then i glued just the outer edge of the cut file -not the bows- to a patterned paper from the add-on kit to form my pocket.
I used a paper from the November Add on kit to create the backgrounds for the layouts, then added the pictures and embellished them with cut aparts from this month's Life Crafted kit and enamel dots from the Christmas kits. All that was left to do was add a title -used puffy stickers from the Add-on kit- to finish this page.
I hope these give you a few ideas for your December memories documenting. I still have a few more days to document before i can put my album away.
Have a Happy New Year!
Tuesday, December 24, 2019
Pocket Life Challenge with Tina Stepanova
Hey there! It's Tina here with you today to bring you a new Pocket Life challenge and hopefully to give you a few ideas and motivate you to create a new layout in your Christmas albums using the wonderful December Life Crafted and Add-on kits!
My challenge for you is to...
1. Create a flip up card/photo.
2. Stamp.
3. Use labels.
So I started by creating a flip up object in a page protector #2 using three photos and a piece of washi tape. Next I glued two labels together at the bottom of the upper photos to make the flip up easier to open. And then I stamped a few phrases on them using the Hustle & Heart stamp set.
In the lower pocket of the page protector #2 I simply put a "good things are coming" card from the Life Crafted kit and added puffy copper gold branches at the top and bottom of the phrase.
On the right hand side of the spread I created a mini layout. First I glued down and trimmed two pattern papers from the Add-on kit to fit into my Life Crafted album. Then I created a small cluster with ephemera pieces and stamped a few phrases with the Christmas Stories 2019 stamp before adding thicker embellishments.
After adhering the photo and the paper cluster I added some chipboard stickers and puffy copper gold snowflakes. And to finish off the page I put a few enamel dots here and there around the photo and added a piece of white thread to the tag.
And that's all for today! Merry Christmas and happy crafting!
XO
Monday, December 23, 2019
December Life Crafted Album Spread
Hello! Lorilei here today sharing a spread I made in my Life Crafted Album using the lovely December Life Crafted Kit!
I was immediately taken with the December This Is Life stamp set and the super cute tiny tag that had little phrases that you could stamp inside the tag!
Of course, at this time of year, I thought about gift tags and decided that might be cute on a page! I stamped the tiny tags and fussy cut them. I tied them onto white paper rectangles, to look like little gift packages!
I chose the Crate Paper tree paper from the December Scrapbooking Add-On kit for the left side of the spread and adhered the "packages" to the paper. For the rights side I wanted a big title so I used my favourite Spencer stamps to create the title word gifts. I typed the rest of my title and adhered it to the page, along with my photo!
Thank you so much for joining me today, wishing you a very Merry Christmas and Happy Holiday!
I was immediately taken with the December This Is Life stamp set and the super cute tiny tag that had little phrases that you could stamp inside the tag!
Of course, at this time of year, I thought about gift tags and decided that might be cute on a page! I stamped the tiny tags and fussy cut them. I tied them onto white paper rectangles, to look like little gift packages!
I chose the Crate Paper tree paper from the December Scrapbooking Add-On kit for the left side of the spread and adhered the "packages" to the paper. For the rights side I wanted a big title so I used my favourite Spencer stamps to create the title word gifts. I typed the rest of my title and adhered it to the page, along with my photo!
Thank you so much for joining me today, wishing you a very Merry Christmas and Happy Holiday!
Sunday, December 22, 2019
Sunday Sketch
Hey everyone! It's Alena with layout for Sunday Sketch.
Here's a look at the sketch this week:
Instead of creating a traditional 12x12 layout, I I translated again these sketches into a Life Crafted Album's pages.
I just divided the layout exactly in the middle and shifted the right photo a little. These pages are quite simple and has lots of white space.
Love how this turned out, the colors of the kit are perfect for the cute pictures of our boys.
Well, then it is time for you be inspired by the sketch to create a page of your own. Remember to share your creations with us on the Citrus Twist Kits Friends page on Facebook or by using #CTK, @Citrustwistkits on social media. I cannot wait to see what you create with this sketch.
Saturday, December 21, 2019
3-To-Inspire with Sheree
Hi everyone! It's Sheree here with a new 3-to-inspire challenge to get you creating this weekend. The recipe I've come up with for you today is:
1. make a photo into a tag
2. put your title on its side
3. use at least 3 photos
You can create a layout, life crafted spread, traveler's notebook spread or whatever format you like so long as you've included these three things.
Here's what I came up with using the December 2019 Life Crafted Kit...
I had three photos chosen for this spread today of my son cooking himself some pancakes...something he never would have done alone before! Now that he's studying hospitality at school he's gained so much confidence in the kitchen which is great to see so I wanted to document it.
I absolutely love the colourful, striped paper in the kit this month so that was the first thing I reached for when starting this project. I decided on a plain white background for the first page and a full sized patterned paper background for the second page using the pretty blue paper from the kit.
On the first page I adhered a strip of the colourful stripey paper down the left side and added some machine stitching. I used a stamp from the This is Life "Born For This" stamp set and the puffy alphabet stickers for the title, positioning them together down the left side, then arranged the two smaller photos onto the page. A circular chipboard piece between the two photos and a date stamp was also added.
For the second page of the spread, I matted the larger photo with more of the stripey paper, added some stitching then punched a hole in the top to create a tag. Twine was tied the hole, then after the tag was adhered to the page I stapled the twine to the top of the page. A die cut was also adhered to the top left of the tag with foam dots.
Under the photo I added a label from the digital printable cut apart sheet and a word phrase sticker from the kit. Then I simply printed my journaling and stitched it to the bottom of the page.
You can see my process in the video below...
Thank you so much for popping by the blog today. I hope you will have a go at the challenge too! Enjoy!
Sheree x
Friday, December 20, 2019
Life Crafted with Erica

Hi guys! I hope you've been having a fabulous holiday season! I'm on the blog today to share a spread in my Life Crafted album using the December Hustle & Heart kit.

I was very inspired by one of the journal cards in the kit that looked like a house in a snow globe. It reminded me of a particular Christmas when I was obsessed with putting everything into bell jars. And thus inspiration was born!
I started by using the three numbered ephemera pieces in the kit and chose three bell jar ornament photos to highlight. I created clusters with the circle elements from the December Digital Cutaparts sheet, a word phrase (or arrow) for each and a gold chipboard star.
The clusters are quite busy so I kept the photos rather simple and just stitched around them to create a frame and add some texture.
On the left side of my spread I chose three of my favourite papers, cut them into strips and stitched them down to create my background. I wanted to bring some of the gold stars onto the left-hand side so I placed one at the bottom with a label and two at the top with a sprig.

I knew I wanted to use the snow globe card for my title and for my journaling. Adding in a vellum pocket was the best way to get to do both. I used the alphas from the kit and a piece of ephemera for my title and stitched down my pocket with some coral/pink thread.

I typed my journaling on my typewriter and decorated the back of the card with a photo and a couple of embellishments. The pocket was also a great way to add in more ornament photos, because I made a ton!

I hope this gave you a little inspiration to try documenting something from a past Christmas in your Life Crafted album. Add in pockets and try stitching on your photos!
Thursday, December 19, 2019
Life Crafted using December Add-On with Patricia
Hello CTK Friends! Hope you have been enjoying the kits and inspiration from the team and other CTK subscribers! This is Patricia to share a Life Crafted spread using mostly the December Add-On and focusing on creating a divider using a December Cut File, acetate, and the new Hustle & Heart stamp set.
I was very inspired by the flowers from the Hustle & Heart stamp set. They have a geometric look to them and so perfect for the holidays. I duplicated the Sparkle & Shine cut file and then did a mirror image of it so that I could sandwich acetate in-between the cut files to build off of the cut file image using these floral stamps.
I really did a lot of experimenting with this idea. After my floral images are stamped using green and red Staz-On, I decided to use alcohol markers to color the inside of the star shapes from the cut file. This is a cool way to add color through the acetate, but it did create some bleeding as it touched the cardstock, but I kept going. As I kept going, the idea to then take the same alcohol marker holding it at an angle and brushing it across the star cut file image worked! A happy creative experiment!
Once I started this idea, I kept going by adding an alcohol marker to the center of the stamped flowers, and then adding doodled stitched lines to the other star cut file from this cut file. To help my see-through divider show the detail of the stamping and coloring, I used white cardstock under it and created that page to be both decorative and a place to add more interest to my divider's design and a place for journaling.
I used mostly the December Add-On stickers to decorate this page, but that deer chipboard piece is from the Life Crafted kit.
My left side uses pattern paper as the background with a large photo and a smaller trimmed piece of pattern paper layered over the edge of my photo from the December Add-On kit. I used twine from my personal stash, a die cut, and stickers from the Add-On, with a heart chipboard from the Life Crafted to finish up that side.
I have a video showing how this experimental creative spread came together. Hope you enjoy. You can also watch it in HD on my YouTube Channel here.
Subscribe to:
Posts (Atom)