Showing posts with label Add on kit. Show all posts

Sunday, December 5, 2021

SUNDAY SKETCH with Nathalie


Hi there!

Nathalie with you today to bring you some inspiration featuring this week's sketch and a mix of new products from this month's release.  I am sure that you (as many of us) are looking at easy and quick ways to document your memories.  Well, sketches are a great help when it comes to documenting in style in a short amount of time.  They are like a blueprint to your page, the rest is up to you! Let me show you this week's sketch:


And here  is my project, inspired by the sketch:


I chose to use the sketch  for a Life Crafted album layout.    First, I had to decide on the orientation of the sketch so that it work for my album.  This meant, rotating the sketch 90 degrees counterclock wise.


I chose to place my photos and all the paper layers ( Fernwood Add -on kit and December Digital Files) on the left side of the album.  I followed the layering on the sketch to build the layers behind the photos, and replace the cut file mat with ephemera pieces from the Fernwood add on kit,


I decided to switch the background paper of the other side of the layout to one of the Digital papers from the December release ( this was also used as a layer behind the  photos.  I used Photoshop to add my journaling before printing.  


I added the small strips of paper to the right of the layout, just like in the sketch.  I repeated some of the patterned papers -Fernwood Add on kit-  so that it ties the two sides together; then switched the small label for CTK exclusive TAKE IT INSIDE ephemera pieces.   


I hope this inspires you to use the sketch to document your memories... Remember to have fun with it!!

XO


Saturday, October 16, 2021

3 to Inspire with Kira


 Hey there!  It's Kira and I am so excited to be back on the Citrus Twist blog to share a look at what I've been working on.  And today I've have a challenge for you, use these three items on a layout:  

1.  Cut file 

2.  Multiple photos

3.  Patterned paper

Here's a look at what I came up with:


I am working with the Hocus Pocus Halloween mini kit to document our 2020 Halloween, so I started by choosing my photos.  I picked two of my son in his Captain Hook costume, one sized to a full LC page (4.25x8.25) and the other to 2x3.  


Then I decided on the color scheme I was going to use.  I love the floral print paper included in the kit, so I wanted to play off the colors on that:  pink, orange and yellow.  I pulled out other papers that I felt coordinated well.  

I love the leaves in the Fall Days cut file, and thought they could work well as layering pieces on my layout.  I cut out the outline leaf in pink and yellow and the solid leaf in orange.  They were sized to about 5" wide, but I cut most of the clusters apart before using them on my layout.  


Now it was time to start piecing this layout together!  I cut three pieces of paper into strips and layered them on top of each other on white cardstock.  I added some machine stitching on top of a few of the strips.  Then I brought in my leaves and layered them under and over the strips.  I adhered my smaller photo down and added some die cuts and chipboard pieces in the corners.  

On the reverse page I chose the chipboard "October 31" piece as my title.  I thought it felt a little plain so I decided to layer some of the cut file leaves under it as well.  A small chipboard heart finished off the layout.  


Thanks so much for stopping by!

xo, Kira 


Monday, September 6, 2021

MEET OUR SEPTEMBER 2021 GUEST DESIGNER: JEN MCMURTREY


Hello there!

Today we are very excited to introduce our first guest designer for September.  She is an amazing designer with a great eye for color, story telling and always eye catching projects.  She is also a friend of ours, and we are so happy she is joining us for this month.   Here is Jen McMurtrey!


 My name is Jen McMurtrey, and I live in a small agricultural town in southeastern Washington State (the population is just over 6,000 people). My husband Dan and I have three kids: Phoebe, 26; Caleb, 21; and Abby, 17; as well as three dogs who make regular appearances in my projects. Currently, I work as a business education teacher at the local high school where I teach business communications, accounting, business management, and career exploration classes. Additionally, I am an adviser for two clubs that keep me very busy this time of year. Prior to teaching at the high school, I taught business classes for four years at a college 50 miles from here before moving into the associate dean position. With all of the craziness in my life, crafting is what keeps me sane. Currently, I work on the creative teams for Elle’s Studio, Simple Stories, and Studio Forty; and doing so is a dream come true. I am so excited and feel so honored to be guest designing for Citrus Twist Kits and can’t wait to share my projects.


Q&A with JEN

·         When did you start scrapbooking?

In 2001, I was taking courses at the local community college and befriended a group of classmates who took me to a crop one Friday night at the LSS. I had no idea what to expect other than them telling me to bring a few photos. From the moment I stepped into that store, I was absolutely hooked. Never had I ever seen so many stickers and fun papers! It has been in the last ten years that I have been scrapbooking consistently and that is due in large part to being on various creative teams. Scrapbooking is my therapy and truly brings me joy. If I were able to craft in some capacity, I don’t know what I would do.

·         What is something most people would not know about you?

In my early 20's, I had a pet pot-bellied pig named Lucy who lived in my apartment and went everywhere with me . . . rides in the car, walks in the park, and over to my parents' house to visit. Sadly, she passed due to an uncanny series of events that I won't go into. However, her story was published in the local newspaper and later picked up by the Paul Harvey Show . . . and, "now you know the rest of the story." 🙂 

·         What are the 3 scrapbooking products you can’t live without?

First and foremost would have to be white cardstock, which is a staple on the majority of my projects. Any and all floral die cuts would have to be next because I love flowers and put them on everything. The third and last item has to be enamel dots because they add that extra bit of color and texture to projects that makes them feel complete.

·         What do you love about the 
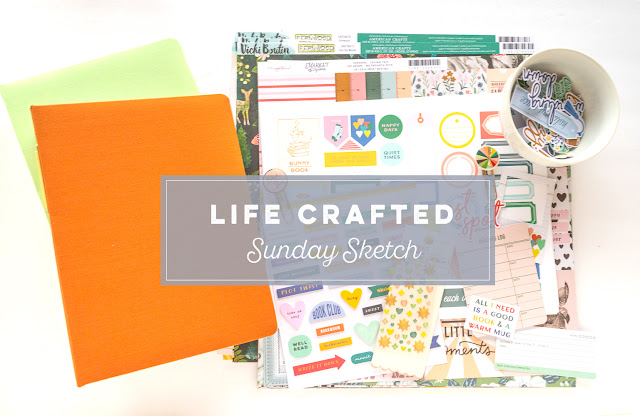
September – Scrapbooking Add-on Kit?

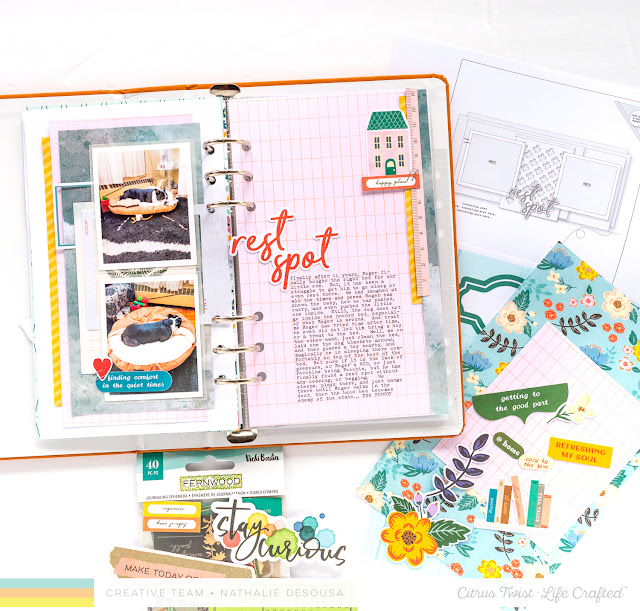
Seriously, I love everything about the kit; however, the CTK ephemera packs were my favorite. They have this cool vintage vibe about them that reminds me of graphics from when I was kid.

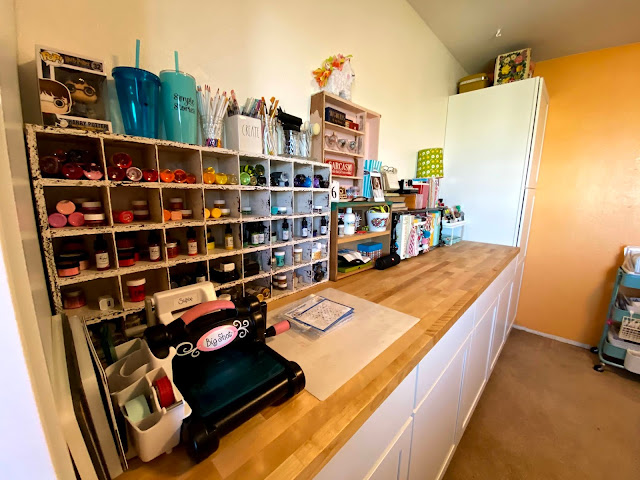
·         Finish this sentence “If you could see my scrapbooking space now . . . “

. . . you would think a bomb went off! It is a hot mess right now!!


This is Jen's first project using our September Add on kit, True Life V1 Stamp set,  and  HERE WE GO Die Cut ephemera ( CTK Exclusives).


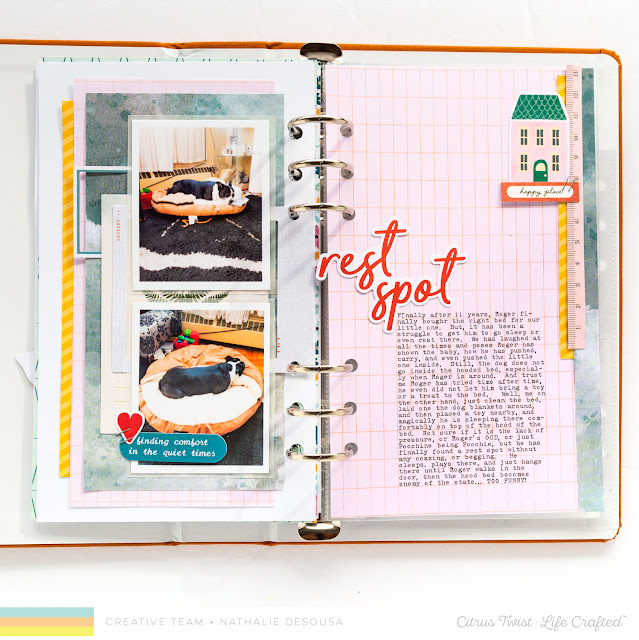
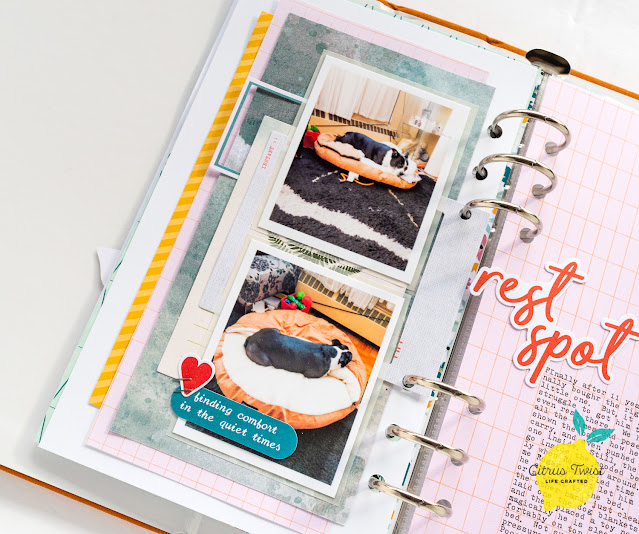
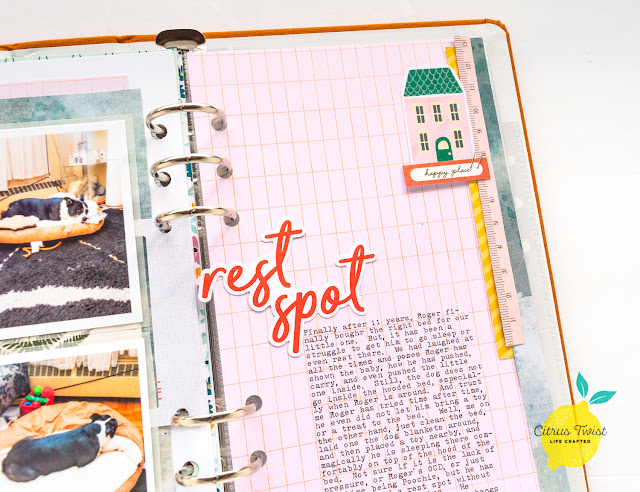
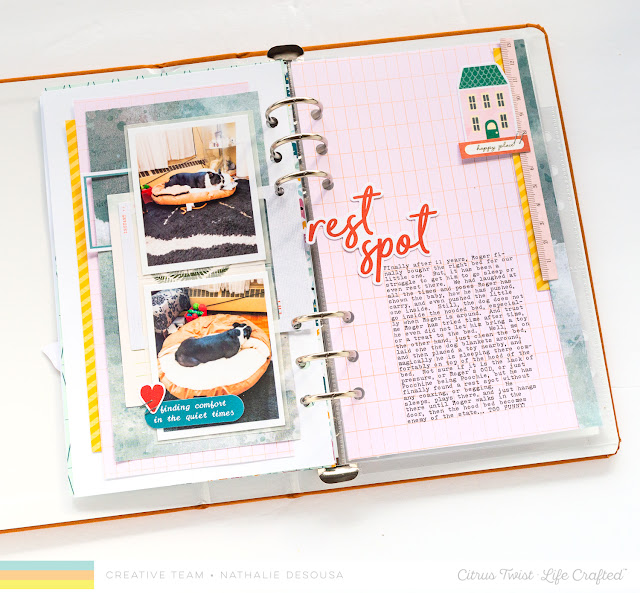
We love how she has combined our exclusive ephemera in small clusters through the length of her page( and all the repeated photo of her youngest daughter)


Her focal point is accented with a color photo and a large cluster of ephemera from our Add on Kit and exclusive ephemera, too


Her title work is just gorgeous.   She created a stamped line of sentiments using our True Life V1 stamp set.  Then added a title combining our Puffy words and alphas to continue the look of the stamped border.    She then finished her page with a last cluster of embellishments, ink drops and our September enamel dots.


Thank you so much Jen for this gorgeous project, and letting us learn a bit more about you.   Jen will be back during the month to share more of her talent with us.  You can always find her on Instagram to check her latest projects and lots of inspiration @jencmc72  https://www.instagram.com/jenmc72/


XO


Saturday, September 4, 2021

3-to-Inspire with Nathalie


Hello there!

Nathalie with you today with  this week's 3-to Inspire challenge.  Finally the weather is slowly changing here, that means that we are able to enjoy the outdoors a bit more.   So, today, I am using this week's three prompts and a mix of our complete September release to create my project.   Here are this week's prompts:

  1. Go bold/large with your photos
  2. Use a digital file
  3. Create an insert
Here is what I have created:


I had fun with all the gorgeous September kits, exclusives and digital files, and created a compound spread.


I used two large photos (5"x8") for the background of my page.   All I had to do is perforate the holes for the binding and added the simple script words, from the September ephemera, and some of the new enamel dots.


For my insert, I  pulled a piece of the specialty acetate paper from the Add-on kit (Paige Evans) and cut it to 4"x7".  I layered one of the August journal cards, with some of the September ephemera with the photo.   The small tag and paper clip are from my stash but just bring texture to the page.


 I added a few more pieces of ephemera from the Add on kit to add a bit of interest to the back of the acetate piece. Then added the foam adhesive sentiment with it.


I did not want to hide the details of the photos. So, I created a small pocket behind the second large photo.   The new 6"x8" digital ledger papers are a great way to add lots of journaling in one place.   I simply added my story on the laptop, and print it all together.  I fussy cut the small element from the digital element cut apart to the top of the ledger and slid it in the pocket.


I love how this spread turned out.  The September release is gorgeous and filled with beautiful products that will help you document your days.   Remember to share any project you create for this week's challenge with us

XO


Saturday, July 24, 2021

3-to-Inspire with Nathalie


Hi there!

Nathalie with you today to bring you some inspiration using our July release.   There is such an outdoorsy feeling to this month's release, that it was so fun to put this spread together using this week's 3-to-Inspire prompts:

  1. Multiple Pictures
  2. Hidden  Journaling
  3. Floating element.

Here is the spread that  I have created, and it spans through two layouts in my Life Crafted navy album:


These photo series is from back  in April when the weather finally warmed up, here in Toronto, and it was a perfect for a walk around the neighbourhood.


I am using 5 photos in this spread.  On the first part of the spread, I have sized my photos to 2x2.5".  I am keeping two of them together (film strip).  I used a piece  of patterned paper from Jen Hadfield's Reaching Out 6x8 paper pad  to back the photo.  


 I used puffy alphas from the July exclusive puffy words and Pinkfresh Studio  Happy Blooms collection ( add on kit) to create my title.


I needed to tie the rest of  the photos to the page, so I decided to create a floating element ( or so I call it) to help with this.   A 3x4" piece of acetate serves as pocket card.  I glued the third picture to the front of it, and  used the same patterned paper ( as in the title page) to back this card on the other side of the acetate.


On this second part of the spread,  I am using two 3x4" photos.   Once, I had the one photo on the pocket, and the back of my floating  element set, then  it was all about dealing with the journaling.


I combined two of the TN Digital papers to create the pocket for my page.   I used a digital card from May 2018 to create the tag for my photo, and slid it in the pocket, thus concealing the journal lines.


I just love how this spread turned out!   Remember to check all the materials used in the CTK shop, and join in the challenge!


XO


Sunday, July 11, 2021

SUNDAY SKETCH with Nathalie


Hello everyone!  

Nathalie with you today to bring you this week's sketch.   We all love sketches, it is one of the best tools when you need inspiration to build your page.   This week's sketch is so versatile, fun, and layered... let me show you


Well, did I mentioned that sketches are the inspiration for a page, well here is my page inspired by the sketch and featuring July's Add-on kit.


It looks just like the sketch with a few small (or not) changes.   Starting with the orientation.  I chose to flip my sketch 90 degrees counterclockwise, this set my title at the top left corner of the page.   


I love all the layers, but chose to replace the largest paper layer with a hand stitched background.   For this,  first,  I masked the area outside of the paper layer.   Next, I used a pencil to draw diagonal lines, and proceeded to use the Spencer Outline Stamp set to stamp the word, "EVERYDAY" repeatedly.   I used a paper piercing tool to create the stitching guide following the letter outlines, then spent a few hours hand stitching them with white thread.


I did not want to cover the entire stitched layer, so instead, I decided to follow the paper layers ( all the papers and embellishments come from the Add-on kit) in the sketch,  but place them in the bottom right quarter of the page.


My choice was to replace the small tickets, flags and banners from the sketch with  floral pieces from the add on kit ( and fussy cut from the papers).   These help to create a visual triangle on the page, and a great placement for the title.


I used ephemera and Happy Blooms puffy stickers to create the title.  Then just like in the sketch, added a few stamped sentiments from the True Life v2 stamp set, followed by my journal lines.


I love how the page turned out with the sketch as inspiration.   Remember you can find all the materials used in the CTK shop.


XO


Sunday, April 11, 2021

SUNDAY SKETCH with Nathalie


Hi there!

Nathalie with you today with this week's Sketch Challenge.   Let's just say that sketches are a busy scrapbooker's best friend ( aka  ME!).   Having a blue print for your page is just awesome, as it just gives you a clear idea for your page (thus taking the guessing game) and allows you to add small touches that will make the page your own.   


This week's sketch is a fun one, and pretty versatile as it can be adopted into many sizes and formats.  For my page, I used the sketch as inspiration, and mixed papers and embellishments from the add on kits and shop exclusives.


I focused on the gold tones of the papers, and brought pops of teal to add a bit of a masculine touch to the page.  Of course boys need flowers!!


I started with a  piece of the Country Arbor paper (Maggie Holmes - April Add-on kit).  The scalloped border just adds movement to the page, and softens the look of the layer.   Next, I followed the sketch to cut the next two layers of paper from High Tide, and Blossoms in Blue ( both in April's add on kit).   


Here is where my take on the sketch changed a bit.  Since, I am enlarging the sketch to fit a 12x12 page,  I had to extend the layers on the left of the sketch so that they are part  of the paper cluster under the photo.  IN addition, I chose to actually use the pocket in the sketch keep my lines  of journal.   So, I created the pocket out of vellum, and also backed the picture with vellum so that it has a cohesive look.


I used a premade manila tag to add my journal and slid it into the pocket.   I chose to follow the sketch for the placement of the  embelllishment cluster.  However, since my page is larger, I needed to add two more clusters with repetitive elements.   I added flowers and ephemera from March's Add on kit, plus some of the Hearts and Such and Floral CTK ephemera as per in the sketch, then used flowers from Heidi Swapp's  ephemera pack ( April add-on kit) to create two other small clusters at the corners of the paper layers.


 One of the biggest changes is removing the small strip of paper behind the picture, and instead replacing it with ephemera and an embellishment cluster.   I love having my printable elements at hand, so I can easily just add them to my clusters.     


I used puffy Weekender gold alphas for my title, and replaced the journaling position with a stamped subtitle.  The Storytelling stamp has the same font as the alphas, and the sentiments just fit the memory!


I hope this inspires you to use the sketch to create a project of your own.  Remember to share with us your finished projects (use #citrustwistkits #ctksketch).  We love being inspired by you, too!

XO