Sunday, August 29, 2021

SUNDAY SKETCH with Nathalie


Hi there!

Nathalie with you today to share this week' sketch.   We love sketches, as they are one of the fastest and easiest ways to create  a page in no time.   Let me  show you the sketch for the week:


I have to say that this sketch looks so challenging on paper, but once you pull your photos, embellishments and papers it just works. Here is what I created using the August Add-on kit and the sketch as inspiration...


My first choice was to use the sketch in my April Life Crafted album.   For this, I literally zoomed in the sketch to the to just the area around the photos.   If you look closely -at the zoomed in version- the sketch forms a loose grid design.   


I started with Paige Evans'  Bungalow Lane collection -paper 15- for the base layer for my photos.   Once, I had the photo and paper on my layout.  I decided to go for a monochromatic look for the layout.   For this, I used tones of teal for all the embellishments in the Add-on kit as well as the Travelogue puffy and chipboard stickers.   I placed these following the sketch.


I took a bit more of freedom when it came to the other side of my layout.   I kept the location and general embellishing idea from the sketch for the second photo of this layout.  I decided to repeat the circular embellishments in this side of the spread, too.


I think one of the biggest freedoms I took with the sketch was in the title area of the layout.  I decided to bring the layered ephemera pieces from the top left corner of the sketch to the area below the title.  Then moved the small label from the right of the title to the bottom of the page.   I kept the small strip of  paper at the bottom of the layout as in the sketch, but decided to use the neutral paper  from the add-on kit -also used behind the photos-.


I love how this turned out, and how easy it came together using the new August Add-on kit.   Now it is your turn to create a new page inspired by the sketch and share with us your projects.  Remember to tag us @citrustwistktis #citrustwistkits #CTKSketch when you share your projects on social media.  We love to see what you create !


XO


Saturday, August 28, 2021

3-TO-INSPIRE WITH NANCY


Nancy here today with a traveler's notebook page using some of the beautiful ephemera and stamps released in August. Perfect for all of your summer stories.

Today's three to inspire prompts are:
1). Create a collage out of ephemera
2). Use an oversized photo as a focal point
3). Create a photo frame with a stamp

I started this page by printing out a favorite photo so that it would become the base of my left page. Using an enlargement creates a bold focal point for any layout.
Next, on the right side I started creating a collage by using some of my favorite stamps from the Good Time Adventure Stamp Set. I started at the center of the layout and worked my way out from there.

A few pieces of ephemera and some journaling completed the colorful collage. I used a speech bubble stamp to frame out a favorite photo.

I hope you find using stamps to create collages and in unusual ways is a fun challenge. The August ephemera release is both colorful and versatile for all of your end of summer stories!


Sunday, August 22, 2021

Sunday Sketch with Alena


 Hey everyone!  It's Alena with  layout for Sunday Sketch.

 Here's a look at the sketch this week:

And here's what I came up with using the store's new products.


For this layout, I chose Pinkfresh Studio "Happy Bloom" collection paper, floral die-cuts and  dies, which are now available in the store


For the title, I again used Hello Sunshine puffy phrases.

For embellishments, I used The Good Life chipboard stickers,  new Hearts puffy stickers "Hello Sunshine" and pieces of the new We Go ephemera.

When layout was almost ready, I decided to add small accents using Enamel dots and machine stitching.


Well, then it is time for you be inspired by the sketch to create a page of your own.  Remember to share your creations with us on the Citrus Twist Kits Friends page on Facebook or by using #CTK, @Citrustwistkits on social media.  I cannot wait to see what you create with this sketch.

Saturday, August 21, 2021

3-to-Inspire with Shu-Wen

 
Hi Everyone!

It's Shu-Wen here, sharing a spread that I created in my Life Crafted Album with the August 2021 release and the Fancy Pants "Peachy Keen" 6x8 paper pad! I love how the cardstock ephemera, chipboard stickers, and journaling cards from this month's release work so well with the colors in the "Peachy Keen" line!

This week's 3-to-Inspire prompts are:
1. Interactive element
2. Stamping
3. Multiple photos

Here is a photo of the layout that I created for my Marigold Life Crafted Album!


For the left side of my spread, I included a full-page photo measuring 5" x 8 3/8". To frame the top of this photo, I added the "hike" word and an orange heart puffy sticker from the "Hello Sunshine" Puffy Phrase & Icon Stickers from July's release. I specifically wanted to include a green word phrase sticker to match the green in the trees and grass around the other edges of my photo. 

For the right side of my spread, I made a waterfall flip-up page for the rest of my waterfall photos, making this a waterfall waterfall! Get it? ;) To do that, I cut 8 pieces of white cardstock into 3 1/4" x 4 3/4", scored on the 4 3/4" side at 1/2", applied double-sided tape to the 1/2" hinge, and adhered all the flaps down onto my base page so that they all aligned in a waterfall pattern. I matted the flaps of my waterfall with patterned papers from the "Peachy Keen" 6x8 Paper Pad from Fancy Pants that I had cut down to 3" x 4". To fill out the panel to the right of the waterfall, I stamped the name of our hike (Beauty Creek to Stanley Falls) using the new "Sophie" Alphabet Stamp Set. I LOVE how this stamp set includes the bold AND the un-bolded alphabets in the same stamp set so they can be used together! I also stamped an arrow stamp from the new "Good Time Adventure" Stamp Set to indicate that Stanley Falls was our destination for the hike. 


Next, I added some clusters to the patterned papers in my waterfall using pieces from the "Here We Go" Die Cut Ephemera Pack. I love that some of the die-cut ephemera pieces, such as the "Smile" ticket and these cute blank labels, had spots for me to do some more stamping, again using the Good Times Adventure Stamp Set. I even did a bit of stamping on my photo to fill in some of the empty space! While I was decorating, I made sure not to add too much bulk on the insides of my waterfall flaps by only using the cardstock ephemera and stamping. 


For my last two flaps, I included two journaling cards from the new "Everyday Life" Double-Sided Journaling Cards. For the first one, I typed up some journaling onto clear sticker paper and adhered it to the center of the journaling card. For the second journaling card, I used a couple of Citrus Twist Kits' older stamp sets ("It's Weathering" Stamp Set and "Let's Wander" Stamp Set) to document the extremely hot weather we were hiking in. I love how the circle stamp lined up perfectly with the circles on this journaling card! Then, I decorated both journaling cards with more ephemera pieces from the "Here We Go" pack. 

To finish off my spread, I added a couple of "The Good Life" Chipboard Stickers to the very first flap in my waterfall; one to decorate the center of the flap, and another to hide a magnet that I've attached to some ribbon to keep my waterfall closed. 

You can check out the process video that I made for this spread on my YouTube channel.


I love how this spread turned out! If you'd like to give this challenge a shot, feel free to tag me on Instagram or on the Citrus Twist Kits Facebook Fan page so that I can check it out! Make sure to check out the Citrus Twist Kits shop for all the new goodies this month! Thanks so much for stopping by!


Sunday, August 15, 2021

Sunday Sketch With Aimee


    Hey there Citrus Twist friends!  It's Aimee here with you today with another Sunday Sketch. Like most, I love using sketches when I am feeling less than creative but also just as a jumping off point. Many times the finished product does not look like the sketch at all while other times I follow it rather closely. Let's take a look at this weeks sketch: 


I absolutely love all the details in this sketch and what I love most about Citrus Twist Kit sketches in particular is that they show detailed embellishment arrangements! It really takes the guess work out of putting your page together when you receive your new products. Today, I have decided to follow the sketch pretty closely but I will modify it to fit inside my Life Crafted album


 I love the plus sign die cuts from the Here We Go die cut pack, they reminded me of a hospital insignia and so they are actually what  inspired me to document this particular story— a story about a spell of appendicitis I had in June. To start this page off I noticed that the sketch seemed to have some splatter in the background. I used a Faber Castell Gelato stick in the color Amber and a wet paint brush to add some beautiful droplets to my page. Next, I laid out a large 4x8 inch cream tag as my base that will span  across both pages. I layered up bits and scraps of paper from the Jen Hadfield paper pad on top of my tag in a similar fashion to what is shown on the sketch. I'm really leaning into those warm orange, yellow and red tones right now!


Now, obviously in the sketch the die cuts shown are ones with rather upbeat sentiments on them and my photo obviously tells a not so great story. That's totally okay though because I was easily able to swap them out for more fitting embellishments from the pack. I exchanged, "It's a good day" for "you got this" and "my happy place" with "I'm done" and so on. 


I simply adore how the sketch calls for scattered plus signs and added machine stitching. So many fun details that add so much interest and texture! I went ahead and added stitching where I could and a little black puffy sticker from the Stars and Hearts sticker sheet that I could not pass up. So fitting! 


 On the right-hand side under my photo I added a chipboard sticker from The Good Life chipboard sticker sheet and typed in my journaling. 


 At last, I trimmed the whole layout in half so that it could fit into each page protector.  I love that this sketch is still relatively intact and still feels like it is one piece— despite being cut into two separate halves. Sketches can absolutely be shrunken down in scale to fit whatever format you're working with. I encourage you to give it a try and see what you come up with! 

Affectionately, 


Saturday, August 14, 2021

3-to-Inspire with Desiree


Happy Saturday crafty friends!  I am here today to share this week's 3-to-Inspire.  

The 3 items on the list today are:

1. Stamps
2. Journaling cards
3. Puffy stickers


I decided to do a 12x12 layout with my picks.  Once I saw the lovely patterns and soft colors of the journaling cards, I knew I wanted them to be my focus and wanted to layer them.  So I got to work with the new Citrus Twist 3x4 Everyday Life Journaling Cards on white textured cardstock.  The colors and designs of these cards made them really easy to work with.  


Next, I used the patterned papers from the Happy Blooms 6x6 Paper pack to layer under the cards.  To give my layout a little more texture and interest, I distressed the cards and papers by simply turning the edges up a bit.  


Then, I layered all the fun die-cuts onto the banner from the Here We Go Ephemera Pack.  I think my favorite may be the mint-colored "It's All Good" die-cut. Next, I added stamps all over my page.  The stamps sets I used are the Good Time Adventure 6x8 Stamp and the True Life Version 2 6x8 Stamp.  For my title, I used the Sophie Alphabet Stamp.  All the stamp fonts mixed so well together even though they were all very different.  I love how they all looked together.


Then, I tucked the Stars & Hearts Puffy Stickers all throughout my layout.  As I was finishing up, I realized the layout was very light and airy. To ground it, I sprinkled in more black to play off of the black ink and ground it.  I added black splatters and threaded black/white twine through my banner.

It was fun to see how these simple three things made my layout come together so well.  I hope you have a chance to try this 3-to-Inspire challenge.


Sunday, August 8, 2021

SUNDAY SKETCH with Nathalie


Hi there!

Nathalie with you today to share a new project inspired by this week's sketch.   I am sure that we all love the practicality sketches can bring to memory keeping.   A good sketch is a great foundation/blueprint for your project.   It speeds the designing process while allowing for freedom of expression all in one.   Let's look at this week's sketch:


I love all the layers, movement, and negative space the sketch provides.  But my first impression was how it is set up as a modified grid. So, I decided to use it to create a layout on my Life Crafted album.


The sketch just made this page come together  rapidly, and I love the results.   First, I decided to focus on the the center part of the sketch ( this means, I imaginarily trim the sketch to fit my album layout).  This automatically got rid of the third photo, the top paper strip and  part of the large cluster at the bottom right corner of the layout.


I followed the sketch to create the layers of paper , and also the position of the pictures in my page.   The Reaching Out paper pads ( Jen Hadfield collection) were the perfect background for the photos.   It was a personal choice to keep the embellishments on the photos very simple - this creates a nice balance with all the patterned papers and color in the photos-.


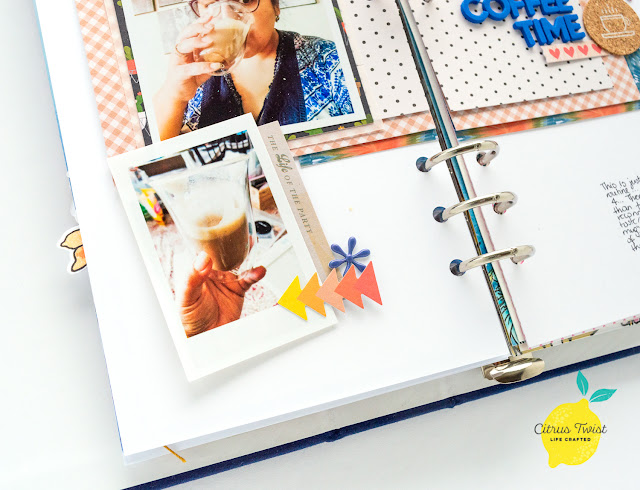
The larger change in my page ( from the original sketch) is the position of the title and journaling.   To play with  the shades of blue of the photo, I am using the blue foam alphas for the title, and combining it ephemera pieces from the Reaching Out collection, the August release and May Cork sticker.  


The next major change is moving the position of the journal to the bottom right corner of the layout .   Having the journaling there, balances the page ( makes the layout into a modified grid) as it gives it much needed white space.


I hope this shows you how you can utilize a large sketch, and modify it to fit into your Life Crafted album. Remember to stop by the Citrus Twist Kits Shop to check all the materials I have used in this page,


XO