Showing posts with label citrus twist kits. Show all posts

Saturday, February 4, 2023

3-to-Inspire with Nathalie


Hi there!
Nathalie with you today bringing you this week's 3-to-Inspire challenge featuring the new Cherish release.  Here are this week's 3 prompts:

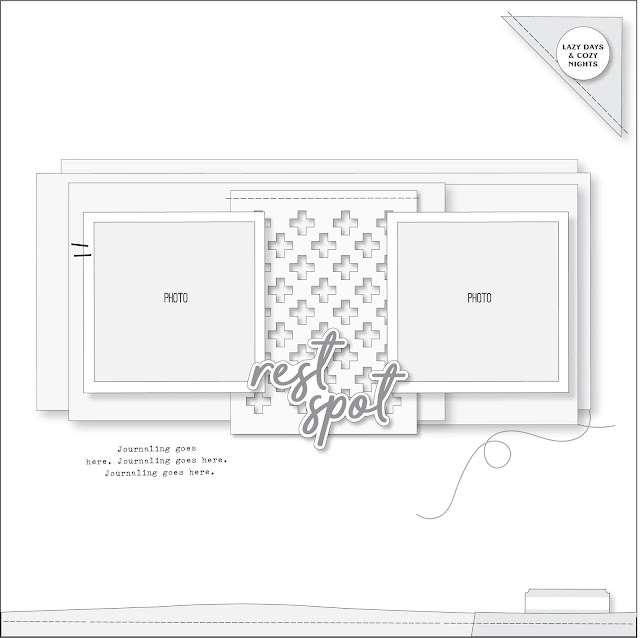
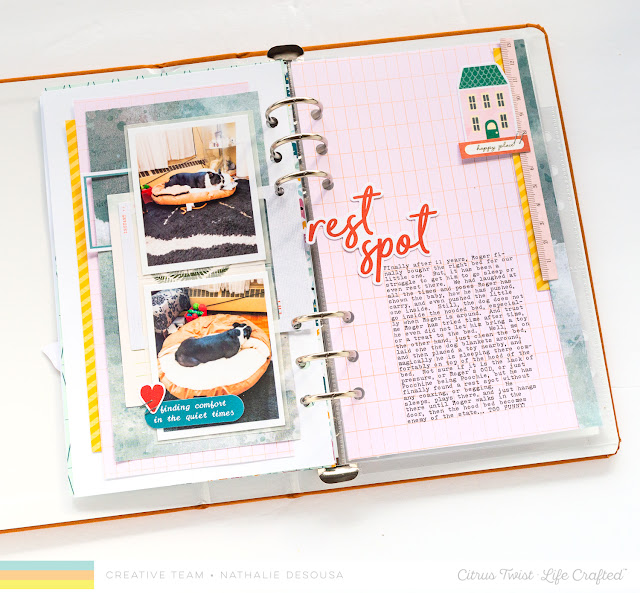
  1.  Set your title on an angle
  2. Use a small color palette
  3. Ephemera is your friend!
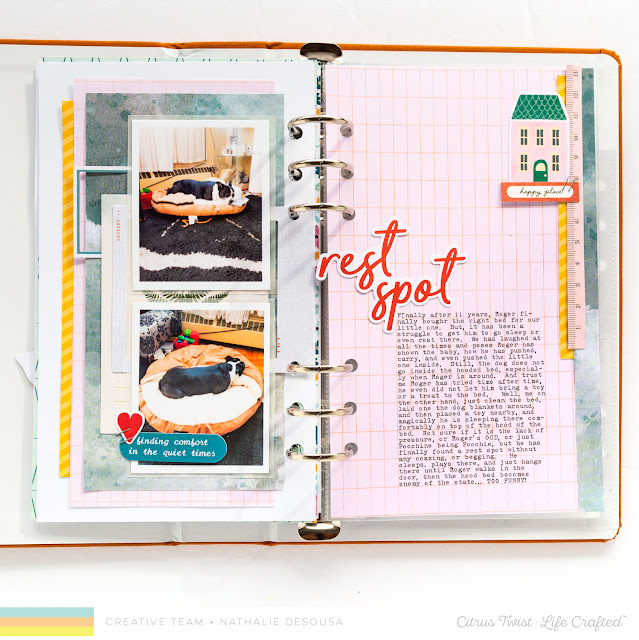
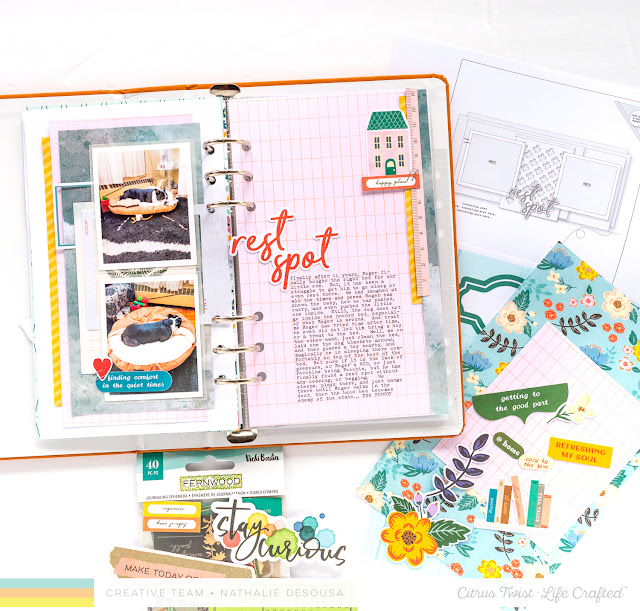
I used the three prompts and the Cherish kit and digital files to create this spread for my 6x8 Life Crafted album:


I love how the three prompts actually helped to pull this together in a short amount of time.   Let's take a closer look:


I started my project by selecting my color palette. I wanted to make the green and coral peachy of the Cherish kit to shine. So, I added a bit of teal and yellow ( both from the Digital Patterned paper) to  complement my palette.


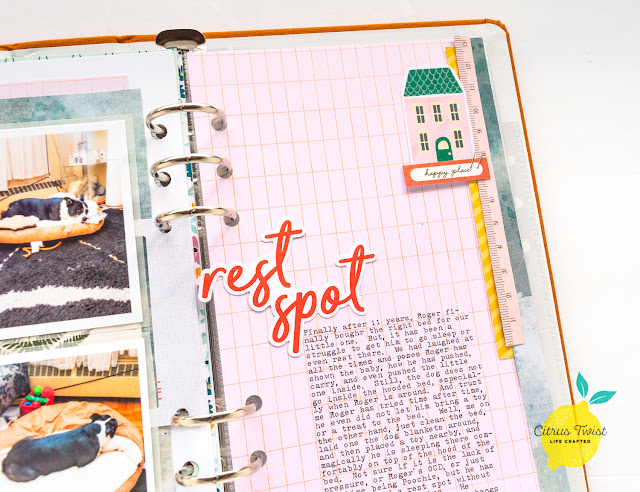
To bring some of the journaling patterned paper to the photo side of the picture, I chose to line the top of the paper (both digital papers) with  it, then folded to reveal the design.  The angle the fold creates was the perfect spot for my title (Sadie Teal Green Puffy Alpha stickers).    The large ephemera flower just helps to emphasize the angle of the fold, and title placement.


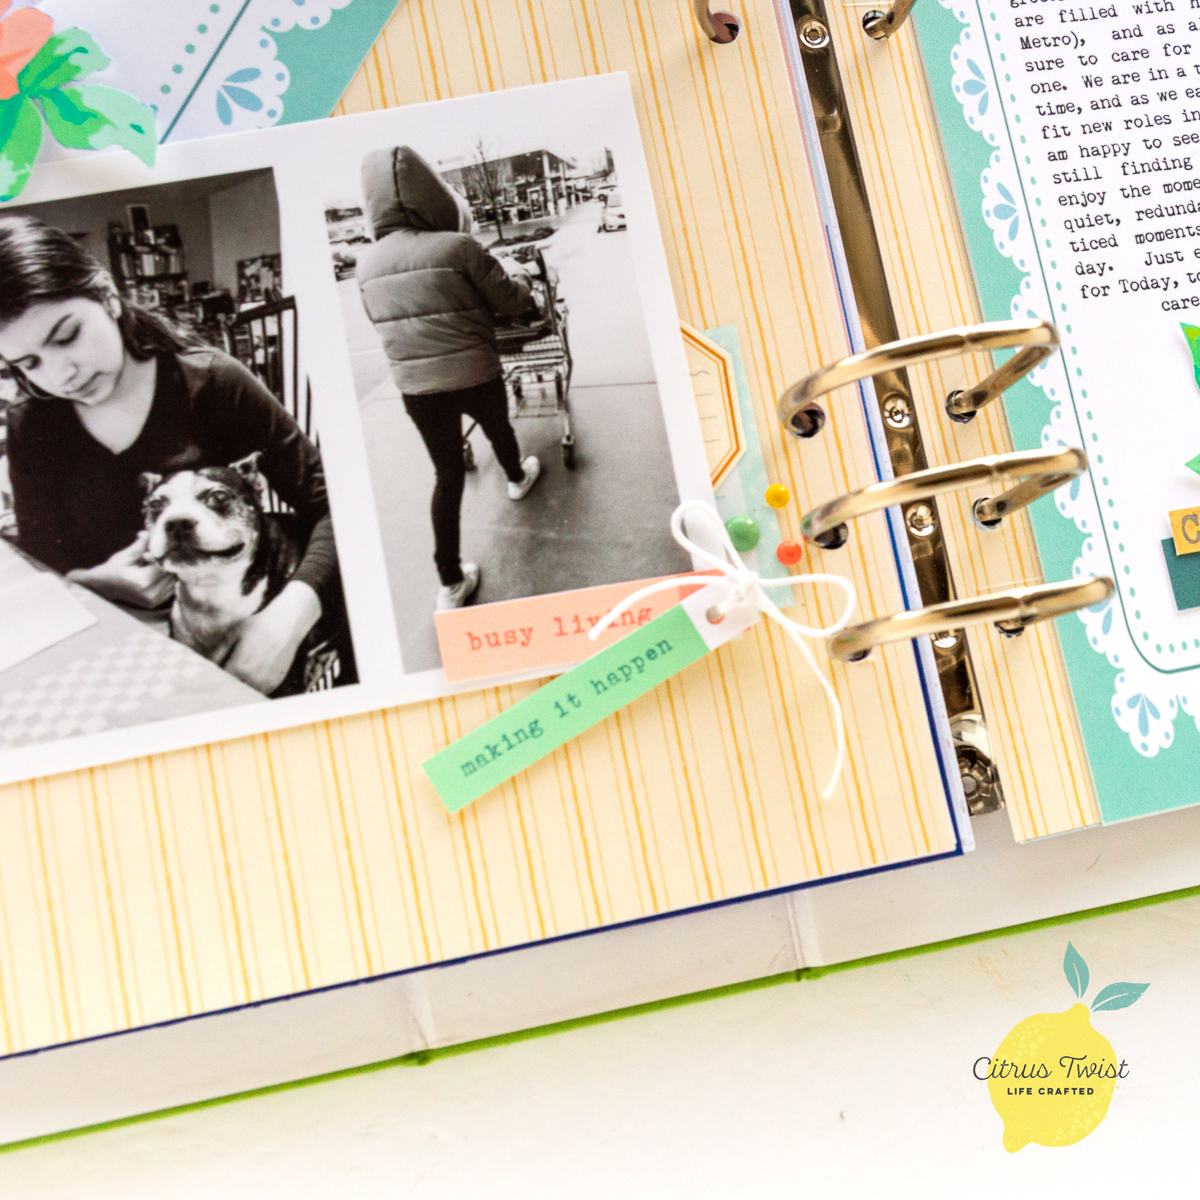
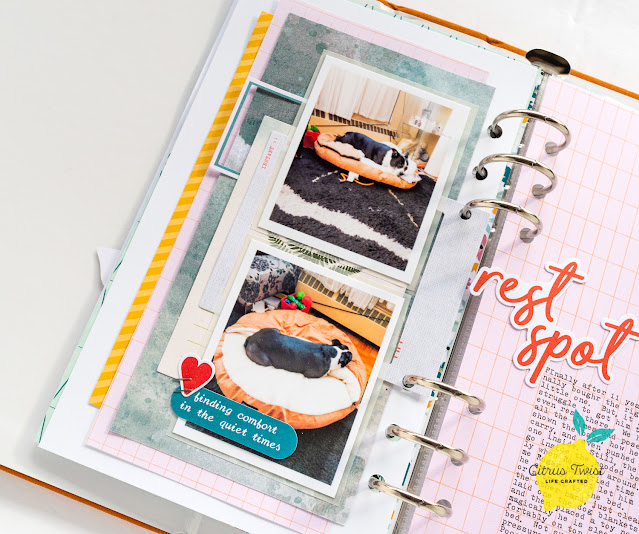
This month's Cherish ephemera is packed with so many elements.   I used the large floral ephemera as anchors at the two corners of the spread.   Then, decided to layer a few of the pieces at the bottom corner of the picture.  I am adding a bit of interest here with the texture of the twine that keeps the tags together.


A few enamel dots complete my spread.   I hope this inspires you to use the prompts and our CHERISH release to create a project of your own!

XO


Saturday, July 2, 2022

3-to-Inspire with Desiree


Hi friends! Today I am here with this week's 3-to-inspire.  Here's what I chose.

1. pocket pages
2. hearts
3. patterned paper

For this spread, I chose to work in my Blueberry Life Crafted Album and the #2 page protectors with 3x4 pockets. These fun pictures from a recent visit to the World of Coke were perfect for this month's kit.


I started by selecting my patterned papers, there were so many good ones to choose from. I chose a 6x8 paper from the Flea Market Findings V2 Papers, a journal card, and a digital paper from the Flea Market Findings V2 Digital Papers. I used the blue diamond patterned paper as my base page and cut hearts from the remaining papers.


I layered the hearts vertically on the page. I also cut my photo into a heart shape to add to the layers. I love working with hearts, there are many ways to use them and add them to your projects. Once I saw all the pretty papers, I knew hearts would be perfect for this spread.


To make the page a little more fun, I decided to unevenly layer the hearts instead of stacking them in a perfect line. I couldn't resist adding the Flea Market Findings V2 Puffy Stickers and the Flea Market Findings V2 Tiny Word Stickers to the hearts. The colors were the perfect balance of softness that I was hoping for.


I saved my pockets for last. I reprinted this brown and white journal card with the flowers and butterflies because it is my favorite. I thought using the design twice would help to create a more cohesive layout. I popped a few of the Flea Market Findings Enamel Dots through my spread. To complete the layout, I added a phrase sticker to the 3x4  picture of my husband and me.
 
I hope you enjoyed today's spread. I hope you take a moment to try out this week's 3-to-Inspire with the lovely Flea Market Findings V2 kit. Stay crafty!


Sunday, May 1, 2022

Sunday Sketch with Kira


Hey there!  It's Kira and I am back with another Sunday Sketch using the May Craving kit.  First, here's a look at the sketch I will be using today:


And here's a look at my take on the sketch:

My family and I recently took a road trip to Las Cruces, NM.  My late father-in-law went to school here and my husband was looking for a way to connect with some of the memories he had when he was a child.  So, it seemed only natural that we visit my father-in-law's favorite restaurant while we were in town.  Since the sketch included a single landscape photo, and I usually only take portrait style, I decided to print out a larger photo of my husband and two smaller photos of our children.  

The colors on my husband's shirt worked well with the kit colors, but my children's clothing did not, so I decided to print their photos in black and white.  I decided to keep one side of the layout with a white background and the opposite using some of the papers from the kit.  

But once I started placing my photo and embellishments on the white background, it felt a little flat to me.  Which gave me the idea to add fork cut files to my white background and stitch over the top of them.  This gave just enough texture and interest to not feel so boring.  

I typed up my journaling on one of the other digital papers (which I turned the opacity up on, so you might notice the color is a little more subtle than it looks in the shop).  I cut the journaling out, roughed up the edges and added a little stitching for texture.  

I felt like the right side was missing some white, so I brought in one of the forks to add just a little pop of the white.  I finished off the whole layout with die cuts, chipboard stickers and puffy stickers from the May kit.  And done!

Thanks for stopping by!  I can't wait to see how you use this week's sketch!

xo, Kira 


Sunday, February 6, 2022

Sunday Sketch with Kira

 Hey there!  It's Kira and I am back with today's Sunday Sketch!  Here's a look at the sketch I am using today:


And here's my take on the sketch:

 Movie nights are a big deal in our house.  My kids each have a basket that I decorate to coordinate with whatever movie we are watching.  Of course when Encanto came out, we needed to do a movie night.  Since I hadn't seen the movie yet before movie night, I gathered most of my inspiration for decorating from our local Fiesta celebration with lots of bright colors and flowers.  


So when I saw the flowers in the Handcrafted mini kit, I knew I wanted to scrapbook the photos of our Encanto movie night.  I started by printing out my three photos as 2" squares.  


I layered the three photos on papers from the Happy Heart kit.  And built an embellishment cluster with a flower die cut and puffy phrase sticker  from the Handcrafted kit and a puffy heart from the Happy Heart kit.  

On the opposite page I used the ombre alpha stickers for my title, which I stitched over the top of and layered with a puffy sticker from the Happy Heart kit.  Under the title I added a phrase sticker and a flower puffy sticker.  


For my journaling, I typed on top of the pink grid paper from the Happy Heart kit and used a washi puffy sticker so it looked like a note was stuck to my page.  I added the cactus puffy sticker as a nod to Isabella from Encanto.  


Thank you for stopping by!  I can't wait to see how you use this sketch!


xo, Kira 


Sunday, December 5, 2021

SUNDAY SKETCH with Nathalie


Hi there!

Nathalie with you today to bring you some inspiration featuring this week's sketch and a mix of new products from this month's release.  I am sure that you (as many of us) are looking at easy and quick ways to document your memories.  Well, sketches are a great help when it comes to documenting in style in a short amount of time.  They are like a blueprint to your page, the rest is up to you! Let me show you this week's sketch:


And here  is my project, inspired by the sketch:


I chose to use the sketch  for a Life Crafted album layout.    First, I had to decide on the orientation of the sketch so that it work for my album.  This meant, rotating the sketch 90 degrees counterclock wise.


I chose to place my photos and all the paper layers ( Fernwood Add -on kit and December Digital Files) on the left side of the album.  I followed the layering on the sketch to build the layers behind the photos, and replace the cut file mat with ephemera pieces from the Fernwood add on kit,


I decided to switch the background paper of the other side of the layout to one of the Digital papers from the December release ( this was also used as a layer behind the  photos.  I used Photoshop to add my journaling before printing.  


I added the small strips of paper to the right of the layout, just like in the sketch.  I repeated some of the patterned papers -Fernwood Add on kit-  so that it ties the two sides together; then switched the small label for CTK exclusive TAKE IT INSIDE ephemera pieces.   


I hope this inspires you to use the sketch to document your memories... Remember to have fun with it!!

XO


Sunday, November 14, 2021

Sunday Sketch


Hey there!  It's Kira and I am back with this week's Sunday Sketch.  Here's a look at the sketch we will be using today:


And here's my, slightly unconventional, take on the sketch:


I am currently working on some foundation pages for my December Daily.  So, when I saw the cute wreath die cuts in the Warm Wishes add on kit, I knew they had to be featured in my album somehow.  I have been loving all things interactive in my Life Crafted albums lately and I thought a door, with a wreath hanging from it, would make the cutest flip out.  


I started by creating my door in Cricut Design space.  I sized a rectangle to 5"x8.25" and cut out "windows" near the top.  I added two vertical rectangles below the window to look like door panels.  And created a doorknob and key hole with cardstock.  I backed the window with vellum and some light patterned paper.  The left side of the door is scored at about 1/2" in to create the fold out. 

The "inside" of the door I tried to stick closely to the sketch.  I chose a grid paper for future journaling and added my title at the bottom. 


On the reverse page I added a chipboard frame.  I removed the adhesive from the top so a picture can slide right in.  


Thanks for stopping by and I hope you are able to find some crafty time to play along this week!

xo, Kira 


Saturday, October 16, 2021

3 to Inspire with Kira


 Hey there!  It's Kira and I am so excited to be back on the Citrus Twist blog to share a look at what I've been working on.  And today I've have a challenge for you, use these three items on a layout:  

1.  Cut file 

2.  Multiple photos

3.  Patterned paper

Here's a look at what I came up with:


I am working with the Hocus Pocus Halloween mini kit to document our 2020 Halloween, so I started by choosing my photos.  I picked two of my son in his Captain Hook costume, one sized to a full LC page (4.25x8.25) and the other to 2x3.  


Then I decided on the color scheme I was going to use.  I love the floral print paper included in the kit, so I wanted to play off the colors on that:  pink, orange and yellow.  I pulled out other papers that I felt coordinated well.  

I love the leaves in the Fall Days cut file, and thought they could work well as layering pieces on my layout.  I cut out the outline leaf in pink and yellow and the solid leaf in orange.  They were sized to about 5" wide, but I cut most of the clusters apart before using them on my layout.  


Now it was time to start piecing this layout together!  I cut three pieces of paper into strips and layered them on top of each other on white cardstock.  I added some machine stitching on top of a few of the strips.  Then I brought in my leaves and layered them under and over the strips.  I adhered my smaller photo down and added some die cuts and chipboard pieces in the corners.  

On the reverse page I chose the chipboard "October 31" piece as my title.  I thought it felt a little plain so I decided to layer some of the cut file leaves under it as well.  A small chipboard heart finished off the layout.  


Thanks so much for stopping by!

xo, Kira