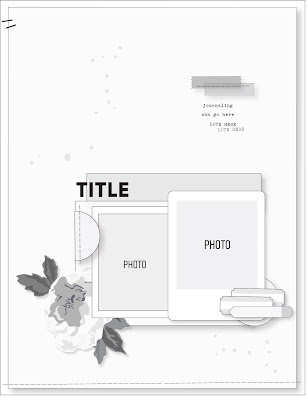
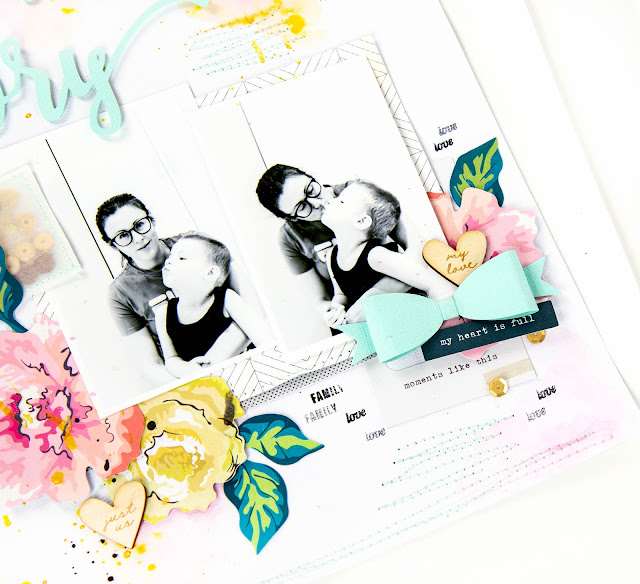
Hello Citrus Twist Friends! I'm excited to be on the blog today to share my interpretation of the Sunday Sketch and a look at how I'm using the Travelogue Collection to document the family Disney Cruise five years ago.
Hello there!
We are so excited to introduce our second Guest Designer, Sarah Hayas. She is a past Creative Team member, and friend of CTK. We adore her style, and are always in awe of what she creates. We couldn't be happier to have her join us for the next two months, and share some inspiration with our Travelogue kit!
· What is something most people would not know about you? I love to travel and took lots of road/camping trips as a young girl, but my first time in a plane didn't happen until I was 24 (which was for a work trip to Washington DC). Since then I've been so fortunate to travel to many places (both near and far from where we live). One of my favorite trips was to Canada where we got to snowboard in the Whistler Blackcomb mountains.
· What are the 3 scrapbooking products you can’t live without? Stamps, a good adhesive, and my trusty Fiskars paper trimmer :)
· What do you love about the TRAVELOGUE kit? Besides the vibrant color scheme, the die cut pieces are always my favorite from any CTK kit. They are so versatile, and add that fun detail to any project.
· Finish this sentence “My dream destination/vacation is . . . “Alaska! It's been on our travel bucket list for years!
Hello everyone! I'm so happy
to be back with Citrus Twist Kits as a guest designer for the Travelogue
kit! This kit immediately caught my attention with it's bright, fun
colors, and since travel themed layouts are some of my favorite projects to
include in my Life Crafted albums, this kit was right up my alley!
The life crafted albums are perfect
for documenting one off trips, but I also like to use them for an all
encompassing travel album (which is a big ongoing project I'm currently working
on). My goal is to create one or two pages per trip to give an overview
of all the places we've visited over the years. For today's project I decided
to document a trip I took with my husband to Seattle back in 2016.
I used one of the 2x2 grid
page protectors for the right page so I'd be able to include more photos,
and then I kept one of the standard size page protectors on the
left. I loved creating little clusters with the die cut pieces, and
even had them overlap with my larger photos. It gives the page such a fun
effect.
For my 2x2 grid page I mixed the photos with the embellishments to keep a good balance on the page. Since the photos are so small I decided to keep them as they are, but I added embellishments to all of the other pockets.
Finally, I printed my journaling
onto some grid paper and added it under my large photo. My goal with the
journaling for my travel album project is to write up an overview and maybe add
in a few details, but not to include everything (which would require much more
space than one or two layouts.)
Thank you for stopping by to take a
peek into my travel album!
XO,
Sarah
-----
I really had a lot of fun with this sketch and the Travelogue Kit. I think the possibilities for the kit are endless.
Thank you for visiting us today. Don't forget to get your kit!
XO, Desiree
Hello crafty friends! Shannon here with another 3 to Inspire to kickstart your memory keeping. For this post, I'm focusing on a travel layout using the new Travelogue products available now at Citrus Twist. My husband and I took a trip to Hawaii back in July 2014 and I never got around to scrapbooking it. These products inspired me to get some photos ordered and finally document our trip!
Let's look at my list of 3 things to inspire your layout...
1. Make your own title card
2. Use a cluster of embellishments
3. Bring in some history
1. Make your own title card. -- Since the Travelogue Mini Kit doesn't come with printed cards (you can get them digitally though!) I decided to challenge myself to use only the mini kit and some cardstock to make my own pocket page cards. I started this title card by stamping a background using the 6x8 Travelogue Stamp. I love stamping backgrounds in a pattern. I tested out a few light colors to see what would match the kit best. This yellow is bold enough to catch attention but suble enough to be a background. Next, I chose the word "explore" from the Travelogue Puffy Phrase and Icon Stickers. Finally, I pulled the large "go" from the Travelogue Ephemera and used foam adhesive to give it a little pop. I chose to work with bold colors (yellow and orange) so I didn't feel the need to add any additional embellishments. I really wanted the title to stick out.
2. Use a cluster of embellishments. -- The colors that I chose to use on this card dictated the rest of the page. I had free rein of color choice since my photos are all fairly neutral in color. Since the photos are outside and depict a WWII bunker, I wanted to go with a more muted palette to fit the mood of the page. I decided on chartreuse and forest green with a pop of coral. Then, I went into the Travelogue Ephemera pack and Travelogue Puffy Stickers to find embellishments to match my theme. I didn't like that I could see the bottom corner of the ticket through the hole in the location icon, so I backed the hole with the same cardstock that I used as the background of my card. Once I had my cluster arranged, I felt it was missing something at the bottom. I grabbed my 6x8 Travelogue Stamp and split the "full of wonder" phrase into 2 lines. This a really great trick to make your stamp fit if it's too long to be in a single line! Just cover the word(s) you aren't stamping with washi (after inking the stamp!).
3. Bring in some history. -- Hawaii is so rich in history that it would feel like a disservice to leave that out of my album. Of course, I can't remember every fact about everything we saw nearly 7 years ago. Hello, Google! I knew what this WWII pillbox on the North Shore of Oahu was called, but I couldn't remember the information that was on the historical marker nearby. These days I would take a photo of that marker to have the facts right at hand. Live and learn! A quick Google search brought up the historic marker and some additional information. I used that to fill in some of my journaling. To top off my card, I used a phrase from the Travelogue Ephemera pack.
Putting this page together and stretching my creativity to make my own pocket cards really revitalized my energy to dig into this travel album. Do you have a vacation that needs to be documented? Don't let it weigh on your mind for 7 years like I did - take the opportunity to dive in now! I can't wait to see what you create!
We are so excited to welcome one of our Travelogue kit Guest Designer and a good friend of CTK, Ashley Horton. We have had the pleasure of having Ashley as part of our Creative Team, and love her style. You are going to love what she has created. So, here she is...
Q & A with Ashley
What is something most people would not know about you?
I have a strong dislike for Pop music...there are a few artists
or songs that I can tolerate, but I would much rather listen to the Alternative
genre.
Chipboard, Alpha Stickers, Ephemera
I love that the Travelogue Kit has a wide variety of vacation
themes included in it...you can use it for beach themed, outdoor themed or just
general travel themed projects!
My dream destination/vacation is an extended trip to Ireland and Scotland.
______________________________
Hey CTK fans!! It's Ashley, and I'm excited to be back with
Citrus Twists as a Guest Designer for the months of March and April! The
CT Kits are always so much fun to work with, and I was extra excited to be
working with the Travelogue Kit, since travel themed layouts are kind of my
favorite! Today, I have a layout to share with you in my Black Life
Crafted album. It was a quick and easy layout, since everything was
already coordinated for me in the Kit.
When I am working on a smaller format project, I usually like to
find ways to still bring in a lot of product from my Kits. I thought a
grid design would be a great way to do this and feature some of my favorites
from the Travelogue Kit. I started out by checking out the Digitals, so I
could have some pattern paper squares for the base of my grid design. I
printed out 6 squares sized approximately to 2.5x2.5 and placed them on a 5x8
white background. After all of the squares were in place, I machine
stitched in between each one of them.
Next, I went through the Ephemera pack and pulled out a variety
of pieces. Then, I eliminated from those to get the ones I wanted to use to
embellish each square. For dimension, I used pop dots behind a couple of
the ephemera pieces. I also brought in some of the puffy stickers andchipboard stickers. I really love the look of mixing embellishments on my
projects. It always adds a lot of variety and dimension.
I decided that I wanted to go with a full sized photo for the
right hand side of my layout. We went out west in 2019, and had not
originally planned to visit Mt. Rushmore on our trip, but made the decision to
go, while we were traveling near that area. I took A LOT of photos and
thought this would be a great one to document on this layout. I had some
white space at the bottom of the photo, so I used that as my journaling
area. I just typed it in, while I had my photo open in Adobe Illustrator,
so it would print right on my photo when I was ready to send it to the printer.
You could also hand write in the white space on photos or use a typewriter and
then cut out the journaling strips to add in the white space. Then to
finish it all off, I added two of the ephemera pieces to my photo and one of
the stars from the puffy sticker sheet.