Hello crafty friends! Shannon here with another 3 to Inspire to kickstart your memory keeping. For this post, I'm focusing on a travel layout using the new Travelogue products available now at Citrus Twist. My husband and I took a trip to Hawaii back in July 2014 and I never got around to scrapbooking it. These products inspired me to get some photos ordered and finally document our trip!
Let's look at my list of 3 things to inspire your layout...
1. Make your own title card
2. Use a cluster of embellishments
3. Bring in some history
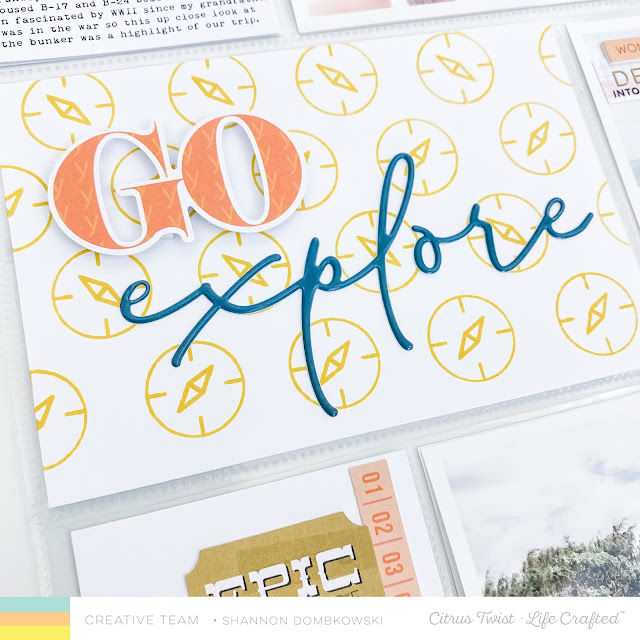
1. Make your own title card. -- Since the Travelogue Mini Kit doesn't come with printed cards (you can get them digitally though!) I decided to challenge myself to use only the mini kit and some cardstock to make my own pocket page cards. I started this title card by stamping a background using the 6x8 Travelogue Stamp. I love stamping backgrounds in a pattern. I tested out a few light colors to see what would match the kit best. This yellow is bold enough to catch attention but suble enough to be a background. Next, I chose the word "explore" from the Travelogue Puffy Phrase and Icon Stickers. Finally, I pulled the large "go" from the Travelogue Ephemera and used foam adhesive to give it a little pop. I chose to work with bold colors (yellow and orange) so I didn't feel the need to add any additional embellishments. I really wanted the title to stick out.
2. Use a cluster of embellishments. -- The colors that I chose to use on this card dictated the rest of the page. I had free rein of color choice since my photos are all fairly neutral in color. Since the photos are outside and depict a WWII bunker, I wanted to go with a more muted palette to fit the mood of the page. I decided on chartreuse and forest green with a pop of coral. Then, I went into the Travelogue Ephemera pack and Travelogue Puffy Stickers to find embellishments to match my theme. I didn't like that I could see the bottom corner of the ticket through the hole in the location icon, so I backed the hole with the same cardstock that I used as the background of my card. Once I had my cluster arranged, I felt it was missing something at the bottom. I grabbed my 6x8 Travelogue Stamp and split the "full of wonder" phrase into 2 lines. This a really great trick to make your stamp fit if it's too long to be in a single line! Just cover the word(s) you aren't stamping with washi (after inking the stamp!).
3. Bring in some history. -- Hawaii is so rich in history that it would feel like a disservice to leave that out of my album. Of course, I can't remember every fact about everything we saw nearly 7 years ago. Hello, Google! I knew what this WWII pillbox on the North Shore of Oahu was called, but I couldn't remember the information that was on the historical marker nearby. These days I would take a photo of that marker to have the facts right at hand. Live and learn! A quick Google search brought up the historic marker and some additional information. I used that to fill in some of my journaling. To top off my card, I used a phrase from the Travelogue Ephemera pack.
Putting this page together and stretching my creativity to make my own pocket cards really revitalized my energy to dig into this travel album. Do you have a vacation that needs to be documented? Don't let it weigh on your mind for 7 years like I did - take the opportunity to dive in now! I can't wait to see what you create!


No comments:
Post a Comment