Showing posts with label Layout. Show all posts

Saturday, December 16, 2023

3-to-Inspire with Desiree Lamar


Happy holidays scrappy friends! I am sharing this week's 3-to-Inspire challenge using the Oh What Fun Christmas Kit. 

 For this challenge, I used ribbon, floral die-cuts, and phrase die-cuts or stickers. Here's my layout.


 I kept it pretty simple with two large clusters. I started with white cardstock on a simple patterned base. My goal was to incorporate the ribbon into the page. I decided to wrap it around each corner like a gift. I chose this blue, velvet ribbon from the Oh What Fun Kit that has sticker backing. 


The light, pastel color of the ribbon inspired me to keep my whole page light. So I reached for soft-colored florals from the Winter Florals Ephemera pack. The florals were perfect to layer on my clusters. I added doilies and 6x8.5 papers from the Oh What Fun Kit to complete my clusters. 


There were so many gorgeous titles to choose from in the Oh What Fun Icon Ephemera pack. I decided to do a double phrase with "love" and "good cheer" I love how the colors echoed the colors in the layout. 


My layout felt very light and airy. To ground it and give it contrast, I splattered black paint throughout the page. 

This layout left me feeling all the good cheer. I think my favorite part is the ribbon. Thank you so much for following along with me today! Happy Holidays!


Sunday, March 6, 2022

Sunday Sketch with Desiree


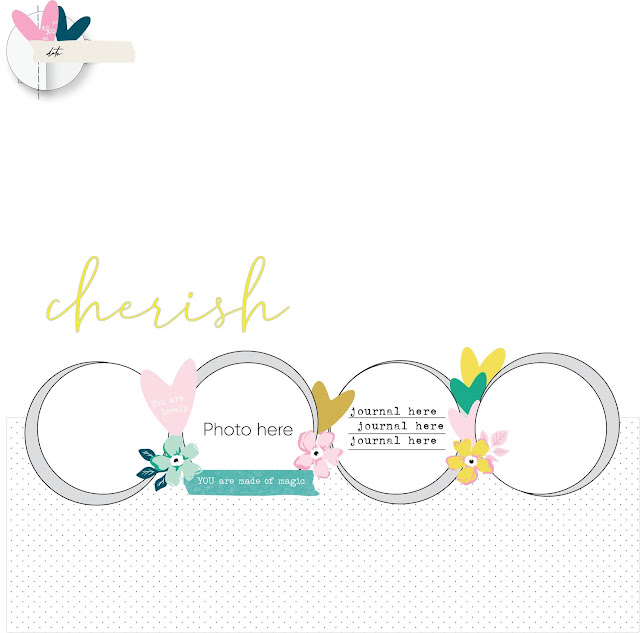
Hello CTK friends! Today I am here to share a sketch that I could not wait to get started on. Let's take a look at the sketch.


The sketch is lovely on its own but the Citrus Twist Kits March exclusives made me really excited to bring this sketch to life.


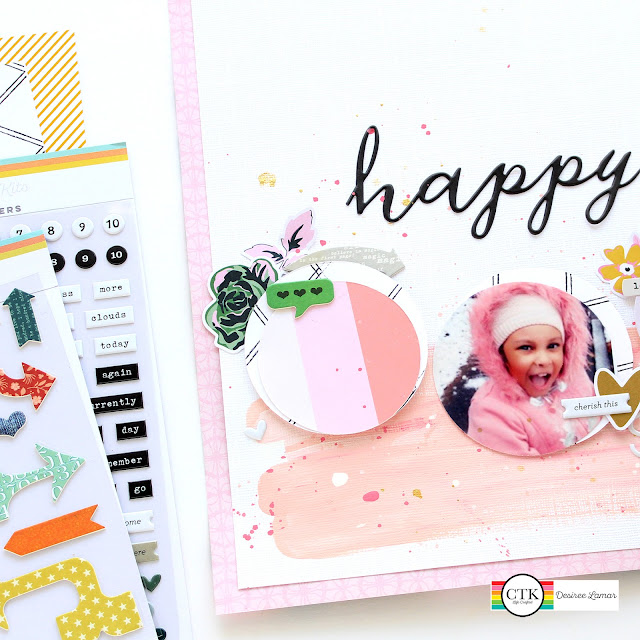
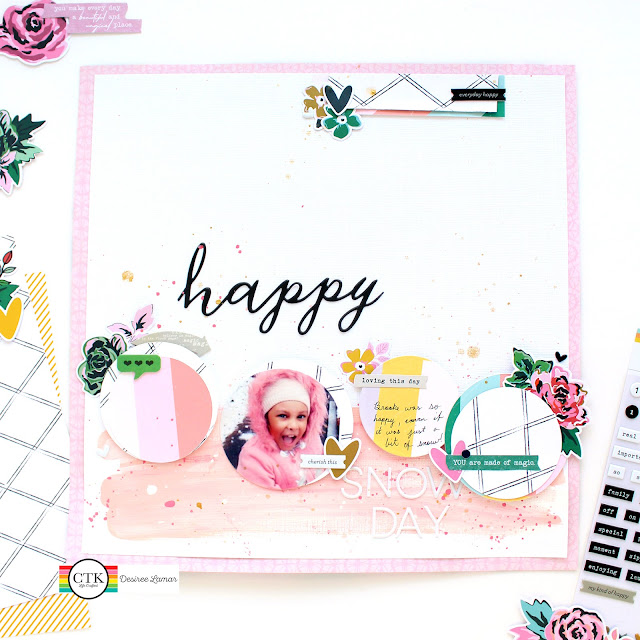
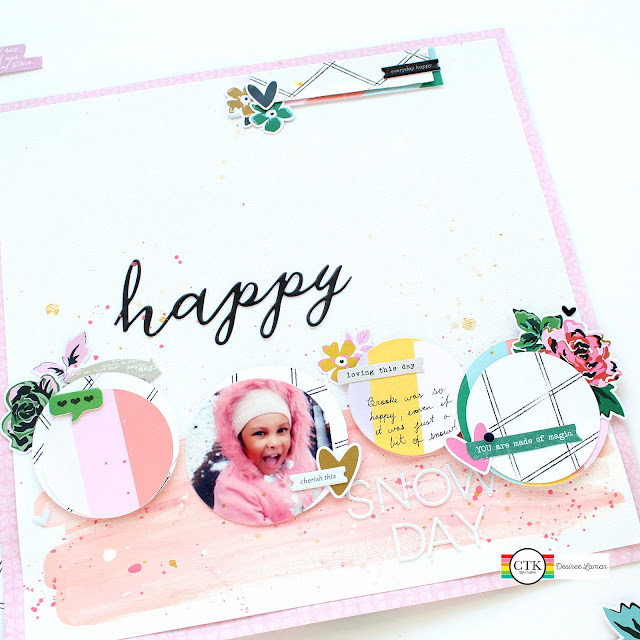
I started with white textured cardstock on a pink pattern background. In place of the pattern at the bottom of the sketch, I opted for a few brushes of pink acrylic paint and splatters. 


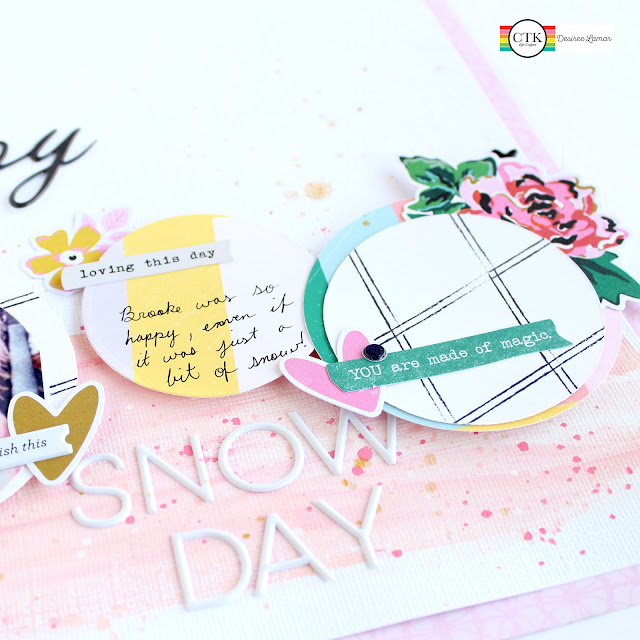
To create my circles, I used two papers from the Back to Basics TN Paper Digitals. To create interest, I cut several larger and smaller circle sizes to layer on each other.


Next, I layered the Back to Basics Florals throughout my circles. The Back to Basics Puffy Word Phrase and Number Stickers were perfect to continue the black and white theme throughout my layout. To create the smaller cluster at the top of my page, I layered on a few paper pieces, and florals.


I continued to layer more Back to Basics Ephemera and Back to Basics Chipboard  Stickers to the page. Once my layout was ready to be completed, I added two titles to my page. I used the "Happy" phrase from the Fresh Starts Puffy Phrase Stickers and Back to Basics Puffy White Alphas to make my "Snow Day" title.

I am truly loving the simplicity and versatility of the Back to Basics Mini Kit. I can't wait to create more projects with it.


Saturday, June 27, 2020

3-to-inspire with Marivi


Hello again, I bring you a new layout with Life Crafted "CRAVINGS" Kit .Today 3-to-Inspire challenge that I created with the June kit.

These are my three prompts for you.

1.Chevron pattern
2.Splaters
3. # 2, 3x4 Pockets


With three of the papers from the kit I have cut strips to then fit them to create a chevron of different colors, then I have sewn the pattern, which I have placed at the top of the layout.


I have not centered the photo, I have left it a little to the left, to place underneath a card with a message.


I have also placed various decorations, a chipboard, a pair of puffy stickers, a star and splashes.


and the other part of the LO, is a page protector # 2, 3x4 Pockets with two kit cards and a puffy sticker.


I hope you like this challenge, I am looking forward to seeing your version.
I wish everyone is well and see you soon!


Wednesday, April 8, 2020

Life Crafted inspiration with Marivi


Hello again, I hope you are all well and from here I wish you the best, we will get out of this soon.💪

I bring three projects, two made with the Life Crafted "NIGHT & DAY"kit on the LC Album.

In this I have used several papers combined with each other and with the photo. It is a small collage and some decorations to complete.


The second project is a LO, for which I have used LC Night & Day and Add-on-kit.

One of the LC kit papers as a background. The title and trimmings Add-on kit.
At the top a rivet with the same paper and as it did not reach me I have added another little piece.
I have also sewn with a sewing machine and a few staples.


The third could not be easier, as the protagonist, in addition to the photo, that precious paper that asked not to be cut.
A pair of chipboards and you're done.


I hope you like them and inspire you to create.
See you soon.


Sunday, January 12, 2020

Sunday sketch with Laura


Hello ladies! It's Laura here with a new project for the end of the week! It's time for the Sunday sketch challenge! It's so perfect to boost your creativity and enjoy your Life Crafted and Scrapbooking kits! Here you have the sketch, do you feel your ideas flowing? 


It's a very versatile design and I decided to go full color and use the beautiful goodies from the scrapbook kit mainly, these florals are perfect! 


For the title, I decided to create a little cluster with the foam stickers from the Life crafted kit, some of the amazing stamp words and a few stickers, they look so cute all together!


To frame the picture, you just need some of the papers from both kits and layer them. Then add some tags from the She's magic collection from Dear Lizzy, a few more diecuts and stickers and you'll have that ready!


Finally, my favourite part from this layout is the top border! I decided to change the straight lines from the scketh and use these beautiful flowers, because remember that this is just a guide, you can change it as you feel!


I also added some white splatters underneath the flowers to give it more dimension and make it stand out from the base yellow paper! I love how bright it looks!


And that is all for today! I hope you liked it and that you get inspired to create your own pages with this cute sketch! And as always, don't forget to visit the shop for more cute items! 
Best wishes! 


Sunday, July 7, 2019

Sunday Sketch with Kelli


Hello! Kelli here, today I'm sharing a layout based on this sketch. I had so much fun with this one! 


Here's what I used: 

-a black and white photo
-an old book page 
-the adorable colorful striped paper
-some cute ephemera 
-a 3x4 card
-a hand-made tag
-a big title
-handwritten journaling
-stamps: "summer is here" & "loving this"

This page documents a fun summer day at our house with a new little swimming pool.


The July Life Crafted kit couldn't be cuter and I loved using it and the sketch to create this layout.


Thanks for joining me. Hope you get to create today!


Thursday, June 6, 2019

"Love this so much!" Life Crafted Layout with Suzanna

Hey everyone, Suzanna here! As always, I'm so excited to be back on the blog today sharing a layout I created with this month's Life Crafted kit. I created a layout for my Life Crafted Album by mixing a few styles - on the left page of the layout, I've used a stacked pocket page, and on the right, I put together a mini layout, without a pocket.

Surprisingly, this is my first layout for my Life Crafted Album, that I created without slipping it into a pocket. I've seen so many crafty ladies on the team, and so many of you, create these types of layouts and have been meaning to try it out myself. I love mixing layout types and styles in all of my albums, so it seemed fitting to finally give it a go in my Life Crafted Album!


I was so excited to see a lot of the goodies this month were perfect for documenting my favorite spaces. I've been taking quite a few photos of my space recently, and this layout was perfect for documenting a couple of them!


Using a patterned paper from the kit, I trimmed it down to around 4.75 inches wide. I did this to allow a half-inch margin on the left side to punch my holes, without cutting into my layout design. Using a mixture of die cuts, labels, stamps, and alpha stickers from the kit, I created the large title - "Love this so much!" It describes my feelings about the photos perfectly, and allowed me to describe my feelings without adding additional journaling. Sometimes I don't have a lot of words about my photos, they just make me happy, and that's totally okay!


On the left side of the layout, I used a stacked pocket page for my two photos. Using a couple stamps, I added sentiments straight to my photos for a clean and embellished look.


To finish off the layout, I added a tab from the die cuts to the top of my bottom photo, and included another stamped phrase. Stamping is such a great way to embellish your layout while still keeping a clean and airy design, like I was going for here.

I hope I gave you a few ideas for your next project, and as always, I'll be following along with your creations over on Instagram! I'll talk to y'all later this month when I'm back with another fun project.

Hugs, Suzanna