Sunday, March 31, 2019

Sunday Sketch with Patricia


Hello CTK Friends!  Patricia to share with you on this last day of March a fun twist to using this sketch.


I have two ways to share with you how this sketch AND the Life Chapters March kit inspired my projects.  For my first project, I created a 6x8 pocket page spread.


The left side is a full 6x8 layout and the interpretation of the sketch.  I used the Hexagon Wreath Cut file for March, die cut from white cardstock to layer under my photo and over manual die cut stars from the papers from the kit.  


I then trimmed some white strips to overlap the stars and hand stitched those in place to create more 'rays'.


Similar to the sketch, I created fun layers from the kit under my photo.


Inspired by the sketch, I wanted to be sure to use the card from the kit with the sun for a journaling card.  I used a light gray ink to add some stamping and details to the card along with typed journaling.


To finish this spread, I used 3x4 cards from the kit with smaller photos, adding little details with the chipboard heart, die cut and stickers from the kit.


Next, I created an opening page to my Life Crafted Citrus Twist Album inspired by the sketch and the kit, especially that paper!


I used the Life Chapters Traveler's Notebook Digital Papers here because the design is sized down perfectly for a TN!  Such a great option.  I traced the width of more pattern papers from the kit to layer in between the 'rays' of the paper to trim and adhere.  This pattern paper has the rays and the circular patterns.  I used both of those to inspire the pattern paper rays and then more hand stitching along the circular pattern of the paper. 


To add more to the page and especially a title page for my album, I used the stamps in the center of the design of the paper, then finished it with die cuts and chipboard from the kit.  The '3' is a digital cut file available to subscribers called Telling My Story.  I used it on my first blog project here.


A great opening page to this Life Craft Album and telling the stories of myself and my family...all inspired by the sketch and the kit!  I love popping into the CTK Fan Page to see what everyone is doing with the kits and their stories.  Please continue to share as well as on Instagram using the tags #citrustwistkits @citrustwistkits so we can see what you are creating and leave a comment!

Saturday, March 30, 2019

3-to-Inspire with Suzanna


Hello, hello friends! Suzanna here. I'm back today with a 3-to-inspire project to share with y'all. This was a fun one and I hope you get a bit of inspiration from it!

If you're new to 3-to-inspire posts, basically I'll provide 3 prompts for you to use when creating your project. You can use all of them, or a select few, whatever you like! Now, let's get started...

Here are the prompts for this project:

1. Stamps - Stamps are a fun way to add detail to your project and customize your embellishments, titles, and more!

2. Word Strip Stickers - I love a good word strip sticker! Use them in your embellishment clusters, as your journaling, or as a border around your photo. The possibilities are endless!

3. Layered Labels - Get crafty and layer up some labels!

Here's a look at my layout:


I created a two-page layout that fits perfectly in my Life Crafted album pocket pages. I'm using this as a "me album" this year, which basically means I just create a bunch of random layouts that make me smile. I don't worry about keeping it chronological, documenting every detail, etc. This is just a place for me to get crafty and have fun!


Let's start with my stamping! I mixed a couple stamps together to add a title sentiment at the top of my photo. I love how customizable stamps are as an embellishment, title, etc.


My second prompt was word strip stickers. It's no secret that I love word strip stickers. I'm not a huge journaler on my layouts, so I love that I can get my feelings across with just a few phrase strips! I clustered mine in a group of three on the corner of my photo.


The last prompt was layered labels. A lot of times we get stuck thinking we need to use products in their standard use. Well, I'm hoping this will challenge you to jump out of that thinking and get creative! I love layering labels, especially to add a little detail to a bit of journaling, or in this case, my date!


I hope you have as much fun with this challenge as I did! I can't wait to see your creations!

xo, Suzanna


Friday, March 29, 2019

Life Crafted with Kelli


Hey friends, its Kelli here. I've been really looking forward to this blog post because I had so much fun making the first 2 spreads in my Life Crafted album. I want my album to be a mix of traditional pages in their sleeves, and also interactive pages. The Life Crafted album is perfect because you can creatively document your life in different ways.


My 6 year old was soo excited to lose his front tooth. It left quite the big hole in his cute smile, and deserved a layout. The kit this month was perfect for this because it had that "Big Life Change" card and that "New Chapter" stamp. 


For the interactive page on the right, I used white cardstock to make 8 rectangles, folded them in half, and glued them on. Then I got to add photos and embellishments to each fun flap. This is one of my favorite things to make with paper! 


The next spread in my Life Crafted album is all about READING. The theme of the kit is obviously what inspired me to make this. 


The pocket on the left is filled with pull out slips of paper including each of our favorite books. I think they will be so fun to look back on in a few years. 


The page on the right includes an instax pic of my son Radley reading his favorite Wimpy Kid book. That Library Borrower's Card is my favorite!  


Thanks for joining me! I hope you get lots of scrapbooking time in today!  


Thursday, March 28, 2019

A Pocket - Layout combo using March Digitals


Hi dear CTK friends!

Anna here today sharing some Pocket - Layout love. I have been playing with some of the March digital printables and a few leftover pieces from my February kit. I love that you so easily can use the different months kits together.

Here's what I came up with.


I just love that circle grid paper. Thats one of the March digital papers and I have printed them out in two different sizes. So wonderful that you can get as many you want of your favourite papers when you have them digital, ready to print.


An there you have it! Hope you like it as much as I do. Soon it's a new month and with that comes a new wonderful CTK Life Crafted kit in the CTK shop. Maybe you already have seen a few sneaks from my team mates on Instagram? So exciting!

Thanks for stopping by! Anna xo


Wednesday, March 27, 2019

3 Relaxing Days | 12x12 Mixed Media Layout


Citrus Twist Kits Life Chapters 12 x 12 Scrapbook Layout - Lydia Cost

I know I'm not the first person to be totally and utterly infatuated with the many shades of blue.  When I saw this amazing striped sheet in this month's kit, I knew it would need to be the foundation of a layout, filled with all the shades of blue that make me dreamy-eyed.

Citrus Twist Kits Life Chapters 12 x 12 Scrapbook Layout - Lydia Cost

I pulled out a few goodies from this month's Add-On Kit to match up with that gorgeous sheet of paper!  The ephemera and puffy stickers in the Add-On Kit are the perfect addition to the shades of blue in the monthly kit.
Citrus Twist Kits Life Chapters 12 x 12 Scrapbook Layout - Lydia Cost

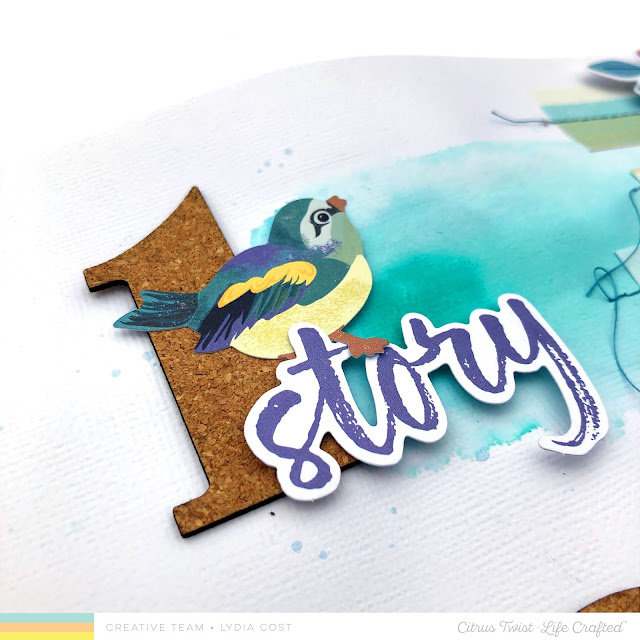
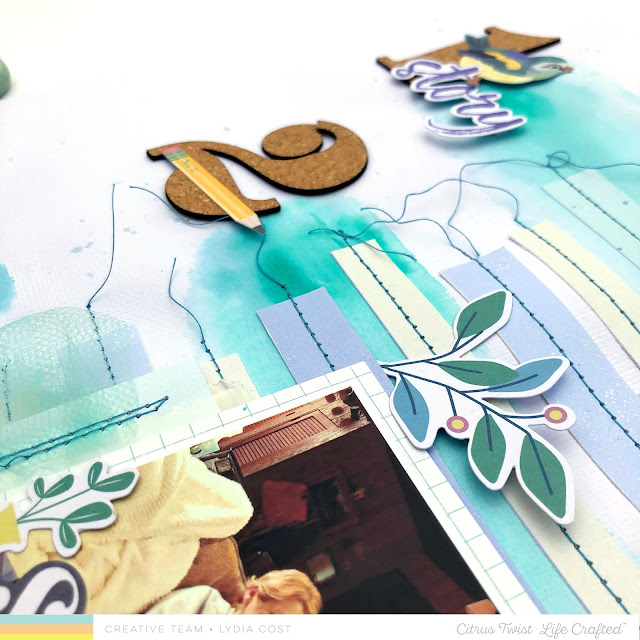
I began my layout on a white sheet of 12x12 paper; I then added 3 stripes of mixed media to solidify the love of dreamy blues.  I swiped on some mint, ocean blue, and a little cornflower blue.  I knew I wanted to align the great cork numbers that came in this month's kit with the swipes of blues.

Citrus Twist Kits Life Chapters 12 x 12 Scrapbook Layout - Lydia Cost

I decided on a whim to cut apart the sheet of stripes to spread across my layout.  I really love how it created little slots to tuck in ephemera and cardstock phrases.  I adhered them to my layout, over the slightly buckled mixed media areas, by stitching them on.  I decided to leave the extra thread because I love the way it adds even more dimension and color.

Citrus Twist Kits Life Chapters 12 x 12 Scrapbook Layout - Lydia Cost

I chose to place my photo in the lower right corner, backed with another great paper in this month's kit.  I really wanted to hide my journaling on this layout, because I wanted the colors to do all the talking!  I included some hidden journaling, using the glassine bag that the cork numbers came in.  I trimmed down a 3x4 card to slide in for my journaling.  I then stitched on some mint tulle, so it would be easy to pull out from behind my photo, and isn't it so pretty?!

Citrus Twist Kits Life Chapters 12 x 12 Scrapbook Layout - Lydia Cost


The last step was to add all kinds of pretty pieces of ephemera, and I had a bounty at my hands between the main and Add-On kit this month.
Citrus Twist Kits Life Chapters 12 x 12 Scrapbook Layout - Lydia Cost

Thanks so much for joining me today!  I hope you fell just as hard as I did this month with the beautiful blues that splatter both amazing kits!

https://ashersmiles.com/

Tuesday, March 26, 2019

Pocket Life Challenge With Theresa


Hello Lovelies, it's Theresa here today with a fun Pocket Life Challenge for you! I absolutely love how easy it is to document our family members using pocket pages, and the March Life Crafted kit has everything you need to get those pages completed. Here is my layout I created for the month of October in my 2018 album.


One thing I do to help me get these pages done is to repeat my favorite techniques over and over again, and I thought for today's challenge I would give you a list of those favorite things so you can choose. Feel free to try one, or try all, and see how it helps you as well. My first technique is:

1. Use alphas to create a working title or journaling on a card. The white puffy stickers included in the kit are perfect for this! I used these alphas for the working title with my photo, which works perfectly for journaling as well.


My title card has a working title using the same alphabet to spell October. On that card you can also see my second technique, which is as follows:

2. Use different stamp sets on your layout together and see what sentences or sentiments you can create. The March kit stamp set works beautiful with the This Is Life stamp set this month!


Up next is a technique that helps give a layout consistency:

3. Repeat an element across the page, whether it is an element, a shape, a label, or other. I have repeated the circle chipboard in several places on my layout, which not only adds a bit of dimension to the layout, but it also leads your eye around the page. You also may notice I have used the word stickers in several different places around the layout too.


You can also see another favorite technique which allows you to get more mileage out of your journal cards:

4. Cut up journal cards to create layering elements. I really love the sentiment "bits & pieces (of our day)" but felt like the blue would be a bit overpowering for the color palette on my layout. So I cut out the sentiment itself and layered it onto the strip journal card. Don't forget to look at your journal cards for opportunities to cut them up and create your own embellishments.


Notice how the pop of blue makes a nice contrast on this layout compared to the muted colors of the layout. The key to making this work was to be sure to use your contrasting color somewhere else on the layout, as I did on my filler card. I used a scrap of the blue to layer along with the stamped label and the stars.


One last technique that I have been using in order to uncomplicate my memory keeping process:

5. Leave one photo or journal card (or both!) unembellished. It can be really tempting to want to put all the things on all the pockets, but it can be really freeing to leave something just as it is. Of course, this allows that element, whether it's a photo or a journal card, to stand all on its own, just as it is. In the photo above of my studio, you can see it needed no journaling or embellishment, just the photo itself that captures a moment in time. There is incredible beauty in that!


I hope you are inspired to try some of these techniques in your pocket pages today! If you are interested, you can view my entire process in the video below.


As always, be sure to tag us when you create from this challenge and share online! We would love to see. Thank you for participating, see you again soon!


Monday, March 25, 2019

Product Spotlight & a Flip Album with Amanda!


Hi CTK Friends & Fans! 

Amanda here, and I am just loving the new March Life Chapters Life Crafted Kit!
So much gorgeousness!
Today I am shining the spotlight on two of my favorite items from this kit; the cork numerals & the die cut ephemera!
To demonstrate the versatility of our Life Crafted Kits, I've avoided creating pages for my Life Crafted Album or even making scrapbook layouts. Instead, I have featured both items in a super cute, miniature flip album!

"Our Lil' Story"


Squeeee! How cute is this mini album?!! SO adorable! 
Here's a closer view of the cover....


The sweetest!
The front cover features lots of the die cut ephemera, and in particular the book pieces to enhance the story themed album title! I also decorate with chipboard hearts, and the white puffy alphabet stickers from the Life Chapters Kit. 

To create this mini flip album, I select 3 of the Life Chapters 6 x 8" pattern papers and machine stitch them together through the center (at 4"). Fold into half, and voila, a lil flip book ready to decorate!
Here's a look inside....


Life is a fairytale seems to sum it up perfectly! With so many book references in this month's kit, story telling is definitely on the agenda!
How awesome is that cork numeral? Such a statement piece!
All good stories start with number one - so gather around, I have a story to tell.


I layered the cork numeral onto one of the 6 x 4" journal cards from the Life Chapters Kit, and then embellished it with ephemera. Simple, but so effective! I use thick double sided tape to adhere the 6 x 4" journal card to the album pages.

Our story begins with the arrival of our newest family member....


Nawww! Such a cutie! 
I use the mint Tiny Word stickers, as well as the puffy white alpha stickers, to document part 1 of this happy story! More ephemera adorns the page, and that 'found' chipboard sticker graces my sweet photo!

Moving on to chapter 2.....


Isn't this adorable! 
Again, I mount the cork numeral onto a journal card - but this time, I use a 3 x 4" one. The cork number 2 also forms the 'handle' to lift the flap....


I love interactive elements, and hidden stories & photos is such a fun element to any mini album!


I attach the 3 x 4" card with washi tape from my stash, and embellish with more of the ephemera, and chipboard stickers. Simple, beautiful creating made so easy with the Life Crafted Kit!

Chapter 3 signals the close of this flip album.....


Like previous pages, the cork numeral is adorned with the exclusive ephemera and chipboard from the Life Chapters Kit.


The ephemera label, Endings can be beautiful was the perfect sentiment to end this mini with.
And there you have it!

Cork numerals and ephemera stealing the spotlight in this super sweet (& easy to recreate!) mini album!
I hope I have inspired you to get creating with your Life Crafted Kits today!
Needing more supplies? Visit the Citrus Twist Kits store HERE.

Thanks so much for stopping by today,
til next time,
Happy Arty Days, 
Amanda xo