Showing posts with label Silhouette cameo. Show all posts

Wednesday, October 24, 2018

Let's Get Digital | Amanda Baldwin


Hi CTK Friends! 

Amanda here, sharing a super fun Fall layout for today's Let's Get Digital post!
I have used the FREE Leaf Frame file with my Silhouette Sketch Pens for a really fabulous mixed media look! 
Here's what I created....

"Small Things, Great Love" 


Isn't this gor-jus?!! All the Fall fabulousness here! 
I have featured the Little Things Pocket Life Kit, and combined it with wood veneer from the Little Things Scrapbook Kit, as well as fussy cut butterflies from the Vicki Boutin paper in the Pattern Paper Play Kit. 
But it's the Leaf Frame File that really makes this layout! 
The Leaf Frame file has been designed by our very talented Nathalie DeSousa, 
& looks like this....
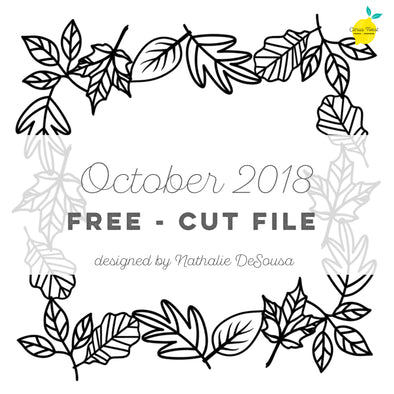

Cut file - FREE - Leaf Frame - October 2018
So awesome!!!
You can download the Leaf Frame Digital Cut File from the CTK Store HERE

I enlarged this file so it would frame around edge of my 12 x 12" cardstock base, & then used Silhouette Sketch Pens (Orange & Red ) to draw the enlarged digital file.
I loosely paint the leaves with the fabulous Pinkfresh Studio Liquid Watercolors in Candy Apple, Clementine, Sunshine & even a tiny amount of Lavender! I love the flow and vibrancy of these liquid watercolors! 
Here's a closer look for you.....


Sketch Pens are water soluble, so I use this 'ink bleeding' to my advantage,  & blend to create a little tone within my messy water coloring. I also add a few inky splatters for good measure. So cool! 
Here's another view for you....


Sketch Pens are really good fun, and combined with the Pinkfresh Studio Liquid Watercolors, they're super effective too! 
Those fussy cut butterflies are such a pretty adornment too! 
The laugh veneer from the Scrapbook Kit coordinates perfectly with both the Fall, outdoorsy theme of my layout.


It's also a pretty accurate descriptor of the story in my photo too! Aren't they just the cutest?!

I layer my favorite Fall photo onto that exclusive PL journal card, and then layer die cuts and 6 x 8 pattern paper beneath it all. 
Super simple creating that's tons of fun, and looks super effective! 

And there you have it! My fun take on this month's Let's Get Digital highlight! 
I hope you'll download this FREE file (and more) from the CTK shop HERE, and get a little creative too! 

Thanks so much for visiting, 
til next time, 


Tuesday, May 29, 2018

Tuesday Tutorial - Altering Alphas

Hello friends! This is Kelly and today I have a fun and simple technique to alter the color of  the puffy alphas by Pinkfresh. This technique works best when covering lighter color embellishments with dark inks. I also recommend to test the color on an alpha that you don't use frequently and for me that is the letter Z.

I started this page with a google search on Mickey images. I knew that I wanted the traditional silhouette, and once I found one that I liked, I imported into in my software and traced the image for this cut file. I also went ahead and messily stitched around the outline with black thread to emphasize the outline.


I don't usually gravitate towards themed products, and as a result a large number of my Disney photos have not been scrapped. The Malibu kit and the Paradise Add-on both had several pieces that I thought worked well with these photos, and inspired me to create another layout for my Disney album.


I wanted to document the park that we were in this day with the initials somewhere on the page. The Pinkfresh alphas were perfect, except the gray color did not stand out on the label with the rest of the black elements on the page. I used a black Copic marker and applied a few coats of ink to alter the color. I left the alphas on the sheet to make it easy, allowed them to dry in between coats, and then peeled them off and adhered them to the label. 


The one other embellishment that "needed" to get on this page was from the chipboard phrase from the Paradise Add-On kit. The phrase works perfectly for Disney photos as well as every-day photos. 


Here's a peek at how the layout came together. I hope that you will try this technique the next time you need a different color alpha. Thanks so much for stopping by today and I hope that you have a great day!


Monday, February 12, 2018

Let's Get Digital with Nathalie


Hi there!

Nathalie back with you all, bringing you a bit of inspiration using one of this month's digital cut files.   You can find all the digital files in the CTK Fans Page on Facebook.


The wreath file was inspired by the Flourish collection floral motifs include in this month's Cedar Grove kits.  The small branches in the wreaths are delicatee and soft, and can form the perfect background for all the florals in the collection.


If you have seen my work before, then you know, I love wreaths, but this time i used a combination of them to creaete a vertical design for my page.  To emphasize the softness of the wreath, a piece of the Always paper from Flourish collection, and stitch it to a piece of white cardstock.


Once the three small wreaths were glued to the page.  I added the picture of my baby girl inside the middle wreath.  To keep the romantic look of  the page, i layered a piece of the music sheet to the picture, and fussy cut ( my favorite floral) from the 6x8 paper from the Flourish collection included in the PL kit. to create the clusters around the picture.


A few lines of ephemera, and little sentiments from the stamp sets complete this page.  I just love how this all came together.    
Remember to stop by the CTK Fans Page on Facebook for your copy of this month's files.  I cannot wait what you create with the files and this month's Cedar Grove Kits!

XO

Nathalie