Showing posts with label Penelope Stamp. Show all posts

Saturday, July 16, 2022

3-TO-INSPIRE WITH LORILEI


Hello! Lorilei here with my first design team post! Today I'm bringing you some inspiration using the beautiful new Flea Market Findings v2 kit and the gorgeous Penelope Alphabet Stamp.


Here are my three prompts to inspire you:


1. Use a die-cut or chipboard as a story jump off point.
2. Use a vertical title.
3. Use at a full size photo.


Here is my project using the prompts!
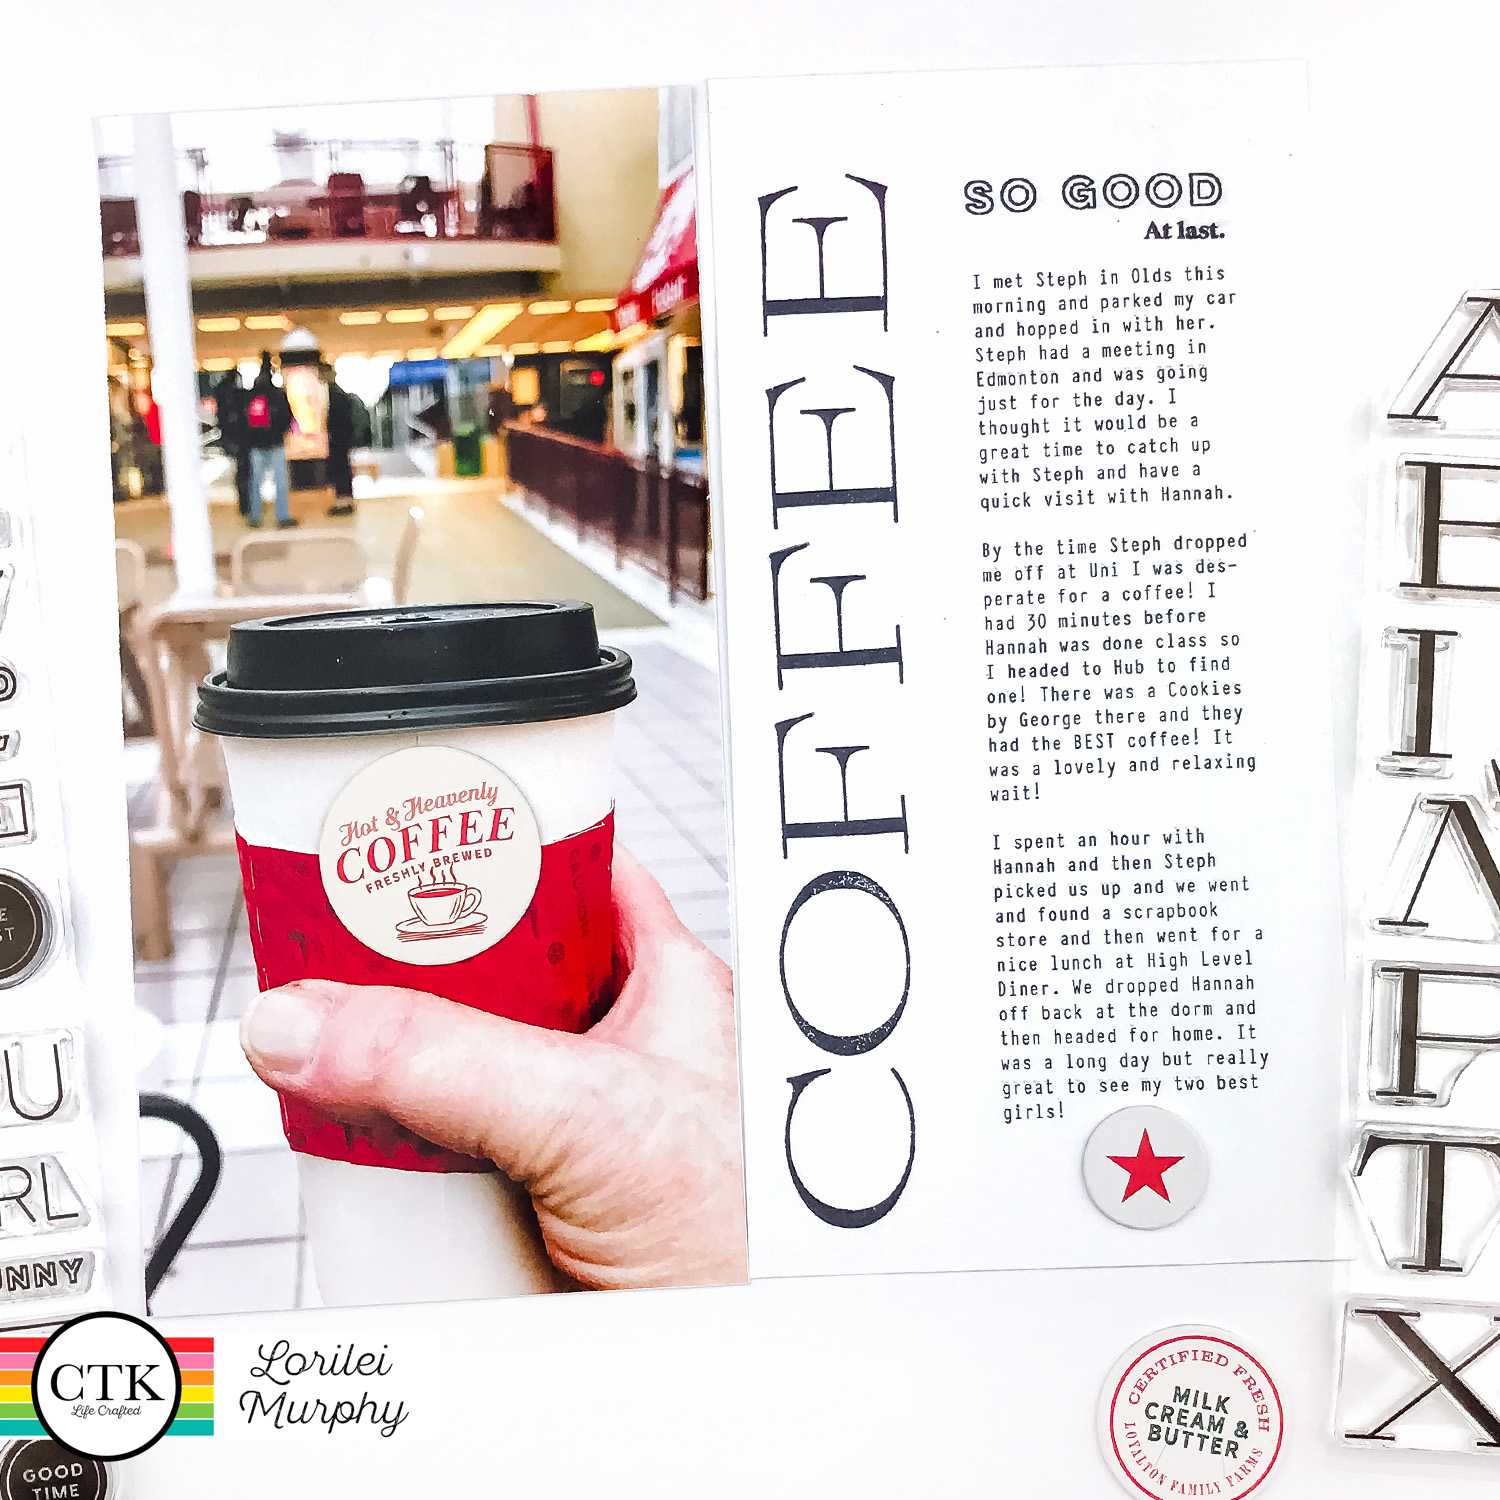
For prompt one, I chose the super cute coffee chipboard circle as the jumping off point for my story. If you don't have a specific photo or story in mind, letting the products in the kit lead the way can be a fun challenge!

Prompt two, always a favourite of mine are full page photos! I used a photo of a great cup of coffee on the left side of the page and my chipboard fit perfectly on the cup and went with the red band!


Prompt three, a vertical title - I used the gorgeous Penelope Alphabet stamp to add my simple title! It adds such great impact! The Penelope stamp is perfect for vertical titles with the wider letters!

I have added another example of using prompt 1 & 2 below! I chose the orange drink chipboard and used the Spencer Alphabet Stamp for the title! Simple and quick!


I hope you choose to use all the prompts or just one! Have a great weekend and happy scrapping!


Sunday, October 24, 2021

Sunday Sketch with Patricia


Hello!  Hope you are ready for the Sunday Sketch inspiration.  My first and favorite size of scrapbooking was 8.5x11.  I've been doing Life Crafted or 6x8 size these past few years, but today, I decided to take this 12x12 Sunday Sketch inspiration and show you how I did it for an 8.5x11 layout using the new Merry & Bright kit.


Focusing on the bottom part of the sketch, I changed the large photo to a digital Merry & Bright digital card for journaling.  I stayed with the two smaller photo inspiration by using the new Chipboard Frames from the Flea Market Findings kit.


With that as my start, I wanted a creative way to add the date.  I stamped with the Luna Nos. onto the pattern paper from the Merry & Bright kit in black in, detail cut out, and adhered around and framing my photos.  To continue the layering look here, I added more pattern paper under, detail cut a flower from the pattern paper to tuck at the bottom, a branch die cut, puffy word sticker, enamel dots, and the number 5 for the day of December using the new Sophia stamp set.


Part of my title I made into banners, but decided to keep and add more texture to this bottom section and used the twine to buck under the photos.  I just used liquid glue in 1-2 spots to hold it.


The top is inspired by the layering, but instead of using pattern paper along the top, I used the Merry & Bright stamp to do repetitive stamping using coordinating ink colors.  Then I added a piece of trimmed pattern paper, a digital label, die cut, and puffy stickers from the kit.  I also extended that creative way of adding my date by adding the Sophia and the Luna Nos. stamp at the top.  I freehand cut banners with the Bailey Alphabet stamp in green and red, then for a large contrast, used the new Penelope for the last part of my title.  Filled in the rest of the title with the puffy alphas from the kit, chipboard and puffy star.


Hope you are inspired by the sketch, by using it on an 8.5x11 layout, and by other documenting ways to use the Merry & Bright kit!


Saturday, October 9, 2021

3-to-Inspire with Desiree


Hello CTK friends!  I am so happy to be joining you today for this week's 3-to-Inspire challenge.  

This week's items:
1. stamps
2. frames
3. ephemera


I was really excited to use the new Flea Market Findings kit.  I had an idea for a layout with stacked frames and a stamped background.  So I got to work on my idea.  I started by stamping the new Citrus Twist 6x8 Penelope Alpha Stamp in a large cluster at the top left of my page.  I made a smaller stamped letter cluster at the bottom right.  There was no specific stamp pattern, I just overlapped the letters and also sprinkled in a different ink color to add interest to my page.


Next, I pulled out the Flea Market Findings Chipboard Frames to start layering them.  I chose this black frame for a picture of me from my Mom's 60th birthday celebration.  I selected smaller frames to layer around my photo.  The beautiful yellow flower from the Flea Market Findings Ephemera was perfect to anchor my cluster with its large size and darker elements that matched my black frame.  I added more elements from the chipboard pack and a phrase from the Flea market Findings Ledger Tiny Word Stickers.


Next up, I used the cut apart sheet from the Flea Market Findings 6x8 Patterned Papers.  I cut out the little tags/cards, punched a hole in them, and added thread.  I used the cute little tags to add to each cluster.  For the smaller cluster, I let the ledger "xoxo" die-cut be the star. 
 

For the title, I selected the "good" ephemera which echoes the colors of the flower.  The Flea Market Findings Tiny Alpha Stickers completed my title. 

Black, pink, and yellow splatters were the perfect combination of colors to add to my page.  To continue the color combo throughout, I added the Flea Market Findings Enamel Dots.

I was so happy wih this completed layout. It came out better than I imagined thanks to the soft and perfect combinations of the Flea Market Findings Kit.