Sunday, October 25, 2015

Sunday sketch with Suse Fish

Hi everyone and a very happy Sunday to you. I've had a lovely time playing with this week's sketch...
Considering last month was the first time I'd ever worked from one, I'm really understanding why they're so popular now! They're fabulous for taking away the guess work and ensuring that your final layout will be balanced and pretty to look at.


I stuck fairly closely to the sketch as I liked it so much. In fact, I deliberately chose a short title to be able to pop it on it's side: I chose my daughter's initials, which I realise don't make much sense to anyone else, but they do to us of course.


I was really pleased to have this chance to work with two photos, as it's something I've rarely got the confidence to do - one photo is my 'go to'! But this overlapping design took away any guesswork and I'm so happy with the result.


I fell in love with these little frame embellishments from BasicGrey: anything handwritten and graphic like this always grabs me.


The delicate little washi stickers from Pink Paislee were another hit for me - though I found that you do need a gentle touch when applying them!


I don't even need to start with how much I love those acrylic stars, do I? It's all I can do not to hoard them! 

I filmed the little process video below for this layout, so do be sure to check it out when you have a spare moment. And then it's over to you with this lovely sketch: can't wait to see what you create! Thanks so much for joining me today.

Saturday, October 24, 2015

3 to Inspire


Hello! Michelle here with this week's "3 to Inspire" challenge!

Your take on this challenge can be a layout or a PL spread and remember that you must include all 3 prompts on your project. This is what I have for you today:

1. Include two or more tags/labels.
2. Add in a bold black. 
3. Put some flair on it.

Here is my take using the October Main Kit:


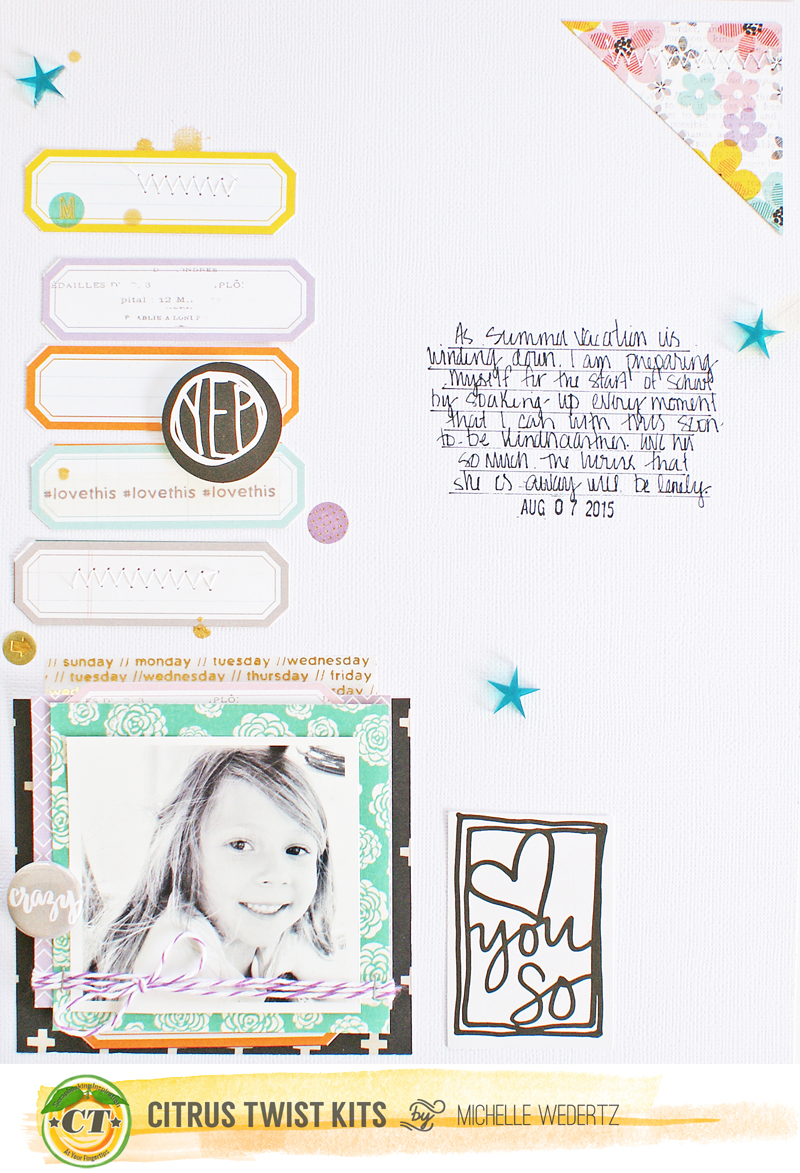
Love You So

I really went to town with the label requirement and made them a main feature of my layout. I embellished them with shapes from the Memorandum Washi pack and some stitching. I added in a few pieces of black from the diecuts included in the package of Basic Grey frames and layered in the fun black plus sign patterned paper (my fave from the kit!). 


Love You So 3

One of my last steps was to place a piece of fun, lavender flair right next to my photo.

Love You So 2

Now it's your turn! Use the three prompts to create your own project, share it with us here in the gallery, and you will be eligible to win a small prize from the CTK Store. Make sure to include the date of the challenge in the title of your gallery submission.  Can't wait to see what you all do!
 
Michelle

Friday, October 23, 2015

Pocket Life Sketch Friday

Hello!
Mira here today with a few Pocket Life Sketches for You Guys! This time I have a really simple and fun composition for Your pockets!

First I'm going to share my page:


It's one simple story: I made a toy for my daughter who loves chewing all kinds of ribbons, twines and threads (who at Her age does not? ;))! It was simple and oh so perfect! toy: piece of fabric with a lot of ribbons! I have to add that my sewing machine was broken for over a year and we repaired it only because I wanted to sew this toy so badly!
Believe me, Ola was so delighted playing with it! Fell in love with this piece of fabric immediately!
But...
After a few days my hubby took Ola for a walk... AND THEY LOST IT!
He was so afraid to tell me that he went for a walk again trying to find it. Ineffectively!
He came back home with nothing.
He told me finally (actually he mumbled it just before we fell asleep hoping I wouldn't even notice which toy he was talking about!) and I was totally disappointed! So the next day goal for my walk with Ola was obviously: to FIND IT!
We've been walking and walking... I was walking with my eyes on the ground all the time! And You know what?? I FOUND IT! (You don't want to know what was lying in its closest vicinity!)

Funny story, a bit of thrill, happy ending - all of it is definitely worth remembering, don't You think? I devoted the entire page in my pocket album to document it! CTK October kits were perfect to do it as always! I used PL Kit together with Sprinkles!

***
Now the sketches!

And a few details:


I hope You like it :)

Thanks for visiting Pocket Life Friday, where every week we share PL sketches and a chance to win a piece of weekly fun mail. For your chance to win, create a layout based on the sketches in this blog post, post your layout to our Gallery or our Facebook Fan Page by Friday, October 30. Be sure to include PL 10/30 in your title!

Hugs,
Mira

Thursday, October 22, 2015

Pocket Pages with Melissa

Good Morning and happy Thursday!

It's Melissa here on the blog with you today and I'm sharing some of my pocket pages made with the October Pocket Life Kit.


I really loved all the fun embellishments included in this month's kit. Plus, I got to work with the "Sprinkles" kit. I loved the chipboard embellishments that were included in that kit! I'm still working my way through July (I'm just a little behind!) and I love how the kits are easily used for anytime of the year you are currently working on.

Make sure you share your Pocket Pages with us! We would love to see them :-) You can share on our FACEBOOK page or in the GALLERY on the website!

Wednesday, October 21, 2015

A traditionnal page with the PL kit

Hi everyone!

Yes, I'm a Project Life-er. But yes, I also want to make traditional pages because I love them! I think they are beautiful and I think they make one particular story SHINE (as when the story is in my PL album, it tends to get swallowed by all the other stories around it).

So when I get my PL kit, I often take out whatever product I like best and I save them for one traditional page, my treat! :)

This month, using only the Main PL kit, I made this:


Tuesday, October 20, 2015

Creating your own stars with Emma

Hi all! It’s Emma here to share a quick tutorial on how to make your own dimensional stars! I’m a big fan of stars– I use them often on my layouts as they’re cute and they match in with just about any page, no matter what it’s about!


To make these you’ll need a couple things:
  • Either die-cut machine or a pair of scissors 
  • Scoring board. 
First up you need your stars, so pick your favourite papers and cut them out. I used my Silhouette Cameo to cut the stars but you can easily do this by hand with your trusty scissors.


Once you have those cut out you’ll need your scoring board. Line the star up so you can score a line from the inside edge out to the point opposite.


Repeat this for all sides of your star.

Once all the lines are scored you need to start bending it to shape. This can be a little tricky depending on how small your stars are. For the “points” of your star you want to fold downwards and for the inside edges you fold upwards.


Repeat for however many stars you need for your layout.


For the page I was making I wanted to have the stars following a circular type of shape – given my page is 6x8 doing a circle and filling a page isn’t really possible so I went with a wonky oval and used my sewing machine to stitch the shape.


Once the stitching was done, then it was just a matter of putting the photo in its place and adding my stars and embellishing with the other goodies from the kit!


At this point nothing is actually stuck down so that if I want to rearrange things, I can do so without ruining the paper.

When I’m happy with things I just stick it all in place! To adhere the stars to the page and ensure they maintained their shape (raised in the centres) I used some foam pop dots behind them in the middle.


For the acrylic stars and veneers I use the Martha Stewarts glue pen – I love how its blue so I can see where I’m sticking but dries clear!


And here is my finished page I created using the October Main kit! 


Super fun and easy page to put together using one of my favourite shapes! I hope you'll give them a try and remember to share them in the gallery and link back here or the CTK Facebook page so I can see them!

Thanks, Em xo

Monday, October 19, 2015

Let's Get Digital with Jessy

It's time for another edition of "Let's Get Digital"!

I had the pleasure of designing the exclusive cut files for this month's feature. I was inspired by my daughter's fav word at the mo, AWESOME. Anything fun & cool, she will utter the word 'Awesome'. Haha. How cute right? 

Here's a layout I created with one of the but file, featuring October Add-On kit.

I really love how the cut file matches the foam thickers!

Close-up shots:


To get your hands on this cut file, just join us on our Citrus Twist Kits Facebook Fan Page where you'll be able to find it as a download. And yes, that word 'Awesome' is handwritten! It's available in .studio, .png & .svg 

Can't wait to see what you'll create with the cut files. Happy Crafting!
Xoxo Jessy