Hi there!
Jen Chapin here and today I am going to share a photography post with you. One of the most common questions I get is, "how do you photograph your scrapbook pages?" I'm going to walk you through my process.
You will want to find an area in your home that has nice indirect light. I prefer to photograph my layouts during the daytime as natural light shows colors best and whites at their whitest. For me, this is in my front foyer. I choose a time of day when the light isn't shining directly in the door and place my layout on a white canvas. I stand over the layout and photograph straight down.
For those of you using a DSLR, my settings for this photo were as follows: f4.5, 1/100, ISO 160. I prefer to use my 17-55 2.8 lens as I can zoom in and out, but a fixed 35 or 50mm lens works as well. The key here is not lowering your aperture too far. If you use a lower f-stop, your layout may be in focus in the middle and blurry around the edges. Also try to use a shutter speed fast enough to compensate for camera shake, unless you are going to use a tripod. If you have good light, an ISO of 160-200 is adequate. Remember, the higher you set your ISO, the more grain you will have so try to keep it in the lower range.
Stand straight above the layout and shoot. I take about 5-6 photos so I know that I will have at least one good shot!
Here is the image straight out of the camera. As you can see, it is a little dark, but the main thing I am going for here is that the image is straight and the details are sharp. We will fix the lighting when we edit.
After opening my layout in Photoshop (I am currently using PSE10), I use the crop tool to crop out the white background. You can also take this opportunity to straighten the layout if needed.
Next I adjust the levels. Push CTRL+L and the levels box will pop up. Move the sliders until the desired level of lightness is achieved. You can also click on the little droppers and click on the corresponding color in your photo to correct the color. For example, if I wanted to correct the white balance, I would click on the white dropper then click on the whitest part of my page.
I also use RadLab, which is a plug-in that can be used with Photoshop and Lightroom. I then open the layout here and add a few filters to sharpen, increase the saturation and the lighting.
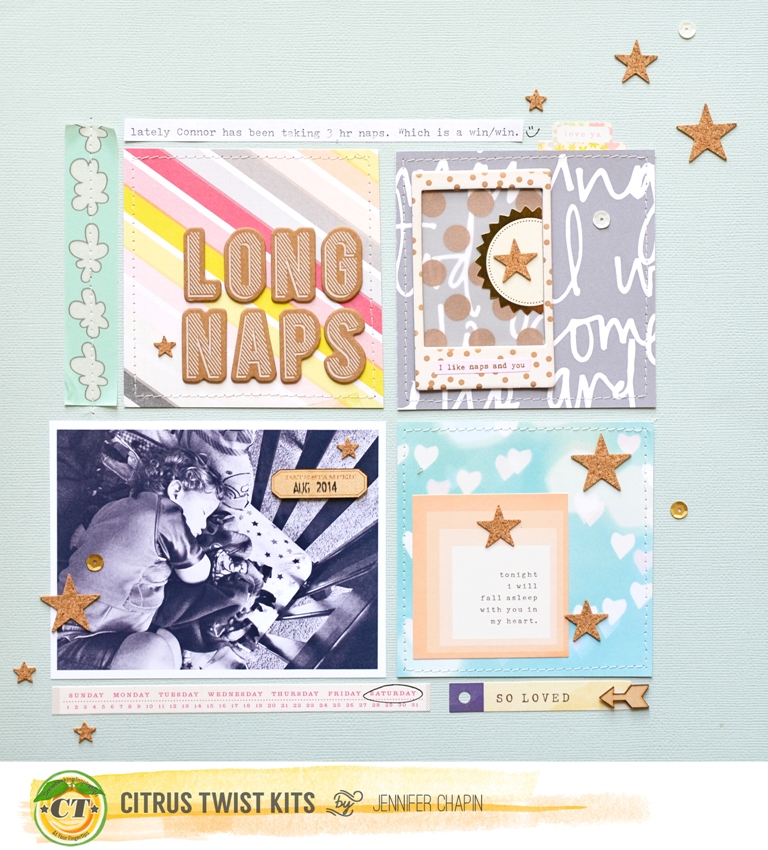
And here is the finished layout. What a difference, right?
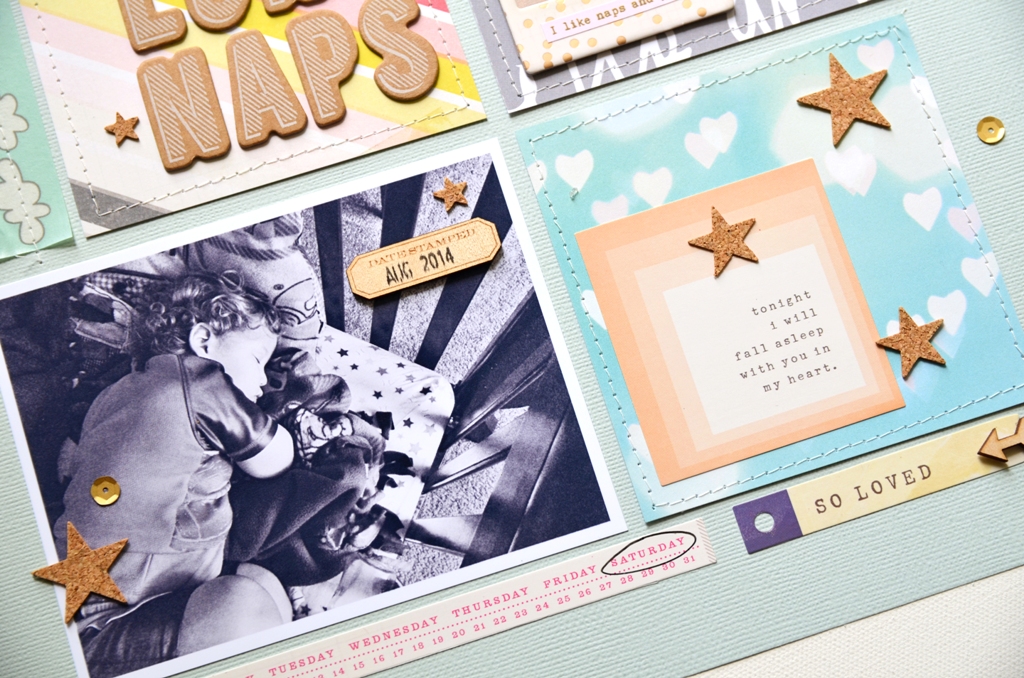
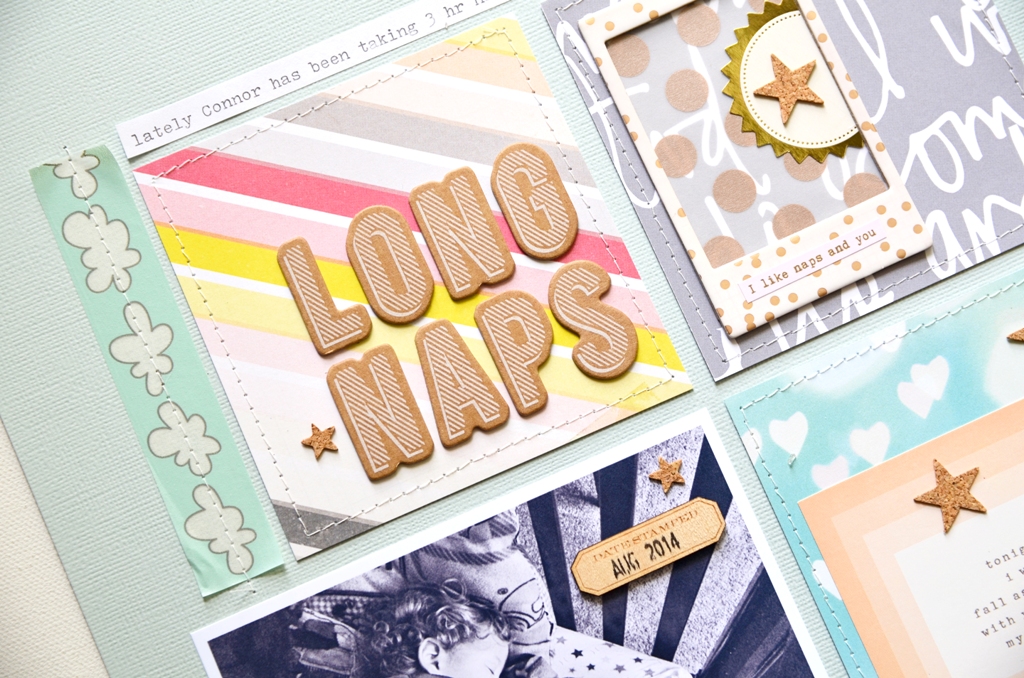
I also like to take a few detail shots. For these I get down right next to the layout and shoot a few pictures with a lower aperture, typically f2.8. I like to do this so you can see the dimension in the embellishments that I've used.
Stitching always shows up beautifully too.
Thanks so much for stopping by today! I hope you have a little more confidence now in taking great pictures of your layouts. If you have any questions, leave them in the comments. Have a great day.

.JPG)
.JPG)


.JPG)

Thanks for your hints....especially the camera settings.....I have PSE...but no idea HOW to use it - & little time to play, unfortunately....I didn't realise you could straighten with it - I usually have to go over to Pixlr to do that ---if I can be bothered! Your page looks beautifully photographed:):)
ReplyDeleteThank you Lizzy!
DeleteThank you for the great tips. I appreciate all of the PSE tips that I can get. Take care, Kim :)
ReplyDeleteYou are welcome!
Delete