Showing posts with label travelogue kit. Show all posts

Sunday, April 2, 2023

Sunday Sketch with Desiree


Hi crafty peeps! I am excited to share the Sunday sketch with the new, awesome, exclusive 2023 Travelogue kit. Let's take a look at this week's sketch.


I thought that this sketch would be perfect for me because it is simple enough for me to put my own spin on it. The first thing I thought about was layering the beautiful, bold color patterned papers from the Travelogue kit on this page.


For this sketch challenge, I decided to do a spread in my Sunshine Life Crafted Album.  Before layering the digital Travelogue papers under my picture, I smudged a bit of yellow ink on the paper to peek from under the cluster. 


I added a smaller picture to the lower right side of the larger picture. Then I layered the Travelogue Ephemera through the page. Below the cluster, I placed my typed journaling.


I decided to have a lot of fun with the left page. I started by smudging yellow and green ink on my paper. Once I saw the travel-themed polaroid picture die cuts, I knew wanted to vertically stack them on my page.  To add more interest, I staggered the die cuts vertically over my smudged ink, layering them over floral ephemera from the Travelogue die cuts.  I added the "journey" and "explore" die-cut words to the vertical cluster.

I used the Chloe Alphabet Stamp to add the small "into the city" title to the bottom of the page. Then I completed the spread by adding black splatters to tie in both pages.

I absolutely love the finished results of this Sunday Sketch. My favorite has to be the Travelogue papers in the cluster and the stacked polaroids from the Travelogue Die Cuts. 

I am so happy you joined me today. I wish you a happy, crafty weekend.

XO Desiree


Saturday, April 1, 2023

3-to-Inspire with Marci


Hello CTK friends! It is Marci here. It is the first of the month which means there is a new release in the shop. I am very excited to bring you the first 3-to-Inspire with the new Travelogue collection! 


Here are the 3-to-Inspire prompts for this week:

  1. Tone on tone embellishing
  2. Use a tag 
  3. Incorporate something “older” from your stash


I was drawn to the digital paper number 9. It reminded me of a map and the stitch marks across the green portion looked like lines on a road. I wanted to take this picture of my son and his friend driving an electric toy vehicle and make it look like they were driving on the road. Digital paper number 10 with the black circles made me think of tire tracks so I used that to mount my picture. 


To embellish the page, I got the idea to add tone on tone pieces to the three color portions of the paper. I used several die cuts from the Travelogue ephemera pack. I needed more pieces to fill in the spaces so I turned to the 2022 Travelogue chipboard stickers and some older enamel dots. Now I had enough pieces in the matching colors to make my design. These are my “older” items for the challenge. (I am using older in quotes because we all have stashes with different ages. Some of our older items might be a month older while other items are 10 years old! Go with what you have available to you.)


This month’s kit comes with a large Kraft shipping tag. I liked the idea of using it as the second page to my spread but the color didn’t work. I used the shipping tag as a template and cut my own out of one of the other digital papers. Now my tag coordinates with one of the colors from the left side of my spread. I added my title, journaling and more embellishments to the tag to finish out my spread. 


I hope you find the 3 prompts this week inspiring and give them a try. 


Sunday, May 29, 2022

SUNDAY SKETCH with Katarina


Hi Citrus Twist friends!

Katarina here with you again, this time with Sunday Sketch inspiration. Today's sketch was so much fun to work with, let's have a look!


I love sketches that are versatile, work for all formats and can be easily modified to work for me. And this sketch was absolutely perfect for this! This time I rotated the sketch by 180 degrees and created a fun layout in my Sea Glass 6x8 Life Crafted Album.


I love layering beautiful patterned papers and this sketch really inspired me to do it here on my layout. I combined digital papers and cards from the Crave and Travelogue kit.


I documented a delicious Pavlova cake that I had enjoyed a couple of weeks ago and the embellishments from the Crave kit were just the perfect match! 


I used the beautiful Crave puffy stickers, chipboard stickers and the digital die cuts to add some fun details to my photo.

I love combining fonts and sizes of letters for my titles. This time I used the super gorgeous Emma Upper Alphabet Stamp together with the Bubblegum Pink Foam Alphabet stickers. To add last finishing touches, I sprinkled some black and yellow enamel dots here and there.


I hope you find this sketch and my project inspiring and that it helps you create something beautiful today! Thank you for stopping by, see you next time!


Sunday, April 10, 2022

SUNDAY SKETCH with NATHALIE


Hi there!

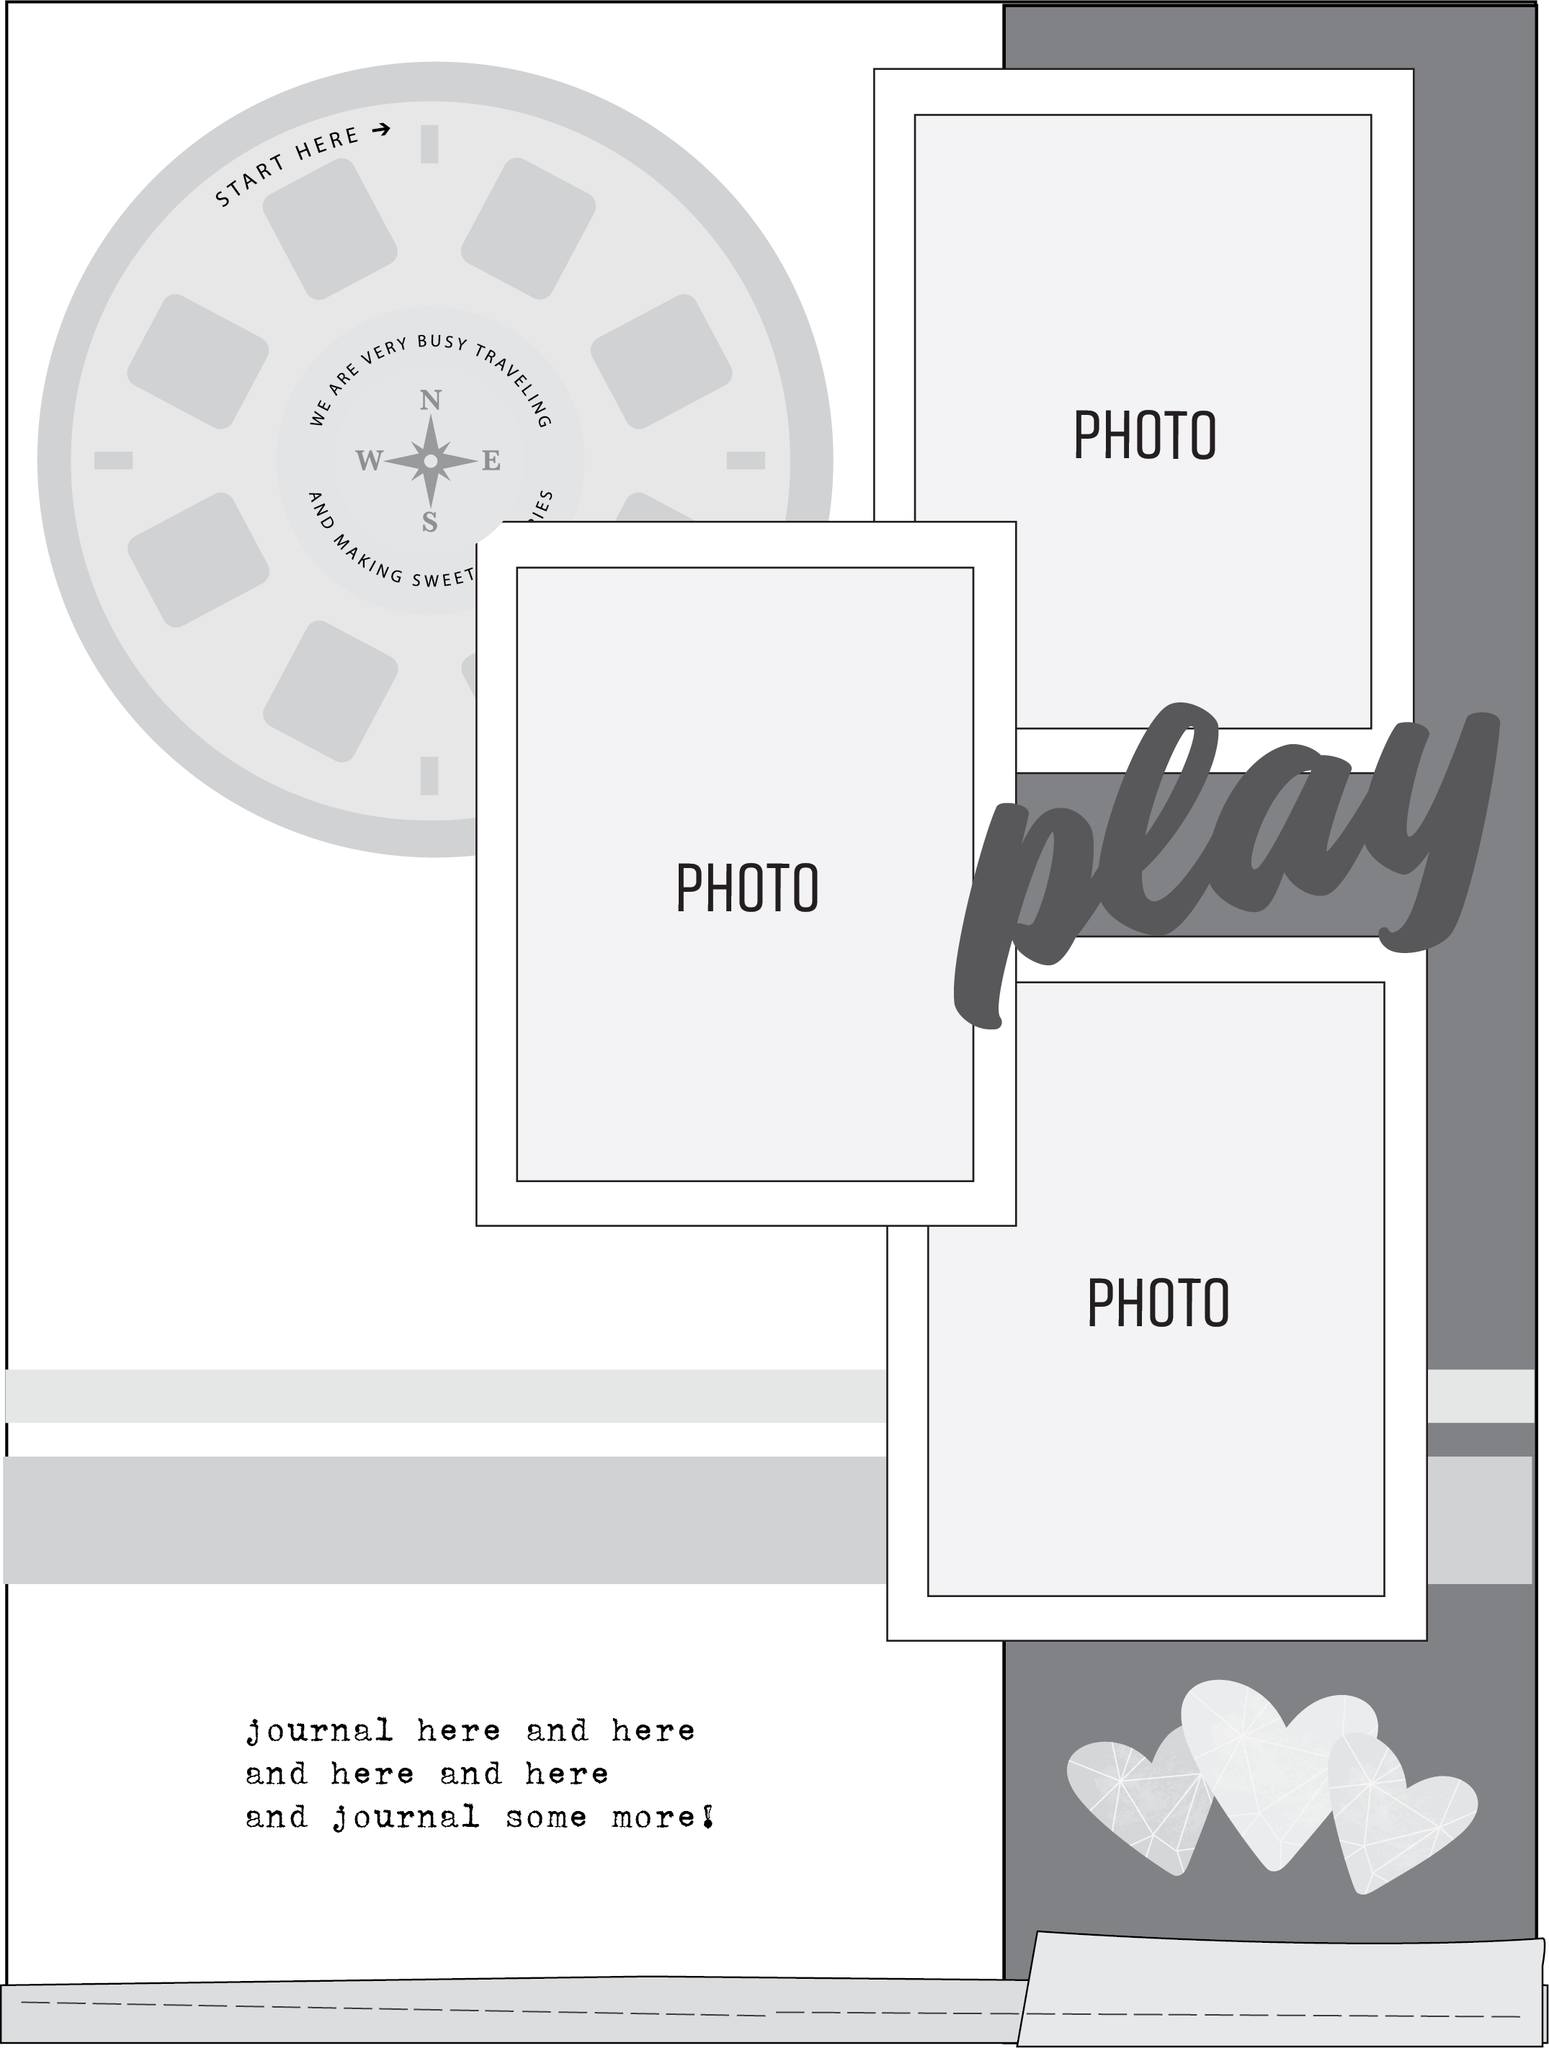
Nathalie with you today to share this week's Sunday Sketch Inspiration.   I think sketches are a memory keeper's best friend.   They are like blue prints to a successful project, which means you can get your memories documented in a flash.  Let's take a look at this week's sketch:


How fun is that design!  Multiple pictures and paper layers.   Here is what I created with the sketch and this month's TRAVELOGUE Kit for my new Sunshine 6x8 Life Crafted Album...


I love the new 6x8 Life Crafted albums, they are perfect for all sorts of documenting, and ideal to hold your vacation memories.  I combined a large photo with my version of the sketch as a complementary page.


I love the three picture aspect of the sketch;  so, I am using the new VACATION MEMORIES cut file  to create the column of photo frames. I cut this from white cardstock and back the spaces with a few pictures of the trip.  


I am using a combination of papers from the TRAVELOGUE kit, and Travelogue Digital papers to create the paper layers behind the photos ( these are inspired by the sketch).   I love all the embellishments in this month's kit, they were perfect to add more sentiment to the page ( and I need a few more train puffy stickers!!)


I decided to change the large embellishment at the top of the page for the round puffy sticker.  This help to keep the focus on the photos.   To finish, I  am using the sentiment from the ENDLESS SUNSHINE Ephemera pack to add the title on this page.


There are so many details in the large photo of this spread, that  going simple with the title was a must.  I am using one of  the chipboard stickers and Puffy Stickers from the TRAVELOGUE kit,  and adding  a small cut apart element from the SUMMER FUN digital Elements page- July 2021 as a title.


I love how easily this spread came together, using the sketch as inspiration for the spread.   Be sure to check all the new products in the CTK shop, and then use the sketch as inspiration for a project of your own!


XO


Sunday, April 18, 2021

Sunday Sketch with Marsha


Hey, friends!  Marsha here today with this week's Sunday Sketch Challenge.  I love using Citrus Twist Kits sketches because they always include such fun layers and details!

Here's a look at the sketch:  


Here's my take on the sketch:

The sketch was designed for a 12x12 page, but I chose to create a layout in my Life Crafted Travel album.  I used the new Food Love Stamp, Travelogue Kit, From the Heart Add-on Kit, and the Real Life Puffy Stickers.  

I chose to flip the sketch 90 degrees counterclockwise, so the photos were on the left side of the layout. I layered a diagonal striped patterned paper behind my photos and used some digital patterned papers to create a tag and banner behind the photos.  Ephemera pieces and a puffy sticker from the Travelogue kit were perfect embellishments for the page.


I added some stamping using the Food Love stamp.  This is such a fun stamp set- perfect for all of your food documenting!  I also added a puffy heart sticker from the Real Life Puffy Stickers.


For the right side of the layout, I followed the sketch and added a thin strip of patterned paper to the edge of the page.  I created the title by stamping the words "Yes to" using the Food Love stamp and black ink.  To complete the title, I used the Explore Chipboard Alphabet Stickers.  I added an ephemera die-cut arrow from the Travelogue kit above the title and added my journaling in strips below the title.  To finish the layout, I stamped another phrase using the Food Love stamp onto a digital patterned paper, trimmed it out, and added it below the journaling.  

I love how this layout turned out using the sketch!

I hope you are inspired to create a layout based on this week's sketch!  Be sure to share your pages with us on Instagram using the hashtag #citrustwistkits.  I can't wait to see what you create!

xo,


Thursday, April 8, 2021

MORE TRAVELOGUE INSPIRATION with Our Guest Designer Sarah Zayas


Hello there!

We are so happy to welcome our friend Sarah Zayas, our Guest Designer, to the blog today.  She has prepared a beautiful spread for you using our TRAVELOGUE kit.   I  leave you with Sarah...


Hi, everyone!  It's Sarah back today to share another project using the gorgeous TRAVELOGUE kit.  For this entry documenting a trip to Lake Tahoe, CA in my travel album I decided to put together a flip out page for one half of my spread.  This is one of my favorite ways to include more photos on a single layout.  Plus, it provides an interactive element, which is always fun to come across when you're flipping through an album.  


I started with a simple piece of grid paper and then folded it where I wanted my flipout to be.  I used pattern paper on both sides, being mindful in choosing colors that would work well together.  On the inside of the flipout I layered photos with some of the die cuts and also did some stamping.  


For the left side of my layout I used one of the three pocket inserts to house a couple more photos and another ephemera piece.


I hope you'll give flipouts a try if you haven't tried them already.  They are super quick to put together, but you get a nice expandandable layout to see all your photos.


Thanks for stopping by to check out this project!


This is just amazing!  Thank you so much Sarah for sharing your talent with us.  Remember you can check more of Sarah's work on Instagram. You are going to love her projects!


Sunday, April 4, 2021

Sunday Sketch with Patricia


Happy Sunday and if you celebrate, Happy Easter CTK Friends!!!  Today brings another sketch for inspiration and as always I love to draw inspiration from the sketch, but not following it exactly.  Here's how I interpreted this one.


I looked at this with the two sides divided and balanced.  One large cluster on each side, one small cluster on each side.  I didn't follow those clusters exactly, but they inspired me first by creating clusters on the left side using the new Travelogue stamp set and kit contents.


The pattern paper I used was from my wonderful stash of leftover CTK papers from exclusive kits.  I just trimmed to fit the pockets.  I have been wanting to use that large geotag image, and this was a perfect place for it as was the circle die cut in the center.  Because this is a continuation of my Disney Cruise album, I've used 'go' already, now that we are at our designation, I used the stamp image 'see'.   The fonts are amazing in this set.


The bottom pocket gets more layers, but I was able to keep them 'looking' like they were light by using the white cardstock cut file frame and palm and then using a die cut and sticker in the same color.    There's a perfect pop of yellow from the die cut under it and the arrow puffy sticker I used.


While I didn't create two clusters on this side as the sketch shows, I still created a cluster with the photo and the embellishments from the kit.  


Adding the cut palm, and the colors of the die cuts from the kit I chose, help to balance with the left side.  I used the same ink using the Travelogue stamp set for the no.1 no.2 no.3 for my journaling to finish.

Very inspiring sketch as always.  Hope you are inspired as well and maybe give adding clusters to your 3x4 pockets as I have done here.  Happy Creating!

Saturday, March 27, 2021

3-to-Inspire with Marsha


Hey friends!  Marsha here today, and I'm excited to be hosting this week's 3-to-Inspire challenge!  This challenge includes three fun prompts that are perfect for jumpstarting your creativity!  For my project, I created another travel layout in my Life Crafted album using the Travelogue Kit, Travelogue Stamp, and digitals, and the From the Heart Add-on Kit.

Here are the 3-to-Inspire prompts:

1.    Add stitching 

2.    Create a mixed title

3.    Include an interactive element


I started my layout by trimming a dot patterned paper from the Add-on kit to fit as a full page in the album.  I also trimmed a striped patterned paper from the same kit into three triangular pieces of varying sizes.  I absolutely love the colors in this striped paper and just had to use it on my layout!  Next, I did some machine stitching with black thread on two of the triangles for a bit of extra interest and texture.  I layered two of the triangles and adhered them and my photo to the page.


For the title, I trimmed an ephemera die cut word from the Travelogue kit in half so that it would fit on the page.  I like it even more trimmed in half than I did before!  I added the word "fun" using the Explore Pink/White Chipboard Alphabet Stickers and stamped below it with the Travelogue Stamp.  I love the way the title turned out using a mix of a die cut word, chipboard stickers, and stamping!


For the other side of the spread, I trimmed a piece of white cardstock to 5" x 8.25" to fit as a full page in the album.  I printed one of the Travelogue Digital Journal Cards at the regular size and printed three more to approximately 1.75" x 2.75" to hold extra photos and journaling.  I cut a slit in the larger journaling card so that the other cards could slide in and out.  I love this interactive element!  


I added some ephemera die cuts and puffy stickers from the Travelogue kit to embellish the layout.  To complete the page, I added the triangle stiched piece I created earlier to the corner to balance out the striped paper on the other side of the spread.


Thank you so much for stopping by today!  I hope you will create a project using these prompts and share it with us on the Citrus Twist Kits Facebook Fan Page or on Instagram using #citrustwistkits.

xo,