Sunday, March 28, 2021

Sunday Sketch with Alena


 Hey everyone!  It's Alena with  layout for Sunday Sketch.

 Here's a look at the sketch this week:


And here's what I came up with using the Travelogue collection.


 Boat manufacturing is our family business. I decided to use this photo from the tests of the new model. The Travelogue collection is perfect for this.


   I made a paper boat out of patterned paper  and used it as the main element of the layout.


The title is a digital cut  file  " EXPLORE SCREENS".  I also used the stars from the Travelogue digital elements . Some of them are glued together from 5 layers of cardstock.


Well, then it is time for you be inspired by the sketch to create a page of your own.  Remember to share your creations with us on the Citrus Twist Kits Friends page on Facebook or by using #CTK, @Citrustwistkits on social media.  I cannot wait to see what you create with this sketch.


Saturday, March 27, 2021

3-to-Inspire with Marsha


Hey friends!  Marsha here today, and I'm excited to be hosting this week's 3-to-Inspire challenge!  This challenge includes three fun prompts that are perfect for jumpstarting your creativity!  For my project, I created another travel layout in my Life Crafted album using the Travelogue Kit, Travelogue Stamp, and digitals, and the From the Heart Add-on Kit.

Here are the 3-to-Inspire prompts:

1.    Add stitching 

2.    Create a mixed title

3.    Include an interactive element


I started my layout by trimming a dot patterned paper from the Add-on kit to fit as a full page in the album.  I also trimmed a striped patterned paper from the same kit into three triangular pieces of varying sizes.  I absolutely love the colors in this striped paper and just had to use it on my layout!  Next, I did some machine stitching with black thread on two of the triangles for a bit of extra interest and texture.  I layered two of the triangles and adhered them and my photo to the page.


For the title, I trimmed an ephemera die cut word from the Travelogue kit in half so that it would fit on the page.  I like it even more trimmed in half than I did before!  I added the word "fun" using the Explore Pink/White Chipboard Alphabet Stickers and stamped below it with the Travelogue Stamp.  I love the way the title turned out using a mix of a die cut word, chipboard stickers, and stamping!


For the other side of the spread, I trimmed a piece of white cardstock to 5" x 8.25" to fit as a full page in the album.  I printed one of the Travelogue Digital Journal Cards at the regular size and printed three more to approximately 1.75" x 2.75" to hold extra photos and journaling.  I cut a slit in the larger journaling card so that the other cards could slide in and out.  I love this interactive element!  


I added some ephemera die cuts and puffy stickers from the Travelogue kit to embellish the layout.  To complete the page, I added the triangle stiched piece I created earlier to the corner to balance out the striped paper on the other side of the spread.


Thank you so much for stopping by today!  I hope you will create a project using these prompts and share it with us on the Citrus Twist Kits Facebook Fan Page or on Instagram using #citrustwistkits.

xo,


Sunday, March 21, 2021

Sunday Sketch With Loredana Bucaria


Happy Sunday friends!

How are you? Hope you all are safe and healthy, be strong, don't give up! 

Today am happy to share my page inspired from today Sunday Sketch, love it and to be true I went out of my comfort zone using some colors that I really don't use often. 


I played with many papers leftover from the past kits and with many different embellishments from the Travelogue collection that I love so much! This picture hides a beautiful story about my first boy, Andrea, he is a big sensibility, a big love fronte nature and I took this pie while he was looking at some horses. It was a lovely moment.

Here my page


I have added some vellum stars stapled together and some black ink drops here and there. I love the travelogue big 6x8 stamps  I have added so many little details here and there using puffy stickers, die cuts and cork embellishments.

Here some details


Every single thing I decide to use has a meaning for the page and the story I focus on.

Hope you like it and I can't wait to see what you create:)

Love, Lory


Saturday, March 20, 2021

3-to-Inspire with Ingunn

Vaccines are rolling out, winter is thawing (at least up here in our neck of the woods), and each and every day I feel more hopeful that we will be able to travel home to Norway at some point this year and see our families again! Until then, I am cherishing the fact that I get to relive our Covid-safe family vacation to our local National Park last summer while using the Travelogue kit. This is one of the best things about scrapbooking – we get to experience our favorite memories many times over!

For this week’s post, I challenge you to use:

  1. PHOTO ENLARGEMENTS
  2. A FLIP-OUT PAGE
  3. DESIGN SCHEME

PHOTO ENLARGEMENTS // When I first started using Life Crafted albums, I was a little worried that I would miss the opportunity to use giant, full-page prints of hiking photos. As it turns out, I needn’t have worried at all – for this double spread, I printed my photo at 10 x 8.25 inches (then cut it in half). Love, love, love this look.


A FLIP-OUT PAGE // This is a trick I learned from the fabulous Pam Baldwin: use a bone folder to fold the edge of a page protector, then attach said edge (the part with the holes) to the edge of your full-size photo. Voila, you have a flip-out! I used one of the travelers notebook-sized page protectors that come with the Life Crafted albums, and added an Avery index tab with a stamped phrase to the edge so you have something to grab onto as you flip it over. 


(This is how the back looks before you attach another full-size photo on top of that!)


DESIGN SCHEME // Whenever I make travel albums, I like to create a repeatable design scheme to make things quicker and easier. On this particular trip, each separate big hike in Mount Rainier National Park got a highlight: a double-page full-size photo with a flip-out:


I created a journaling page by combining two of the digital Travelogue travelers notebook papers, printed them out with my journaling and rating, then added one of the puffy stickers (omg just look at that little backpack!).


On top of the full-sized photo, I added one of the puffy phrase stickers.


On the back of the flip-out page, I added a collage of other photos from the hike, plus a couple of embellishments.


…and on the opposing corner, I added a cardstock flag, then sprinkled puffy stars around the different embellishments.

Now I get to dig into my photos and memorabilia from this trip + the rest of the Travelogue kit to fill in the extras between these highlight sections!


Sunday, March 14, 2021

Sunday Sketch with Patricia


Hello Citrus Twist Friends!  I'm excited to be on the blog today to share my interpretation of the Sunday Sketch and a look at how I'm using the Travelogue Collection to document the family Disney Cruise five years ago.


The first thing I notice about the sketch are the two main clusters with the sentiment on the left and the photo on the right and then the beautiful layers under it.  I flipped that vertically and used two cut files that go with the Travelogue collection to take the place of the two main clusters.  The Beach Life is from the Places We Go cut file.  and the Await is from the Vacation Memories cut file.  I backed the Beach Life with Digital TN paper printed onto vellum.


And for the bottom, I used a photo to back the Await cut file.  I also cut out tropical leaves from the Vacation Memories cut file, then used two shades of pink to add an ombre look to them.  I used those, and Travelogue die cuts and stickers to finish my page.  The Castaway Cay is from my stash of Citrus Twist Kits foam alphas.


The right side top pocket uses a digital card available this month for my journaling and stamping using the Travelogue Stamp.

The bottom pocket is a photo with Travelogue stickers and a die cut adhered to it.  I also used more digital TN papers and the available divider cut files available to stamp 'at the beach.'  I know my album will have activities on the ship and on the beach, so these cut files are perfect for this.  


So happy with how this is coming out.  You can see more of my album using all digital elements from the Travelogue collection on my blog here.  Thanks for stopping by!

Saturday, March 13, 2021

3-to-Inspire with Diane


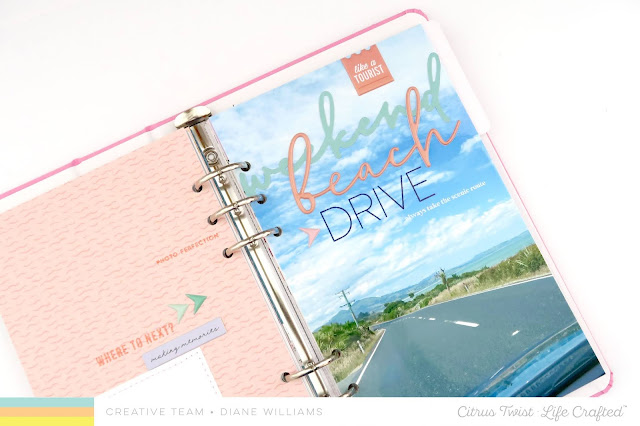
Hi everyone, Diane here with another 3-to-inspire challenge for you! You can find this challenge here every Saturday for those who need a little extra creative push to get scrapbooking, to keep scrapbooking or for those who just like a challenge! Your take on this challenge can be a layout, Traveler's Notebook page or a spread in your Life Crafted album. And remember that you'll want to include all 3 prompts on your project!

Your prompts this week are:
  1. Create a hybrid layout
  2. Use a large photo
  3. Add a mix of stickers!

I started my page by printing a bunch of the different Travelogue digital papers and cards. I wasn't sure what I was going to create at this point, so I just printed all my favourites. That way, the ones I don't use will be ready to go the next time I sit down to create!


Then I printed a full page photo for my Life Crafted album. I print these at 5 x 8.25 inches. Once I had my photo printed, I got started putting my layout together.


The first step was to create my stacked title using a die cut, a puffy sticker and a stamp. The die cut word fit exactly across the page so I made sure to position it in between the holes of the page. Then I stamped the word DRIVE underneath and layered the puffy sticker word on top of both of those. The rest of the page only involved adding a puffy sticker and stamping a sentiment in white ink.


For the facing page, I deliberated between adding my journalling to a blue card on a white background or my journaling on a white card  on a printed background. And as always, colour won out in the end. 


I choose a background the same colour pink as the puffy sticker in my title and typed my journaling onto a plain white card before using my sewing machine to stitch them together.


I embellished the page with a few chipboard sentiment stickers (sticking to those same colours of coral, teal and blue), then I stamped a few sentiments using a darker coral coloured ink. I added the final touch with some puffy sticker arrows and called the spread done.


Here's a look at the process this spread took ...


Thanks for stopping by today and I'd love to see any page you create using this challenge so don't forget to tag me and share over on the Citrus Twist Facebook Fan page!

Thursday, March 11, 2021

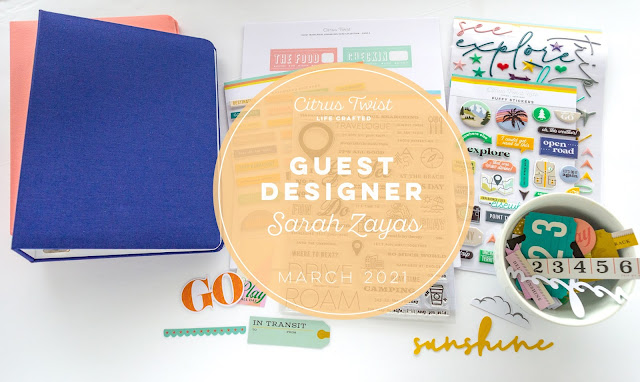
MEET OUR GUEST DESIGNER - SARAH ZAYAS


Hello there!

We are so excited to introduce our second Guest Designer, Sarah Hayas.   She is a past Creative Team member, and friend of CTK.  We adore her style, and are always in awe of what she creates.   We couldn't be happier to have her join us for the  next two months, and share some inspiration with our Travelogue kit!   


 Q & A with Sarah

·         What is something most people would not know about you?  I love to travel and took lots of road/camping trips as a young girl, but my first time in a plane didn't happen until I was 24 (which was for a work trip to Washington DC).  Since then I've been so fortunate to travel to many places (both near and far from where we live).  One of my favorite trips was to Canada where we got to snowboard in the Whistler Blackcomb mountains.
·         What are the 3 scrapbooking products you can’t live without? Stamps, a good adhesive, and my trusty Fiskars paper trimmer :)  
·         What do you love about the TRAVELOGUE kit?  Besides the vibrant color scheme, the die cut pieces are always my favorite from any CTK kit.  They are so versatile, and add that fun detail to any project.
·         Finish this sentence “My dream destination/vacation is . . . “Alaska! It's been on our travel bucket list for years!


Hello everyone!  I'm so happy to be back with Citrus Twist Kits as a guest designer for the Travelogue kit!  This kit immediately caught my attention with it's bright, fun colors, and since travel themed layouts are some of my favorite projects to include in my Life Crafted albums, this kit was right up my alley!


The life crafted albums are perfect for documenting one off trips, but I also like to use them for an all encompassing travel album (which is a big ongoing project I'm currently working on).  My goal is to create one or two pages per trip to give an overview of all the places we've visited over the years. For today's project I decided to document a trip I took with my husband to Seattle back in 2016.  


I used one of the 2x2 grid page protectors for the right page so I'd be able to include more photos, and then I kept one of the standard size page protectors on the left.  I loved creating little clusters with the die cut pieces, and even had them overlap with my larger photos.  It gives the page such a fun effect.  


For my 2x2 grid page I mixed the photos with the embellishments to keep a good balance on the page.  Since the photos are so small I decided to keep them as they are, but I added embellishments to all of the other pockets.


Finally, I printed my journaling onto some grid paper and added it under my large photo.  My goal with the journaling for my travel album project is to write up an overview and maybe add in a few details, but not to include everything (which would require much more space than one or two layouts.)


Thank you for stopping by to take a peek into my travel album!

XO,

Sarah


-----

 We love this new spread by our friend Sarah, and are excited to see more of her creations with our kit.  Be sure to stop by her Instagram feed to check more of her projects and be inspired. You are sure to love her work!

XO