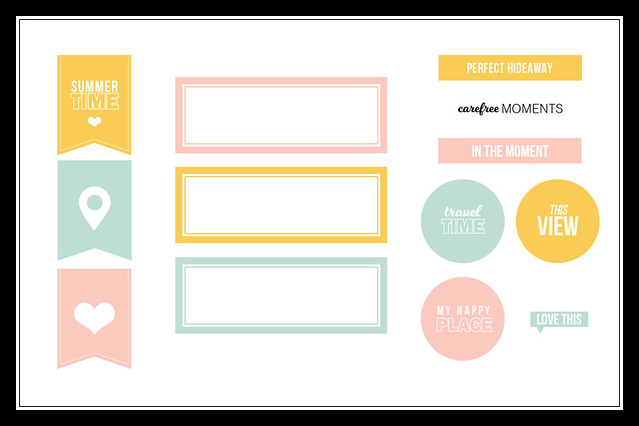
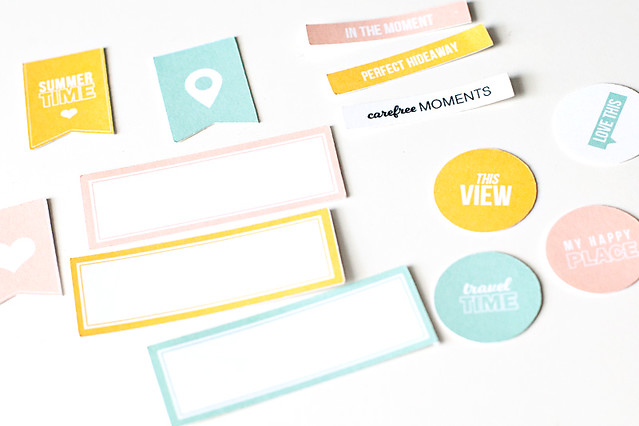
I created some printables that I used on a layout that I am going to share later. If you'd like to download them, you can of course use them, too! All you got to do is join our Citrus Twist Fan Page on Facebook and download the files.
But now on to the printing and cutting part. Of course you can also print and cut them by hand, but I have to admit that I am lazy when it comes to this. So I love the fact that it is possible to print and cut the files with the Silhouette!
I do have a Silhouette Portrait, but it works the same way with the 12x12 Silhouette. Also my Silhouette Studio program is in German, but I am going to do my best to translate everything for you.
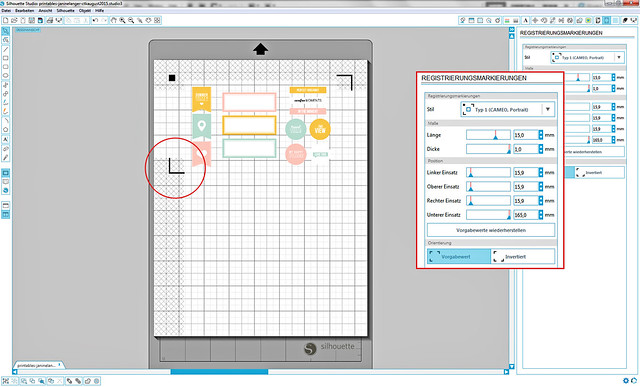
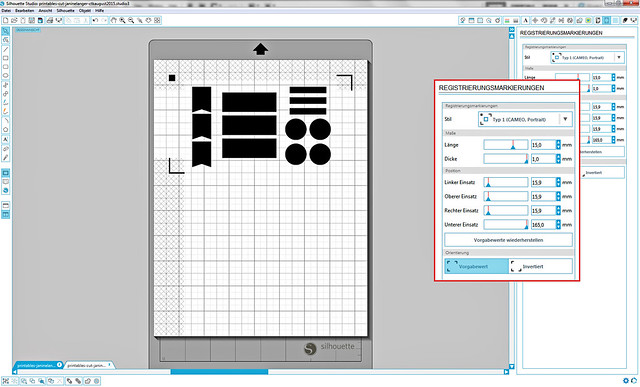
First you open your file. It is very important, that you don't move it around, just keep it as it is. If you do move it around and don't costumize the print file later, then the cut won't be perfect. Anyway, you open your file with the printables and go to your registration mark settings, as shown in the picture above. I don't like to waste paper and I don't want to print and cut a full sheet, so I customize the sliders as shown. In this case I've been looking for the bottom mark to be more on top, so I can cut off the sheet later and use what's left for another project.
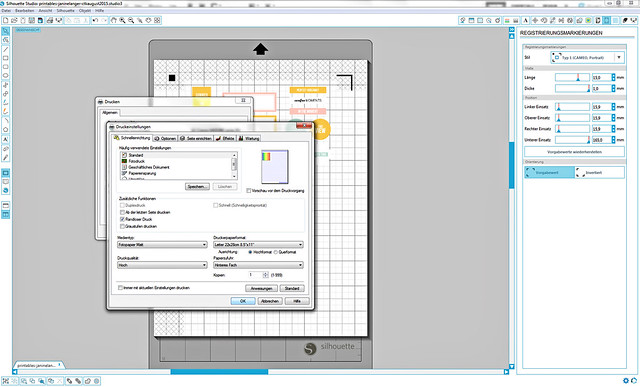
Then you print the sheet with the registration marks on it. Don't forget to customize the settings for your printer first.
Now you open the cut file, that you can download at the Citrus Twist Fan Page, too. You want to set the registration marks the same way you did on your print file.
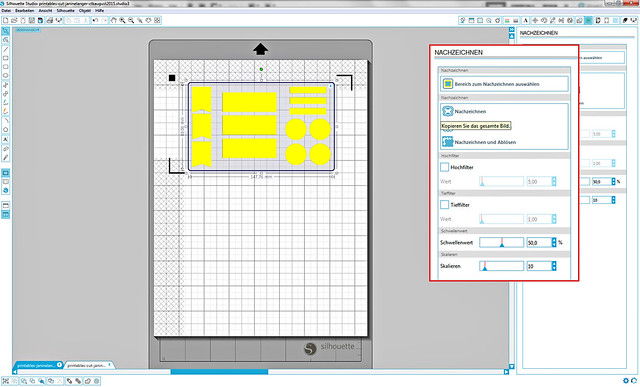
Then you prepare your cut file for the cutting part. You open the trace settings, cklick on select trace area and select the cut files. You unmark the high pass filter and adjust the settings of the threshold settings to your liking. I like to keep it aroud 50, in my experience the cut is better then.
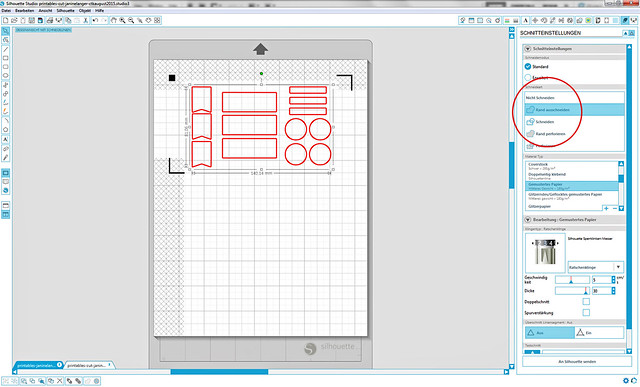
The next step is optional, but I personally like to delete the original cut file and just keep the traced red lines.
Then mark the red cutting lines you created with a mouse click and go to your Silhouette cut settings. It is important that you click on cut edge and then of course adjust the other settings, depending on what paper you use.
If everything looks ok and has a red line showing where to cut, go ahead, line your paper up on your cutting mat and load it into your Silhouette. Then everything is ready to cut, just see the magic happen.
One last hint, try to have the lights on or good daylight, when you cut with registration marks, so the Silhouette can read them properly.
There are some other ways to do this with one file only, but from my experience this way you get the best cut. :)
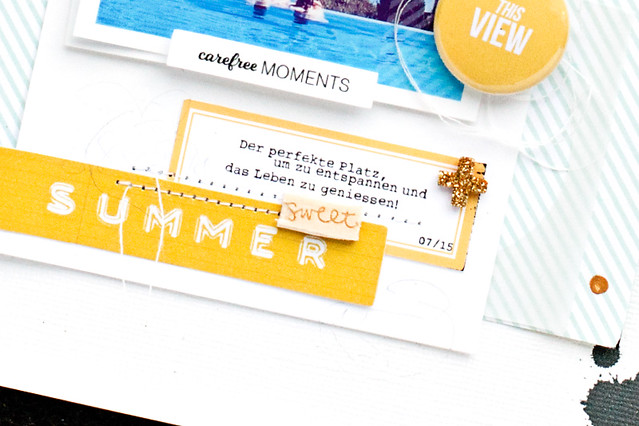
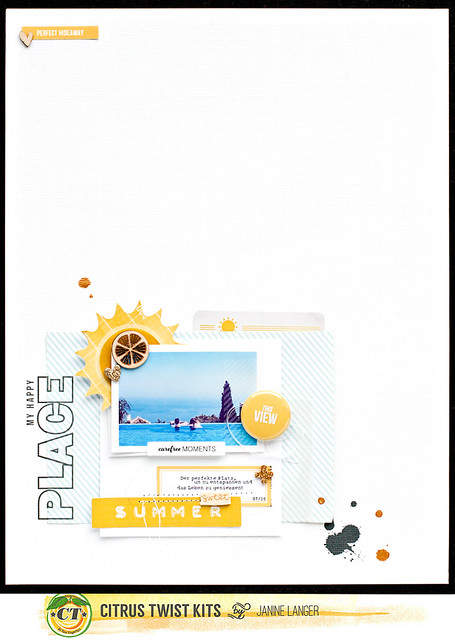
And here is the layout that I created, using some of the printables and supplies from various Citrus Twist Kits from the past. I also made a button with my button machine out of one of the circle printables.
For this layout I used a photo that I took when we were in Spain this summer. It was so hot, that the pool was our best friend! The view we had from the pool was amazing, so relaxing.
That's it for today, thanks so much for joining me.
And if you like the printables, don't forget to download the files. I really can't wait to see what you are going to do with them!


Really wishing I had a silhouette instead of the old cricut expression right now!
ReplyDeleteThese are beautiful Janine! I've not been using my Cameo much these days but I'm definitely going to boot it up and print/cut these :)
ReplyDeleteLOOOOVE this LO!!! Alsowish I had a Cameo.... ;) Hugs Anna :)
ReplyDeleteGorgeous layout x
ReplyDeleteThank you so much everyone! :)
ReplyDeleteIf you don't have a cameo, you can cut it out by hand, if you'd like to use the printables. :)
Ok!!!! Perfect!!!Thanks:-)
Delete