Showing posts with label Citrus Twist Kits Store. Show all posts

Tuesday, October 16, 2018

Tuesday Tutorial with Neftali


Happy Tuesday everyone and welcome back to another Tuesday Tutorial! It’s Neftali here today to share with you a sweet pregnancy book I have created using the Mini TN covers from the shop and the October Little Things TN exclusive papers. As we all know, the exclusives are always so exciting to find every month as they are so bright and beautiful. It’s a given!

But this month I found them to be especially perfect to add to a baby book since they were all light pastel colors and very neutral soft prints.


Let’s get ready, and grab your mom fuel, and let’s make a baby book!


As a side note, you can make any type of book using the items I’m using today. This can be a general guide for prepping your Mini TN’s for any theme or season.

I began by cutting each one of the papers to size so that they would fit nicely inside the wooden covers. Approximately, 3 1/2 by 8 inches. After that I placed them back to back so that they would have a pattern on each side and sewed them together.


I love the look they have when stitched all around! Such a unique and finished look.


Once I finished stitching the pages together, I ended up with 4 base pages for the mini. I simply hole punched them and they were ready to be placed together with ring binders.


My book is now ready to be filled with memories and milestones from this pregnancy.

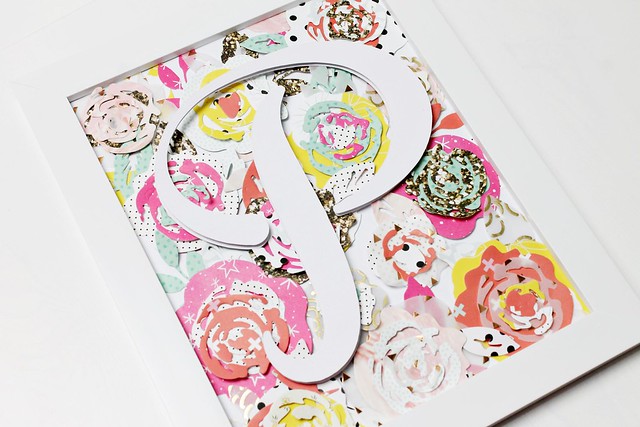
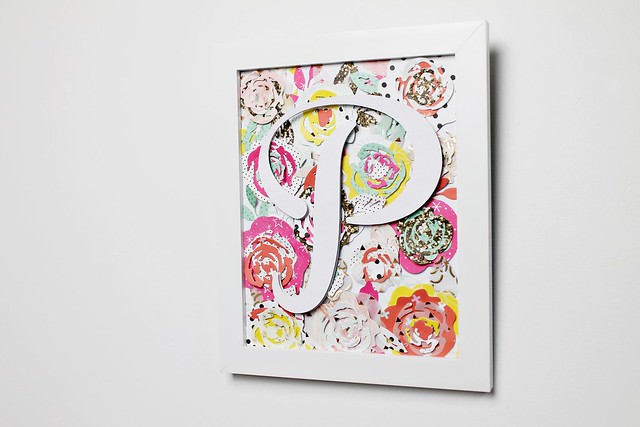
I decided to create a cover page as the first look when you open the book. I used some really pretty details to keep with the soft pastel colors of the book.


I plan to keep adding more pages as I go and different elements like pocket pages and even smaller interactive elements like glassine bags.


So friends, the October Little Things PL Kit is pretty much perfect for a baby book. But these super easy and basic steps can help you create a base for any Mini TN book! Please feel free to share any of your creations in our CTK Facebook group.

Thanks for stopping by today scrappy friends! I hope you are all feeling inspired to play with your October kits and create something beautiful. Have a wonderful week! Xo


Saturday, December 23, 2017

3 To Inspire with Jennie

Hey Friends! This is Jennie with today's 3 to Inspire!
My three prompts are:
1) Get inspired by the holidays.
2) Use pops of red.
3) Use handwriting. This one is my favorite. I love to see my mother and grandmother's handwriting and I'm sure my daughters would see mine. I also include my daughters' handwriting because they are still little and it keeps evolving. 


For this post I chose to work on my December Daily. The Sonoma Pocket Life Kit has a few good bits that you can use on your December Daily. It also had good holiday colors like red, green and aqua. Inside the top right pocket I have a little magazine my Elf brought from the North Pole, This is the back of the magazine. Apparently Target is a big deal there too. 

I love the balance in the journaling cards set. They have enough filler cards and enough journaling cards. The best thing about journaling cards is that a lot of them have lines which makes me feel better when I use my handwriting.  

Of course I have to use the phrase "shenanigans afoot" when I talk about Charlotte! This day she wanted to go for a ride so the "going out" cork piece worked perfectly. 

If you have a little gap on your December Daily you can document your holiday or season favorites! I'm not a big fan of Christmas Music but I like most of the songs from this CD so I decided to record it.

The puffy stickers from this month's kits are awesome! They come with lots of little sprinkles! I also used the stamp set on my date card. 

I hope you enjoyed these little prompts. Show us what you've got at the Citrus Twist Kits Fan Page on Facebook

Wednesday, June 15, 2016

Bonita Rose | Using My June Grace Box In My Journal

HI everyone!
It's Bonita Rose here and today I'm sharing with you
how I'm using my Grace Box inside my writing journal.


I'm one of those people.. that loves journals, anyone else?
Sometimes, I just can't pass by a pretty journal,
even though I have a few empty ones already here at home.
Anyone else?
I digress.


On this day, I found myself praying this morning, and really sharing my heart
with God about the events here in my home state of Florida over this past weekend.
You see, I live only about 10 mins outside of Orlando.
Here, it really hits home.


I wanted to show you all how your Grace Box contents
don't just have to be used in your Bibles, or your faith journals.
They can be used in just simple writing journals too! 

Here, I used some of the stamps, the word stickers, a puffy 'Everyday' sticker,
and a journaling card from the June Grace Box.


Then I just shared my heart. 


My journaling reads: 


With the grace of God, I know we can all get through the hurt.
The pain. The injustice of so many lives lost.
Through it all - God Reigns.

Ever since all these people died over the weekend, 
my heart has been with the families. The ones left behind.
Comfort them Lord. 
Help them to live out loud for You.

To shine Your forgiveness.
One thing I know -- 
Your love surrounds me
And it's Your love that will surround these families left behind.
Help us all Jesus -- to love one another more. 

To be still and know - that it's living our lives as You did
that will change our world. 

Lord help us.
Shine bright in our lives.
Shine bright. 


Sign up!
 for the July Grace Box HERE

Thursday, September 17, 2015

Quick tag using the WRMK Heatwave Pen!

Hi everyone!

It's Emma here to share a project I made using the WRMK Heatweave pen tool that I picked up from the shop this month.

As soon as I saw this Heatwave Pen I knew I had to get one!  I've been holding out for the Minc but I thought this would be a perfect introduction to getting started with foils on projects.

First up, this pen is alot of fun!  But I must confess, I found it had quite a learning curve.  It's not that the pen is hard to use - I mean, it's a pen...you turn it on, it heats up and then you write with it.  Couldn't be any simpler! ;) The learning curve I had was getting a consistent finish with the foil.  I'm guessing most of the inconsistency comes from the way I held the pen (i.e. the way I write) but as with most things...practice makes perfect!  The more I used the pen; the better it got!  If you are looking to pick one of these up I would suggest getting extra foils so you have plenty to practice with.

For today I thought I would share how this tag came together. I love making gift tags for family and friends, and I'm excited that I can now add my own personal touch to each one! 


First up I gathered some supplies from the September kits and my own personal stash that I wanted to use.  As you can see above, I went with gold foil because its my favourite but the pen itself comes with foil sheets in gold, silver, blue, red and pink!


And rather than show you a bunch of photo's, I've actually made a short little video of how this tag came together.  Still learning this video thing so you'll have to forgive me for getting my head into the frame as I wrote with the pen...amateur ;)   But the good news is..there's no talking, ha!


I'd love to hear if you picked up the Heatwave Pen!  How did you find it?  And if you've not got it yet, is it on your wish list?!

Thanks for stopping by!

Em

Wednesday, August 19, 2015

Alpha love with Emma

Hi everyone!  It's Emma here to share a couple projects I've made using not only the amazing August kits but also some fun alpha's I picked up from the store this month. 

I can't help but pick up a little something each time - Trina always uploads those little extra's that you just have to have!  This month it was the Seven Paper, Amelia Gold Puffy Alphabet stickers.  The font is gorgeous!  Plus they're gold.  That alone was a good reason to get them :)

The first project I created was a layout.  I went big with my photo, it's almost a full 6x8.  I set the title at the top of the page to fill that big white space in the photo - the gold against the white makes it really stand out.


To fill the bottom of the page I just picked some paper from Paper Play #1 - I wanted to add some colour given the photo is quite bright.  The tag at the bottom is another shop item I picked up (Maggie Holmes/Crate Paper Ribbon set) then I just layered a few smaller pieces from the Main and Embellishment Kits.  (Oh, the gold dotted vellum I used at the top corner and the gold paper clip at the bottom both came from my stash!)

 
The second project I created using the alpha's was a card.  I'm trying to make more cards lately.  I mean I have all the materials I need, so why not?!  Seems crazy to keep buying them when I can make them.  Plus I'm lucky enough to have friends that actually appreciate hand made cards or want me to make them for them so they can give them away.  Lucky me :)


For this I pulled a few items from my own stash but the background paper is from the August Pocket Life kit.   On top of this I just added a scrap piece of the gold dotted vellum on top (left over from the layout!) then added my sentiment to a plain white tag, sewed them together and popped some enamel dots in black and gold to tie it all together!  Easy one :)


Did you pick up these the shop this month?  Would love to see your creations if so!  Remember to link them up in the gallery or share them on the Facebook page so we can all see :) 

Thank so much for stopping by!
 
Em

Monday, July 13, 2015

The big 26 and a layout, Dear Lizzy - Fine & Dandy

Each month I'm always getting something extra from the store and this month I picked up a couple of the new Dear Lizzy Fine & Dandy items; the shaped paper clips and accent stickers! I thought it might be fun to create a traditional layout and something different (for me).

I went with a card for my "different" this month - which isn't really different at all, but given I'm not much of a card maker I figured I'd be daring and make it a shaker-card! ;)  I never realised just how easy shaker cards were to make. For my base I used the Fine and Dandy "Stripey Straws" paper (from the July Pattern Paper Play 2 kit) then added foam tape around the edges to give me depth.  Then I just popped a piece of clear acetate on top, cut a white border out of cardstock and stuck it on top (to hide the foam tape). It’s that easy! Who knew ;)

A co-worker is turning the big 26 (and when I say the big 26 I should point out she is the "junior" in our office… I wish it was me turning 26..) so I made this with her in mind.


To make sure the accent stickers actually move around (and not just stick to the back paper) I popped them onto a scrap piece of vellum then just cut them to shape.  The shaped paper clips are clipped onto the circle paper but I also added a bit of washi tape at the back to stop them falling out should she decide to really shake that card.


For my traditional layout I went with a double-page spread.  We have just finished up with school holidays over here so we've had both kids (my son & niece) home all day and I love them both dearly but they sure are “funny”.  Thought it would be fun to jot down a few of my niece’s seemingly daily demands these school holidays ;)


This one has a little from the July kits – I tried to stick with the Fine & Dandy collection to keep the colours consistent but also brought in some pinks and golds to match. I love using different alpha’s for the titles and I just popped the “5” shaped paper clip at the top (it’s her age).


I think this is my favourite 2-page layout that I've made so far. I really love the colours!


Did you happen to pick up any of the new Fine & Dandy line from the shop this month?  Would love to see how you've used it if so!

Thursday, June 18, 2015

Stamping with Kelly Purkey!


It's no secret that I don't usually stamp.  I can think of only a couple layouts I've made that include stamps...so it might surprise you to know I picked up the Kelly Purkey stamp from the shop this month!  The Outline Letters 3x4 stamp are the perfect sized font for my smaller pages!  I also think they'd rock any planner or Pocket Life page because they really are the perfect size!


Given that stamping is a little outside my comfort zone I thought it would be fun to challenge myself to use them in a traditional and non-traditional project!  The non-traditional project led me to go through Pinterest (one of my go-to's for inspiration) until I found a DIY on Stamped Clay Bowls 

(If you follow the link there is a detailed step-by-step of how these are made, I was going to retype it here but it's already so easy to follow, so why risk messing it up!)

For my non-traditional challenge using stamps, this is what I ended up with!  Now keep in mind I'm not much of a stamper and this was my first time using dry clay.  So.much.fun. though.  I've already brought more clay so I can try it again with other stamps.  Who knew stamping could be so much fun, haha.


My first attempt was the "Shiny" bowl so it has a few messy stamped area's plus some tears where I wasn't gentle enough when transferring the clay from table to the bowl, but overall I still find it cute!


The second bowl was a bit easier, but still managed to stretch it too much when transferring from the table to the bowl!  I guess more practise is needed :) 


Next up I tacked my traditional challenge! I thought I'd go all out and use the stamp not only as my title but also to create a pattern on the paper.  I just repeated the message over three lines.  And yes, this may have taken a few attempts....there is a knack to getting a perfect impression that I just haven't mastered yet, lol.


To hide a little of the imperfect stamping and to spice it up (and go outside my comfort zone a little more) I used watercolour paint!  Very messily I might add :)

Other goodies on the page all come from the June kits!


I have to admit that I really enjoyed using the stamp set on both projects!  If I had to pick one, I would probably go with the clay bowls, but that's only because it was something completely new :)

Have you picked up the stamp set from the shop? If so I would love to see how you've used it!  Just leave a comment below and I'll be sure to check it out :) PS - Have you noticed you can now search by product AND manufacturer in the shop?!  So easy to find all those things you need now!

Thursday, May 7, 2015

Using die-cuts!

Hi all!

It's Emma here to share a few recent projects I've made using the gorgeous Crate Paper/Maggie Holmes Confetti Flower die-cut set which I picked up from the store.  I've always loved the flower ephemera packs in Maggie's lines and now with this die-cut set, I can make my own!

The colour combinations you make are only limited by the papers you have, and fortunately for me, I have a lot ;)

My first project was a a simple layout with a photo from my niece's 5th birthday party. I picked 6 or so favourite papers and cut one full set of each then just paired colours I liked together.

20150419_CTK_Lovely_7

Then it was just a matter of teaming the bright flowers up with a b&w photo and some neutral papers at the top to create this:

20150419_CTK_Lovely_B

20150419_CTK_Lovely_2

The next project I've made is actually for one of my work collegues; he and his wife are expecting their first baby (a girl!!) and his wife is a big fan of hand made gifts as opposed to brought gifts (and she knows I'm a crafty type because her hubby always gets me to make his cards....ha!) so I offered to make a few things for the nursery.  One being a handmade mobile (still in progress, ahh, she's due next week, I really need to finish!) and the other being a set of wall prints! My plan is for 3 frames, one with a monogram of baby girls name and he other two with cute phrases.  Because I love this die-set, the idea was to have a background of flowers with the letter "P" on top.

First up I cut a bunch of flowers in heaps of different colours...I think I ended up with 13...

IMG_1845_1

Once you've got all your flowers it's just a matter of putting them together in combinations you like (this is my favourite part!) and sticking them onto your background paper:

IMG_1853_1

IMG_1863_1

I used my cameo to cut the letter "P" from white cardstock and put them on top. I was originally only having one P but after I'd put it on top of the flower background I felt it needed some dimension so I cut another the same size, layered it on top with foam dots in between.

IMG_1869_1

Once that was done I just added it to the frame and ended up with this:

20150506_CTK_Frame_1A

20150506_CTK_Frame_3

20150506_CTK_Frame_2


I think once I group it with the other 2 frames it's going to look kinda cute :)

Now I just need to find some time to finish the mobile and other frames before baby pops... *crossing fingers she's not early*.

Emma