Friday, November 19, 2021

MERRY & BRIGHT with our Guest Designer LEILANI GILCREASE


Hi there!

We are so excited to welcome our Guest Designer, Leilani Gilcrease, to our blog one last time.


I loved using the Merry and Bright kit to create another fun Christmas spread in my Life Crafted album. I paired some of the beautiful papers from the paper pad with tons of die cuts to add lots of layers to my pages.


I love being able to mix and match the tiny word phrase stickers with the ephemera pack and chipboard stickers to create lots of dimension on my page.


I also decided to use the gold alphabet puffy stickers and the Harper alpha stamp to create a bold title!


I then used the small glassine bag the sequins came in to create a small pocket behind this photo- the perfect place to hide a little journaling!


I added a bit of stamping along with my story to the back of one of the ephemera pieces. I love how the journaling is hidden and looks like just another piece of layering behind the photo!


I loved using all of these products to document one of my favorite Christmas stories from the past!


Remember you can check more of Leilani's work on her Instagram feed @leilani_scraps


Thank you so much Leilani for sharing some of your beautiful work with our Merry & Bright kit!


Sunday, November 14, 2021

MERRY & BRIGHT with Guest Designer AMANDA BALDWIN


Hi there!

Today, our lovely Guest Designer, Amanda Baldwin, is sharing more of her December Documenting preparation using our Merry & Bright kit,  exclusive stamp sets, and her Cranberry Life Crafted album.


You can find all the products Amanda is using in our shop.     

Thank you so much Amanda for all these beautiful entries.

XO


Sunday Sketch


Hey there!  It's Kira and I am back with this week's Sunday Sketch.  Here's a look at the sketch we will be using today:


And here's my, slightly unconventional, take on the sketch:


I am currently working on some foundation pages for my December Daily.  So, when I saw the cute wreath die cuts in the Warm Wishes add on kit, I knew they had to be featured in my album somehow.  I have been loving all things interactive in my Life Crafted albums lately and I thought a door, with a wreath hanging from it, would make the cutest flip out.  


I started by creating my door in Cricut Design space.  I sized a rectangle to 5"x8.25" and cut out "windows" near the top.  I added two vertical rectangles below the window to look like door panels.  And created a doorknob and key hole with cardstock.  I backed the window with vellum and some light patterned paper.  The left side of the door is scored at about 1/2" in to create the fold out. 

The "inside" of the door I tried to stick closely to the sketch.  I chose a grid paper for future journaling and added my title at the bottom. 


On the reverse page I added a chipboard frame.  I removed the adhesive from the top so a picture can slide right in.  


Thanks for stopping by and I hope you are able to find some crafty time to play along this week!

xo, Kira 


Saturday, November 13, 2021

3-to- Inspire with Nancy


 Hi there Citrus Twist fans, this is Nancy with the Saturday 3 to Inspire challenge. For my project I chose to focus on the beautiful new Gratitude stamp set and November ephemera.


This is a very clean and simple hybrid design and just my style. The background Field Notes paper is a digital that I printed out. Having a digital version of this paper makes it so easy to line up the Top 10 list. After printing the journaling, I added the stamped Gratitude title and "fall story" subtitle to the top of the page.


Next, I added a blue strip of Citrus Twist patterned paper . I created a cluster of ephemera and layered puffy sticker with the November release. In this 3 to Inspire post, I challenge you to:

1. Use a digital paper to create a hybrid page.

2. Stamp your title.

3. Create a cluster of flat and puffy embellishments.


I hope this page inspires you to create a meaningful list of gratitude with a little flair!


Sunday, November 7, 2021

MERRY & BRIGHT with our Guest Designer - JENNIE GARCIA


Hi Friends! This is Jennie with more holiday pages! Last year and even this year, crafters we a bit worried their albums would be boring or that they wouldn’t have many stories. One thing you can look for are online games, websites, and memes. I took screen shots from the Naughty and Nice List. I added a puffy gold star sticker next to my daughters’ names. It’s also a story that you can use any day. 


I used the Luna Stamp Set for the number. I stamped it with red and left a white border to create contrast with the green background. 


I love having different page sizes. This page protector is 4x6, perfect to squeeze a few extra pages. I used the Merry & Bright Stamp on cork to create this embellishment. The punch I used is 1.5 inches. 


One combo that I use all the time was washi tape and little word sticker. I almost used the entire sheet of word stickers and the gold puffy phrases and icon stickers.  


This day was a busy one with lots of photos, so I cut the top 4 inches of a 12x12 page protector and folded it in half. Use a bone folder to make sure it stays folded. To add my journaling, I used a card from the Sparkle & Joy Digital Journal Cards.  


I used the Busy Sidewalks paper pad to make this card. This circle die framed the photo perfectly! This was my favorite card in the whole spread.  


I hope you enjoyed these pages! Take care! 


Sunday Sketch with Alena


Hey everyone!  It's Alena with  layout for Sunday Sketch.


 Here's a look at the sketch this week:


And here's what I came up with using Merry&Bright Christmas Kit.


In the photo, my youngest son in his first Christmas days.


I chose some gorgeous sheets of paper with a 6x8 pattern and layered them. So that the embellishments do not merge with the patterned paper, I added a piece of vellum.


In the lower right corner I have put together a composition of pieces of Ephemera and fussy cut elements. 


To fill the empty space a little, I decided to add some white sequins.


Well, then it is time for you be inspired by the sketch to create a page of your own.  Remember to share your creations with us on the Citrus Twist Kits Friends page on Facebook or by using #CTK, @Citrustwistkits on social media.  I cannot wait to see what you create with this sketch.


Saturday, November 6, 2021

3-to-Inspire with Ingunn

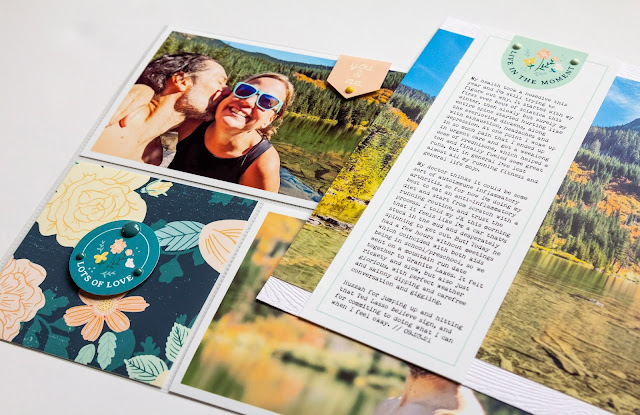
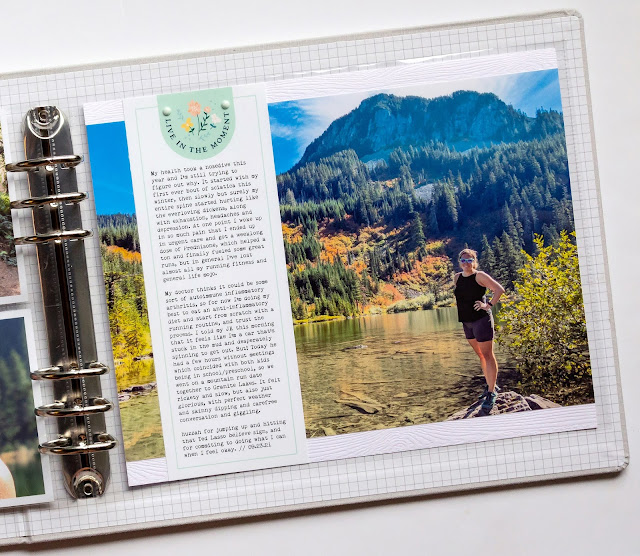
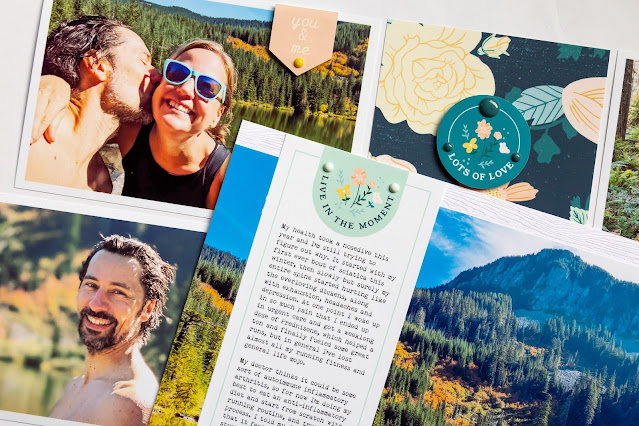
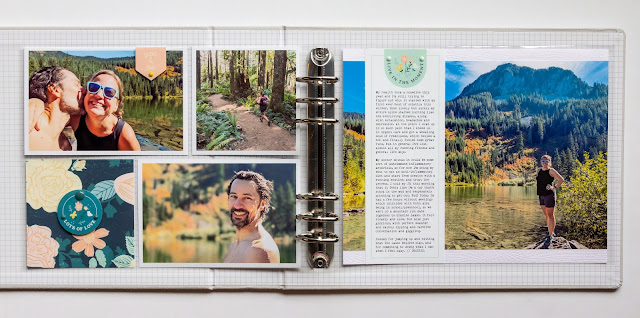
Happy Saturday, Twisties! For my 3-to-Inspire post this month, I decided to play with digital products. I fell head over heels in love with the Citrus Twist digital release this month! The colors and the fall florals immediately made me think of a date run my husband and I had in September while both our kids were in school, so I decided to tell that story, and also the story of my health issues which have made running harder lately.


Since the photos had a lot of color going on in them, I decided to keep my embellishing very simple and stick to:

  1. Digital journaling cards
  2. Digital elements/ephemera
  3. Enamel dots

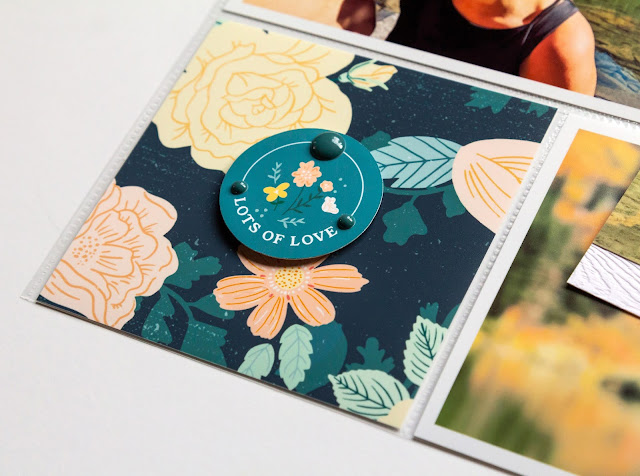
I knew I wanted to enlarge the photo of me in front of the lake, so my first step was to make room for journaling using the Gratitude Digital Journal Cards. I tend to ramble on in my journaling, so I needed more than a 3x4…this is where digital products win! In Photoshop, I used copy/paste (I’m sure there’s a fancier way to do this, but I’ve never claimed to be fancy) to elongate the “Live in the moment” card to fit all the way down my 10x8 inch main page. Then I used the crop tool (set to 4 in by 4 in at 300 px/in) to resize the floral pattern card to fit my 4x4 pocket.


Next, I used my Silhouette machine to print and cut the Gratitude Digital Elements (if you don’t have an electronic cutting machine, you can print and then cut them out by hand!). I wanted to use the one that said LOTS OF LOVE, but since the rest of the sentiment was more Thanksgivingish than skinnydippinginamountainlakeish, I filled in that part of the circle with the background color, and added a white half circle so it wouldn’t look empty. Have I mentioned that I ADORE the versatility of digital products?


I added a “you & me” tab to our selfie, as well. I attached the digital elements with foam adhesive to give my spread a little bit of texture.


My final step was to add one last little bit of texture and interest – the colors of the Flea Market Findings Enamel Dots looked so lovely with these digital products.


Thank you for reading, and I hope that maybe you feel inspired to create something with digitals this weekend!