Showing posts with label Spencer Alpha stamp set. Show all posts

Saturday, July 16, 2022

3-TO-INSPIRE WITH LORILEI


Hello! Lorilei here with my first design team post! Today I'm bringing you some inspiration using the beautiful new Flea Market Findings v2 kit and the gorgeous Penelope Alphabet Stamp.


Here are my three prompts to inspire you:


1. Use a die-cut or chipboard as a story jump off point.
2. Use a vertical title.
3. Use at a full size photo.


Here is my project using the prompts!

For prompt one, I chose the super cute coffee chipboard circle as the jumping off point for my story. If you don't have a specific photo or story in mind, letting the products in the kit lead the way can be a fun challenge!

Prompt two, always a favourite of mine are full page photos! I used a photo of a great cup of coffee on the left side of the page and my chipboard fit perfectly on the cup and went with the red band!


Prompt three, a vertical title - I used the gorgeous Penelope Alphabet stamp to add my simple title! It adds such great impact! The Penelope stamp is perfect for vertical titles with the wider letters!

I have added another example of using prompt 1 & 2 below! I chose the orange drink chipboard and used the Spencer Alphabet Stamp for the title! Simple and quick!


I hope you choose to use all the prompts or just one! Have a great weekend and happy scrapping!


Thursday, April 2, 2020

Add-on kit inspiration with Nathalie


Hi there,
Nathalie with you today in time to share some inspiration using the April 2020 Scrapbooking Add-on kit.   I love the colors and designs of the kit just perfect for the changing season, and all the daily stories i so much cherish.   Let me show you what i have created:


My kids are growing so fast, and i am slowly seeing how they are changing into adults, so i chose a more mature palette of colors to document a recent picture of my daughter.


Since the colors in the picture are very neutral, i chose to bring the yellow plaid paper strip as the anchor piece for this page,  Then cut a few more strips of paper from the  add on kit, and layered them together.


Before gluing the paper layers to the page, i used my typewriter to add my lines of journal at the bottom left of the page.   Once the papers were in place, i pulled the Spencer Alpha stamp set (outline) and stamped the title using light gray ink, then hand stitched around the stamped images, even overlapping the paper layers.


I added a simple layer of ripped vellum between the picture and the paper layers, then added just a few embellishments around.  You can find the Magical Forest Sticker sheet and Pink Paislee's 5th & Monaco sticker sheet in the shop.


To finish the page, i added a bit more of stitching to the top of the picture and then added more stickers and stamped sentiments - Traveler's Notebook stamp set-  around the layers of the page.  A few drops of copper ink complete the page.


I hope this inspires you to check the new April Scrapbooking add-on kit to your box.  Remember you can check most of  the materials used in this page  in the CTK shop.  I cannot wait to see what you create with the kits!

Stay safe friends!


Tuesday, January 22, 2019

Everyday Documenting with Nathalie

Hi there!

Nathalie with you today with a new new pages using the beautiful Fresh Starts kit and the Life Crafted album.   Are you loving  the new album?!  Honestly, what is not to love about it, i mean it is versatile, compact and a time saver.  So today, i want to give  you a few quick ideas on how to use the kit and the album when documenting every day details.


I love large titles, so I took advantage of the 3x8 card that is included in the Fresh Starts kit to build this simple page about my daughter's 16th birthday picture.


I tool advantage of this month's TN stamp and This is Life stamp to build upon the title.  Since this is  all about my wishes for her, what better way than to add  a few flying wishes - dandelion seeds- to the background.


To keep the clean look of the page, i added my journal to a tag that is hidden behind the picture in a vellum pocket.  A few of the stickers from the kit complete this page.


Love how this turned out, and how fast it is to put together!, but since i am all about everyday documenting in this new format, i went ahead and added a new entry on the following page, this time is all about my son's new haircut (FINALLY!)


Once again i went for a simple but striking look for this page.   I reached for the Spencer Alpha and Outline stamps for this page, as i wanted to create a bold title for the page.


I decided to trim the picture into a circle so that it becomes the focus of the page.    Next it was all about using the large alpha stamps to create the title around the picture.  First i stamped the top word using the bold alpha, and then used the outline alpha to create the next word by stamping them on one of the patterned papers and fussy cutting them.


The beauty of CTK stamps is how flexible they are! so, i used a few sentiments from the add on and TN stamps to complete the circle around picture. Then i added a few extra stickers using foam adhesive -LOVE LOVE LOVE being able to add dimension in this new format-


I love how simple these entries are, and how easy they come together in the Life Crafted album, the following video will give you a more in-depth look on how they came together:


Remember to stop by Citrus Twist Kits to check the kits and the album, soon you will see the new kit (gorgeous one , btw!).  As always if you have questions on how these came together, leave me a comment.

XO


Tuesday, December 25, 2018

Tuesday Tutorial!


Hello and Merry Christmas!  I'm hoping you have had a delightful day so far and your family is healthy and happy.  Once the festivities are over, you might want to get crafty - maybe ink up some stamps and that is what I'm thinking that I'll be doing!  I have a fun and super simple tutorial for you today that I think can really help you personalize all of your projects.

The left hand side was kept super simple in order to let the stamping be the highlight.  I used a few bits and pieces from the Pleasant Valley Pocket Life Kit and it was the perfect way to put it all together!


I love stamping.  It's so much fun.  And it's also so easy to personalize your projects.  I mean, where else am I going to find something that says CAL over and over again?  Right here with the Spencer Solid Stamp Set and the Spencer Outline Stamp Set I was able to create exactly what I wanted by repeatedly stamping CAL over and over again.


Before you start, there's a couple of things to consider.  What colors will you use? I wanted to use a golden yellow and navy blue -- the colors of Cal [University of California - Berkley].  I also knew that I DID NOT want the stamping to line up perfectly.  I wanted it to be slightly and somewhat offset -- all of the letters being a little bit different.  Believe it or not, that is how I like this type of stamping best.  And these Spencer alphas are PERFECT with this!


I also wanted to make sure that each line didn't start the same way as the one before it.  So, I had to make sure to keep track of what I had started with on the line previous. I didn't want it to be too contrived or neat - I wanted to keep it casual and random.

Try stamping out your own designs!  Either use them to replace patterned paper or a large cluster of embellishments -- whatever your project calls for!


Friday, December 14, 2018

Traveller's Notebook Challenge with Nathalie


Hi there!

It is my first time creating a challenge in one of my favorite memory documenting formats, Traveler's Notebooks.  It is no secret, I  love TNs, and keep a daily visual journal of my everyday life, plus a few other side projects -all in TN formats-.   I love the format as it allows me to combine the graphic look of a scrapbook page, and the journal look of my dairies.


By now, some of you are receiving the Pleasant Valley Kits (aren't they gorgeous?!!!), well this month two new sets of stamps were also added to the store,  Spencer Alphabet and Spencer Alphabet outline.    I love the large font and clear look of the alphas, so i decided to used them to document some every day memories in my personal journal.


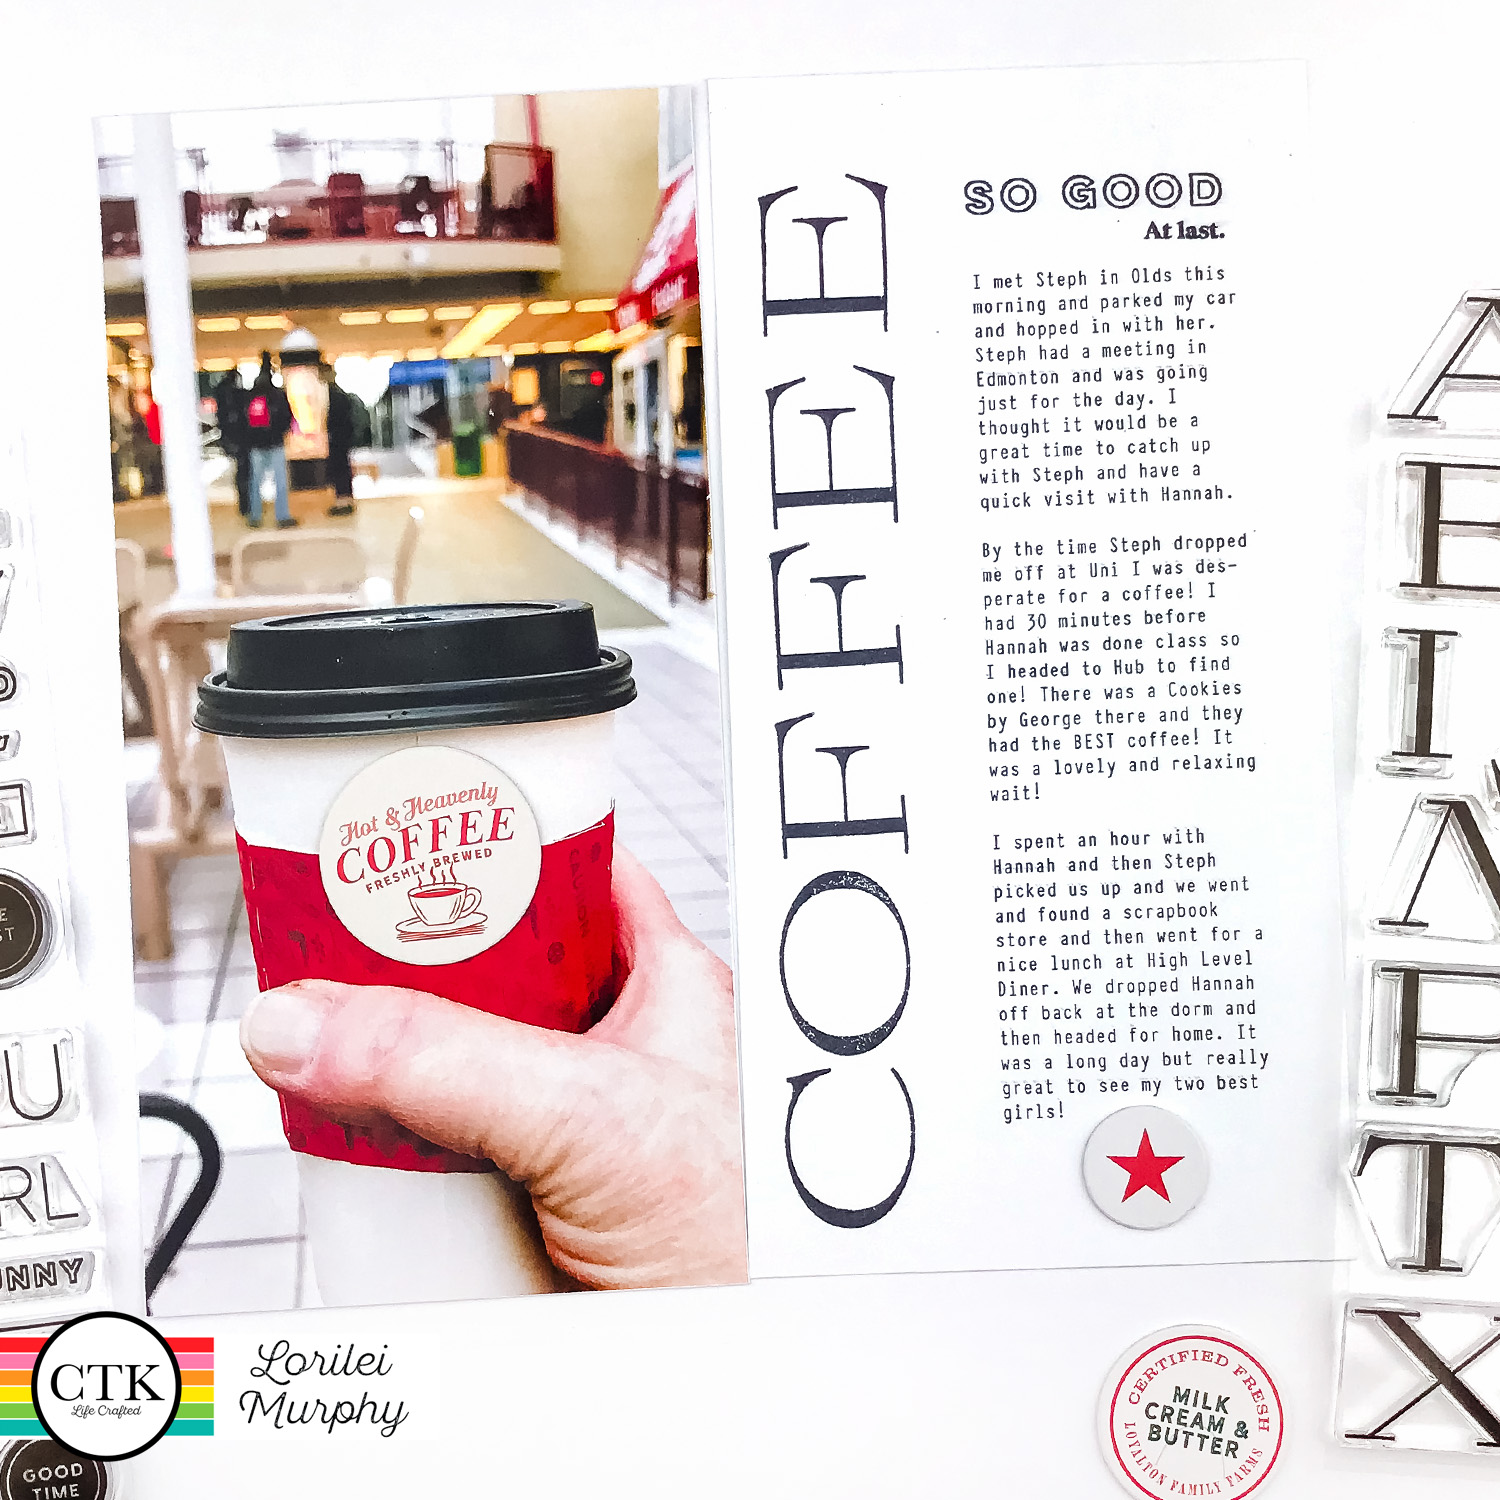
For the first entry, i decided first on a color combination that will make everything pop.   Then i used the Spencer Alpha stamp set to create the large title of this layout. 


The impact of the title makes it one of the focus of the page, so i made sure that it told the story of the picture. 


Love the colors in this month's Pleasant Valley PL kit, so it was easy to stay in the same color combo when adding the clusters around the picture. To finish this page, i added a few more stamping sentiments using the TN stamp set.    Any clues on what the challenge is, yet? Let me give you another hint.


For this page, I chose to tell the story by using the Spencer Alpha Outline Stamp set to create a large title. 


To bring life into the page, stamped the title on different papers from the Pleasant Valley Scrapbook Kit, and then fussy cut around them, the font is so clean and crisp that it took no time to get this done.


The letters were then glued to form the large title, and this time i added stamped sentiments using this month's add-on stamp set.


How lucky  was i to find a few sunglassed  in the puffy stickers from the Goldenrot collection, included in this month's embellishment kit, they complete my title.  Since the story is told in the title, i just used one of the labels, from the Emerson collection stickers included in the main kit, and used it to hide the rest of the journal in a pocket behind the picture.


By now you have guessed this week's challenge:  CREATE A LARGE TITLE.  Use stamps, alphas, paper or the Spencer Alpha stamp sets to create titles that will tell the story of your page and create lots of impact on your pages.   Trust me it, once you build the title, 80% of your page is done.  So you will be able to produce them in no time!

Remember to share with us what you create with this challenge either on social media using @citrustwistkits or #citrustwistkits or on CTK friends page on Facebook.  I cannot wait how you interprete the challenge.

XO