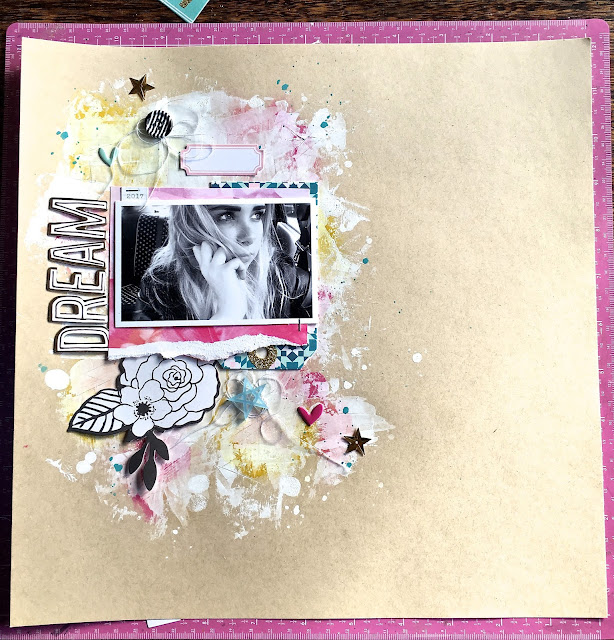
Hi everyone, Gina here to share with you a step-by-step for creating a mixed media background. This is a favourite process to use when creating my layouts. You can also use this technique on white card stock or patterned papers but I love the chalky contrast of the white gesso against kraft card stock
To start, I've chosen a small b+w photo and a few possible embellishments and ephemera pieces from the gorgeous Photo Booth main kit
Lightly pencil in the position for your photo and, using a flexible plastic card or palette knife, scrape thin layers of gesso onto the card stock, working in different directions. I prefer do multiple thin layers and add in a few thicker patches, cutting lines into them, with the edge of the card or knife to add lines for texture
Once the gesso is dry (usually only takes about 5 minutes) start adding some colour with distress stains or a similar product. I've used 3 colours here; a gold and two different pinks and I usually blend them around with my fingers a bit
Applying the stain slightly outside the gesso will result in a more intense colour directly on the card stock. Wipe off excess stain with paper towel, or if you prefer the colour brighter leave as is
I also added some random white splotches with a paint pen
I also added some random white splotches with a paint pen
Add a few watercolour splatters in a contrasting colour
Frame the photo with a piece of patterned paper and tag. A torn edge to the paper is an easy way to add contrast and texture.
Position embellishments, ephemera and title roughly where you want them. I've add some cotton thread under the button and star

Now it's time to stick everything down. I changed the journal tag to a different colour and stamped a phrase onto it
A good quality black felt tip pen is an easy way to add some 'controlled' splatters to your page
Here is the final result (with a couple of graphite scribbles and more stamping under the b+w flowers)
Gina
SaveSave
SaveSave


No comments:
Post a Comment