Here's a photo of my layout for today:
I took this week's 3-to-Inspire a bit literally and used elements in groups of 3 in my layout. You'll see what I mean in the next few photos. ;)
This layout consists of 3 pages:
1) "The Ultimate Donut SHOWDOWN!"
I decided to stamp my title using the
Harper Alphabet Stamp Set because I needed a lot of letters for this one, and I didn't want to use up all of my precious puffy alphabet stickers on one page! Beneath my title, I placed
three 3x4 things: 2 journaling cards and 1 photo layered on top of one another. Then, I embellished the cluster with
three embellishments (two chipboard stickers and a puffy sticker). I finished off the bottom of my page with some journaling about our hunt for the best donuts in Portland!
2) Polaroid Cut File Insert
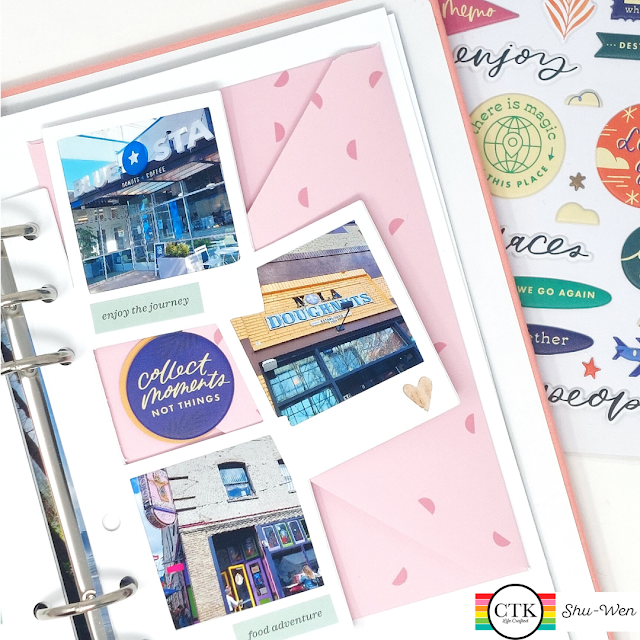
For the second "page" of my layout, I cut out the Polaroid / Instax cut file from this month's release twice. Then, I backed the front side with three photos, one for each of the main donut places we visited on our trip. Next, I backed the back side with three more photos, these ones taken of the donut displays in each of the main donut places we visited. For embellishments, I backed the heart cut-out in the middle frame with some woodgrain patterned paper from the kit, and decorated the front and back sides with a total of three tiny word stickers.
Here's a photo of the back side of the cut file page:
3) "... and the winner is..."
I printed one of the digital TN papers as a full sized 8.5x11" piece of paper, then used that pattern to make an envelope sized perfectly for some 4x6 cards. I mounted this envelope towards the top part of my third page and stamped my finishing title on the bottom of the page, again using the Harper Alphabet Stamp Set. Inside the envelope, I tucked in three bits of ephemera that we collected on our donut tour, three photos from my favorite donut place this trip, and three journaling cards documenting our donut adventures. To hold the envelope shut, I placed a thin magnet on the body of the envelope, covering it up with one of the ephemera pieces from the kit, and another thin magnet on the flap of the envelope, covering that one up with one of the puffy stickers (I made sure to use my anti-static powder tool to "unstick" any parts of the puffy sticker that were hanging over the edge of my envelope flap).
And here's a photo of the inserts in the envelope:
So that's 8 sets of threes in total! ^_^
I'll be sharing a quick Reel of how this layout came together on my Instagram page today, so make sure to check that out! If you'd like to create a layout featuring lots of sets of
threes, be sure to tag me over on Instagram
@ChouxPuffCreations so that I can see what you've created, and make sure to share your layouts over on the
Citrus Twist Kits Facebook Page as well! Thanks for stopping by!




%20-April.jpg)








.jpg)


.png)
%20-april.JPG)


