Sunday, September 21, 2014

Sunday Sketch with our Guest Designer Elena

Hi everyone. It's Elena with a sketch and a layout.


I usually use one picture on my layouts but the truth is that narrating a story through a layout is easier if we use two or more photos. And I had those two photos of my daughter playing with her "friends " in bed which were perfect.
I liked the sketch very much and that's why I decided to follow it from the beginning to the end. Two photos with title above and the journaling on the right.
I intended to trim the white space of the photo paper but decided not to, because I  like adding embellishments on my photos but those two were rather small. So I scattered the cork stars-one of my favorite elements of the kit- at the bottom.

Then I added the title  and I loved how the letters and the stars framed the two colorful photos in the middle.
Then there was the journaling. I don't journal often on my pages and this time I didn't have an important story to tell ,except for a cute, happy moment to capture
So instead of writing something I used the CT sets of stamps, the SC Brighton Pier tiny word stickers(pink and gold is one of my favorite color combos these days) and the wood chip arrows describe the feelings. And they did a great job!

To play along this week and for a chance to win $5 to spend at the CTK Store, upload your projects based off of this week's sketch to the CTK Gallery.  You have until September 13th and please include "Sketch 9/7" in the description.

Saturday, September 20, 2014

How to Photograph your Layouts with Jen Chapin

jenchapin sept photog post (7)
Hi there! Jen Chapin here and today I am going to share a photography post with you. One of the most common questions I get is, "how do you photograph your scrapbook pages?" I'm going to walk you through my process.

You will want to find an area in your home that has nice indirect light. I prefer to photograph my layouts during the daytime as natural light shows colors best and whites at their whitest. For me, this is in my front foyer. I choose a time of day when the light isn't shining directly in the door and place my layout on a white canvas. I stand over the layout and photograph straight down.

For those of you using a DSLR, my settings for this photo were as follows: f4.5, 1/100, ISO 160. I prefer to use my 17-55 2.8 lens as I can zoom in and out, but a fixed 35 or 50mm lens works as well. The key here is not lowering your aperture too far. If you use a lower f-stop, your layout may be in focus in the middle and blurry around the edges. Also try to use a shutter speed fast enough to compensate for camera shake, unless you are going to use a tripod. If you have good light, an ISO of 160-200 is adequate. Remember, the higher you set your ISO, the more grain you will have so try to keep it in the lower range.

Stand straight above the layout and shoot. I take about 5-6 photos so I know that I will have at least one good shot!

Here is the image straight out of the camera. As you can see, it is a little dark, but the main thing I am going for here is that the image is straight and the details are sharp. We will fix the lighting when we edit.

After opening my layout in Photoshop (I am currently using PSE10), I use the crop tool to crop out the white background. You can also take this opportunity to straighten the layout if needed.

Next I adjust the levels. Push CTRL+L and the levels box will pop up. Move the sliders until the desired level of lightness is achieved. You can also click on the little droppers and click on the corresponding color in your photo to correct the color. For example, if  I wanted to correct the white balance, I would click on the white dropper then click on the whitest part of my page.

I also use RadLab, which is a plug-in that can be used with Photoshop and Lightroom. I then open the layout here and add a few filters to sharpen, increase the saturation and the lighting.

And here is the finished layout. What a difference, right?

jenchapin sept photog post (6) I also like to take a few detail shots. For these I get down right next to the layout and shoot a few pictures with a lower aperture, typically f2.8. I like to do this so you can see the dimension in the embellishments that I've used.

jenchapin sept photog post (5)
Stitching always shows up beautifully too.

jenchapin sept photog post (4)
Thanks so much for stopping by today! I hope you have a little more confidence now in taking great pictures of your layouts. If you have any questions, leave them in the comments. Have a great day.

Friday, September 19, 2014

Pocket Life with April

Happy Friday, CTKers!  This month we got a glimpse of the new Pocket Life kit packaging and I've got to say, I loooove it!  The muslin bag was perfect in holding this month's kit while I was still working with it and it made it so easy to carry my supplies around the house (since I don't have a dedicated workspace).

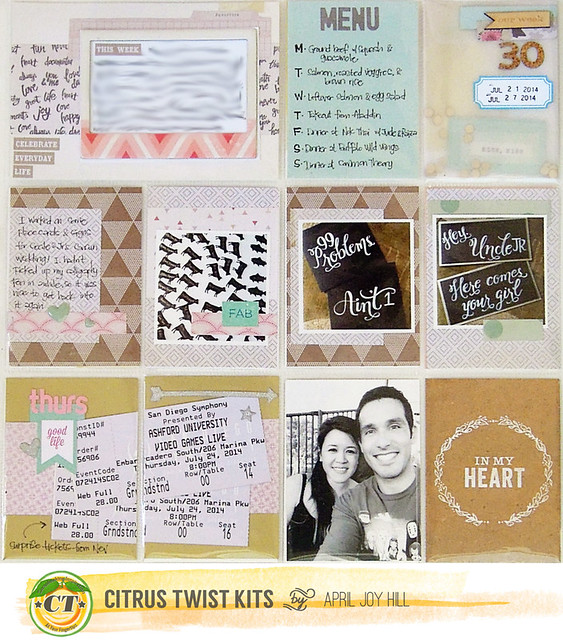
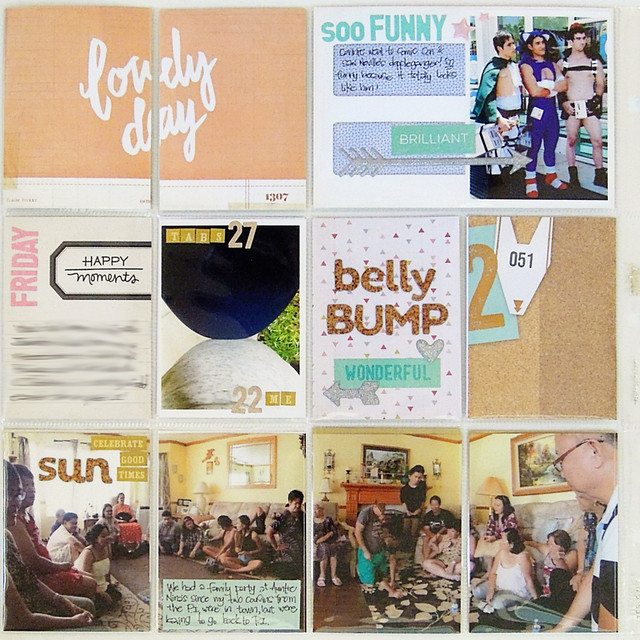
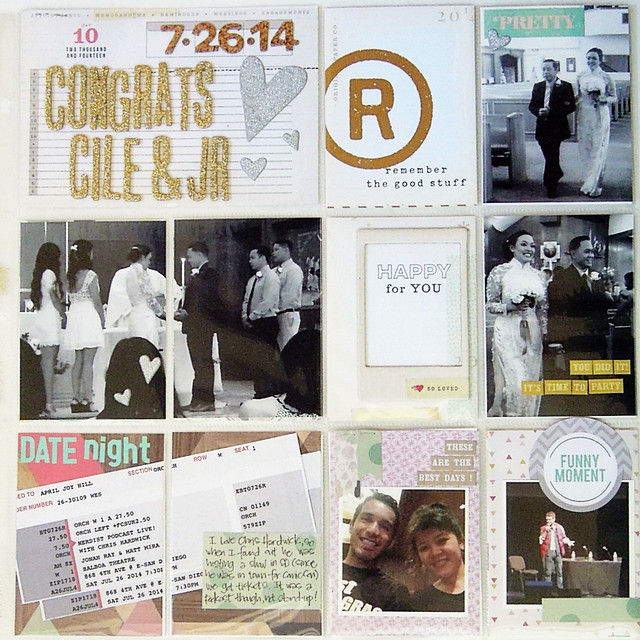
Anyway, I'm here to share my Pocket Life Week 30!  This was a busy week for me, so this ended up being a three page spread.

The first of three pages:

DSCN4898_800_CTK

The vellum envelope filled with gold sequins that came in the PL Embellie kit was perfect, so I used it as my weekly title card with the wood veneer from this month's kits plus an alpha from my stash.

DSCN4899_800

The second and third pages:

DSCN4903_800_CTK

Left side:

DSCN4905_800

I only use a Canon Selphy to print photos, so the biggest photos I can print are ~6x4, but I wanted to incorporate this panoramic photo of my family.  To do this, I took my photo and edited it so that it printed one side to 4x6 and then the other side of the photo to a second 4x6.

DSCN4908_800

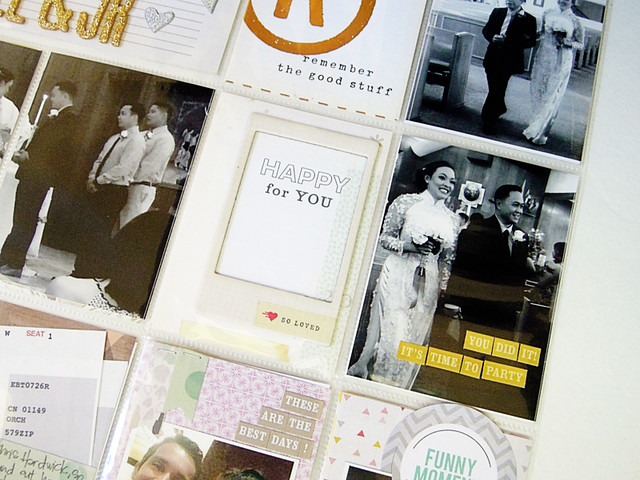
Right side:  I used the glitter alphas from the Aug Main Kit to help document my friend's wedding.

DSCN4907_800

DSCN4911_800

I tried something different with how I photographed my spreads this month.  I usually take all the cards out of the pockets when I take my photos and then put them back in, but it was just sooo time consuming.  I tried Stephanie Bryan's trick on photographing her spreads upside down to avoid a glare and I'm pretty pleased with the results.  What do you think?

Oh, and of course, here are your sketches:

Thursday, September 18, 2014

New Subscribers Plus a Referral Bonus: A 10% Discount Just for You

New September Subscriber Special--10% off your purchase! We are celebrating the roll out of our refreshed website, revamped Pocket Life kit and lower shipping rates for our PL-only subscribers. When you subscribe to either a Main or PL subscription during the month of September, or refer someone who subscribes (they need to mention your name in the comments section at checkout when they place their subscription order), we will send you a coupon code for 10% off of a future store or add-on kit purchase. (The 10% discount cannot be applied to your subscription purchase.)

Christmas kits sneaks are coming soon. We are waiting for the last few elements to arrive in our warehouse and boy, are they luscious and fun. Current kit subscribers will get to shop our 2 Christmas Dailies during a 24-hour presale. We have two fabulous kits designed just under $40, packed with holiday goodness: one for Pocket Life and one for scrapbookers or mini album makers.

You can view the September kits here.


Wednesday, September 17, 2014

A View from Our Gallery: Thamar van der Hoef


Welcome to a View from Our Gallery. This week we have a visitor from The Netherlands, Thamar van der Hoef. Thamar made this layout with her first (August) Main kit she received from Citrus Twist Kits.

Each week we tie a challenge into our View from Our Gallery post and we'd love to see what you do with this challenge! Upload your product to our Gallery by September 30th. For each project you upload to our Gallery between August 26th and September 30th, you earn one entry into a drawing for 1 embellishment grab bag (valued at $100).

Here are our September kits. We have a new Main or PL subscription special this month: sign up for your 3 or 6-month subscription and we'll email you a coupon for 10% off a store or add-on kit purchase.

The Challenge

Here is your challenge: Use string or bakers twine on a layout or Pocket Life page. You can stitch with string, loop string like Thamar did or show us how creative you can get with it. We can't wait to see what you do.

Thamar van der Hoef


With the August main kit ( My firtst kit ) “all that glitters” i created this layout about my son and his father ( My boys) during our vacation in France “ Mulhouse “  last month. I chose the title “A HAPPY DAY” because it was very nice weather and the boys had so much fun together. Unfortunately, we had a lot of bad weather on our holiday, but we had a lot of fun as a family and thats what counts.
I would like it if you visit my blog.

Here are two close-ups of  my layout:


Thank you for visiting A View from Our Gallery today.


Tuesday, September 16, 2014

Tuesday tutorial with Nathalie

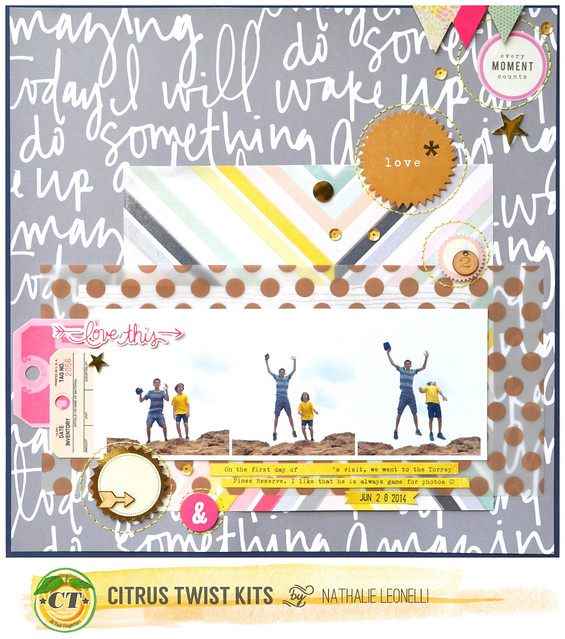
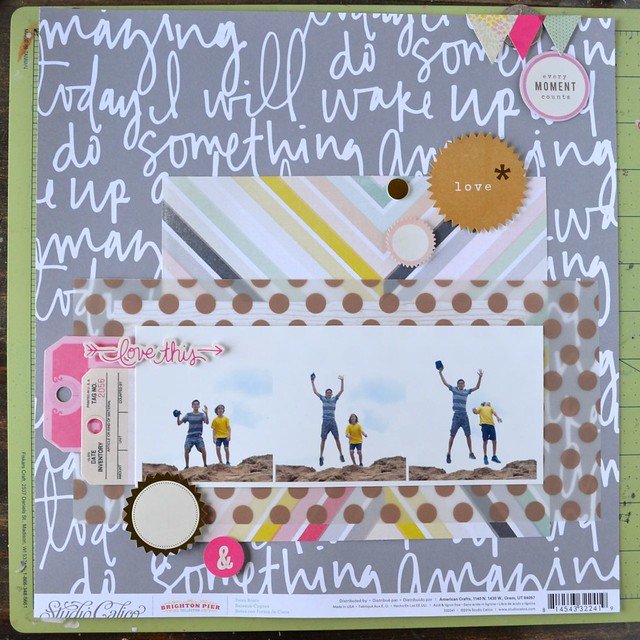
Hi there! I am here today to share one of the pages I created with the September main and embellishment kits as well as a tutorial:

nathalie_everymomentcountswithbanner_CTKsep2014
KITS USED: September 2014 "Free Spirit" main kit and "Spread your wings' embellishment kit
NON-KIT ITEMS: yellow paper from a previous kit, navy card stock and DMC thread from my stash

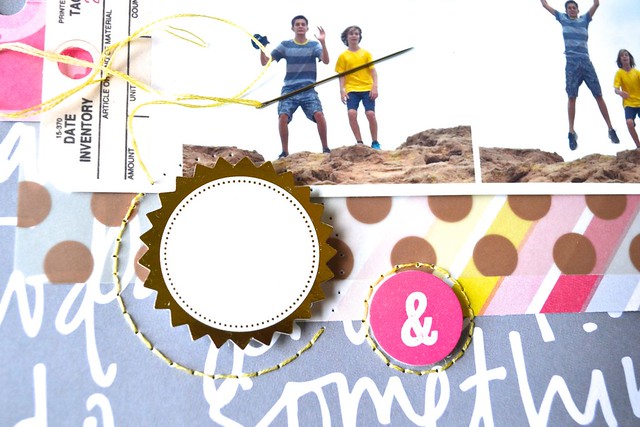
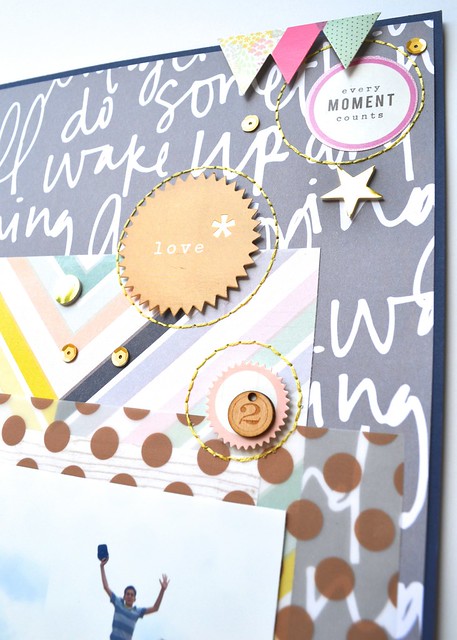
I will share now my low-tech tutorial for stitching perfect circles around circle embellishments. I loved all the different Crate Paper stickers from the embellishment kit and I spread all the circle ones on the diagonal on my page:
CTKtutorial1

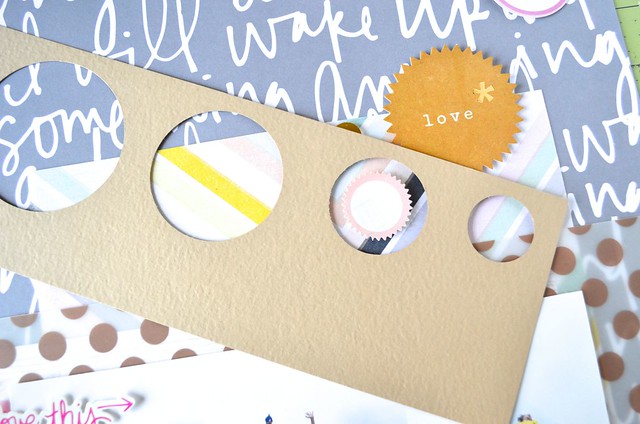
The next step consisted in getting all my circle punches out and punching a scrap of card stock in different sizes:
CTKtutorial3

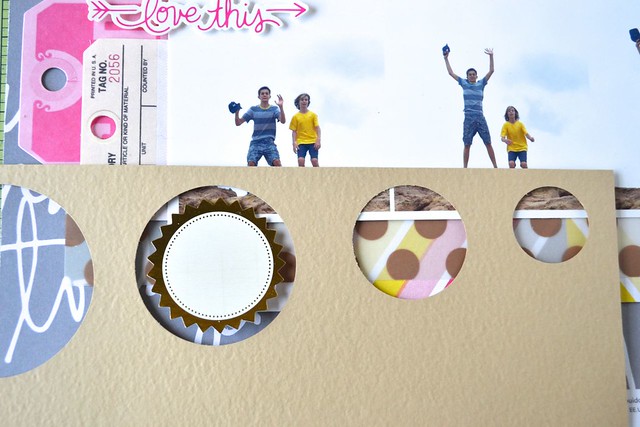
I placed my "template" around each sticker choosing the size I wanted to stitch and then pierced my background as evenly as I could - no need to really stress about it though:
CTKtutorial2

So it looked like this around each sticker:
CTKtutorial4

Using a backstitch, I then stitch with two strands of DMC thread:
CTKtutorial5

And here are close-ups of all the finished circles:
nathalie_everymomentcountscloseup2_CTKsep2014
nathalie_everymomentcountscloseup_CTKsep2014

...and one last look at the finished page:
nathalie_everymomentcountswithbanner_CTKsep2014
I love to stitch on my pages and I hope that this little tutorial will inspire you to get those needles and threads out!

Monday, September 15, 2014

Leftover layout with Christin

Christin here and I am back to show you how I go back to working on my kit layouts after putting everything a side for a while.  For my Kit Love post I showed you how I work with the kits at a crop, but since I hardly ever used a whole patterned paper I always have leftovers and I didn't feel I really killed the kit at the crop so this weekend I decided to use up more of those scraps I had left after making 5-6 layouts with the kits (I bought all kits this month to play with...)

A piece of paper must be really small for me to throw away, they are always good for something. I often tuck small pieces of paper in between here and there or use a border punch on the small pieces. I don't need more than a couple of inch of paper to keep it. Especially my favorite pieces of paper.

When you are working with layers it's a really good idea to mix different sizes of papers to get more layers. Mix the papers with chipboard, doilies (from the add-on kit), tab stickers and also stick some of your embellishments under the paper to add more volume.


CTK christin gronnslett Sept 15th 02
CTK christin gronnslett Sept 15th 03 CTK christin gronnslett Sept 15th 04 I

When I was up with my Kit Love post 1,5 week ago I only showed you how I make my layouts, I never revealed the full layouts, so here they are.  I have mostly used the Main kit and Embellishment kits for the layouts. See how I have mixed the soft colors of the kit with very strong colors in the background. If you do that you have more to work with when it comes to colors.


christin gronnslett CTK Layout 1 September Main Kit 02

Here is the second layout I showed you how I made. I have worked with the same kit, but here I have focused on the blue tones in the kit.


christin gronnslett CTK Layout 2 September Main Kit 03