Showing posts with label Missy Whidden. Show all posts

Monday, April 8, 2019

Welcome our April Guest Designer - Missy Whidden!!


We are so delighted to share our April Guest Designer with you - the amazingly talented, Missy Whidden!  To say we are fans of Missy's gorgeous creations is an understatement and we're thrilled to be able to share on of her layouts on the blog today!

------------------------------------

GET TO KNOW MISSY

Hey there, friends!  I’m Missy Whidden, and I’m from sunny Central Florida, USA.  I’ve lived here all my life, and I’m married to my college sweetheart.  We’ve been married for 19 years now, and we have two beautiful daughters.  Reese is 12 and Paige is 10, and they both have nonverbal autism.  Life around our house is never boring, that’s for sure!  They are the sweetest and funniest kids, and they are very happy.  I used to teach high school English before stepping down to raise our girls.  I’m also a fitness instructor, and I’ve been teaching a variety of classes for 15 years.  When I’m not scrapping, I’m either at the gym, reading or watching Netflix.

I began scrapping back in 2006.  My mother-in-law asked me to help her put together a baby book of my husband’s baby photos.  I was hooked instantly and started scrapping all of our travel photos.  Once Reese arrived, I went crazy scrapping her baby photos.  I haven’t stopped…haha!  I love using mixed media on my layouts.  I love using watercolors, acrylics, gelatos, spray inks…you name it.  I also using cut files and pretty papers.  A few other things I love are stitching and thread.  I tend to stick with 12x12 layouts mostly, and scrapping pool and summer photos are my favorite!

Q & A WITH MISSY

When did you start scrapbooking?

I’ve always been creative, and I used to collect stickers in elementary school.  I had several sticker books, so I guess you could call that scrapbooking.  My very first scrapbook was my senior memories book in high school.  It was so thick it would barely close!  I didn’t realize at the time that it was scrapbooking.  I was just collecting memories, and I had no idea that years later it would become my passion.  I put together a few photo books of my students when I taught high school, but I didn’t get serious about scrapping photos until 2006.

What is something most people would not know about you?

Most people don’t know that I was part of a Super Bowl Half-Time Show.  Back in 2001, I was a JV Cheerleading Coach at the high school I taught at.  There was a call for groups of girls to take part in the show, so somehow our group was chosen.  The game was in Tampa that year, and the performers were NSYNC, Aerosmith, Britney Spears and a few more.  All of the groups of girls were to be the “fans” screaming and cheering for them on the field.  We all got bussed in and had to wait in the stadium tunnels until it was time to run out for the concert.  We jumped and screamed and yelled while they performed.  It was such a fun experience, but we never did see ourselves on TV…haha!

What are the 3 scrapbooking products you can’t live without?

I definitely can’t live without gesso, spray inks and thread!  It’s so hard to only pick three.  I’m a gesso addict because it makes mixed media work so much better!  Spray inks (or any kind of watercolor) are just magic as they spread, flow and blend.  And my beloved thread…ahhhh.  It makes my texture & color loving heart so happy!

What do you love about the new Life Crafted kit?

The Make it a Venti Kit is so cute and versatile.  My favorite things are those super bright patterned papers!  I knew right away I needed to create a rainbow color scheme of some sort.  I also love the tiny white foiled alpha stickers.  You can use them on any type of project!

Finish this sentence "If you could see my scrapbooking space right now . . . "

If you could see my scrapbook space right now, you would be mortified!  It stays in a constant state of chaos.  I scrap in our home’s old formal dining room, and I’m so thankful I have my own space.  However, it’s very brown…haha.  Our house was built in the 50s, and it’s wood.  I have two walls of just windows, which I love.  But the other two walls have doors.  I have pretty much maxed out the remaining space with IKEA shelves and my big desk.  I have papers and things scattered this way and that, and my desk looks like a total disaster 98% of the time.  You would definitely not be inspired by it at the moment…haha!

The only thing that is semi organized at the moment are my rolling carts full of Shimmerz Paints.  I keep them right behind my desk so when I need them I can just turn around and grab what I need.


----------------------------

Here is a layout I made using mostly the April Scrapbooking Add-On Kit mostly.  


I was inspired by the Crate Paper Sunny Days Washi Tapes, so I used those and some of the patterned papers to create circles using different sized punches.  


I used some white gesso & pink spray inks on the patterned paper background first, and then I glued & machine stitched all the circles.  


I added some of the Crate Paper Ephemera as layers behind my photo and added some tangled thread.  


I mixed and matched my title using a Crate Paper word sticker & some letters I fussy cut from patterned paper.  


I tucked those letters behind the photo so they would peek out at the top.  I finished things off with a few cute Citrus Twist stamps!


---------------------------------

You can see more of Missy's amazing work on Instagram or her YouTube channel!


Tuesday, April 5, 2016

Tuesday Tutorial with Missy

Hey, friends!  Missy here, and today I'm sharing a fun tutorial with you using the April Main "Santorini" Kit.  If you're like me, sometimes you have a lot of left over die cut pieces or ephemera that you didn't wind up using on your layouts.  Or there might be some pieces in the package that you don't know how to use or just may not fit your style.  Fear not!  Here is a great way to use them all up no matter what they look like.

I took all the Basic Grey die cuts and vellum pieces that I knew would be hard for me to work with.  I glued them all down on a sheet of white cardstock.  I love getting messy, so I went over the whole thing with some white gesso and let it dry.  Then I added some gelatos and ink sprays to create a watercolor effect over all the die cuts.  Once that was dry, I used a few different sized circle punches to create all these fun circles.  (My process video down below will show how I did this step-by-step.)


Once I adhered all those circles on another sheet of cardstock, I machine stitched through each one and then began placing my photo where I wanted it.  I embellished around it using bits and pieces from the kit.  I used the cute yellow Pinkfresh Studio alpha stickers and combined them with a Cameo die cut for my title.  That blue paper is a Citrus Twist exclusive.


Here you can see one of the circles closer.  I love that some of the die cuts curled up when they got wet and gave it some dimension.  I fussy cut those cute arrows from the Amy Tangerine paper.


You would never really know that these die cuts were about sewing and creating...now they are just bursts of fun color and they give a great abstract look.  I added some of the Amy Tan rubber leaves here under this Basic Grey flower and some tangled thread from my stash.


One more close-up of the circles...I hope you give this idea a try.  It's really fun and easy, and it's hard to mess up!


Here's my process video showing you the entire process.  I hope you enjoy and are inspired!


Thanks for stopping by, and have a great day!

Missy Whidden

Saturday, February 27, 2016

3 to Inspire with Missy


Hey, friends!  Missy here to share this week's "3 to Inspire" Challenge :)

You are welcome to create a layout or a PL spread, but you must include all 3 prompts on your project.   Here is what you need to use on your project:

1.  Use paint, ink or mist (as much or as little as you'd like...I used watercolor and Color Shine).
2.  Use hand stitching or machine stitching.
3.  Use something fussy cut from patterned paper.

Here is what I created using the 2016 February "Stories" Main Kit.  I mainly used pieces from the Maggie Holmes Bloom cut apart sheet and created a grid design.  I used watercolors on the background and added a large die cut butterfly.  I used lots of bits & pieces from the Pink Paislee collection, and I fussy cut those cute hearts from the Studio Calico paper.


I love these fun tab pieces from Pink Paislee!  They are perfect for layering and adding details to your layout.  This fun doilie gives such a feminine look to a page.  I used a blue colored gelato here to add a hint of blue to this side of the layout.  I also used my sewing machine here with some shiny gold thread.


I machine stitched through this black piece here, and I used one of those fussy cut hearts here.  I added even more gold thread just because I love it!  This fun cork piece was the perfect touch to add on top of the cute frame.


Hello adorable puffy stickers!  I am in love with this cluster...Pink Paislee knocked it out of the park with these gorgeous stickers!


I have a process video for you if you'd like to see how I created this layout...I hope you enjoy it!


Now it's your turn!  Use the 3 prompts to create your own project, share it with us here in the gallery, and you will be eligible to win a small prize from the CTK Store.  Make sure to include the date of the challenge in the title of your gallery submission.  I can't wait to see what you create!

Thanks for stopping by, and happy scrappin'!

Missy :)

Monday, February 8, 2016

Love Love Love Layout with Missy

Hey there, Citrus Twist friends!  Missy here with you, and today I'm sharing my first layout using the February Main "Stories" Kit.  It is so beautiful, and it's full of pretty pinks, yellows, teals and lots of floral elements.  I've had this photo ready to scrap for quite some time, but the papers were never right.  This kit is perfect...it has just the right colors and elements.  I knew right away I had to get it scrapped!

I used a few cut apart pieces from one of the Maggie Holmes Bloom papers and paired it with some of the Pink Paislee ephemera pieces and stickers.  I did a bit of mixed media work on the background and used a flower stamp from my stash to create a few subtle hearts on some vellum.


I love how this cluster turned out.  I fussy cut the YOU banner from the cut-apart printable exclusive sheet and machine stitched it down.  I fussy cut that tea cup of flowers and layered it with the Pink Paislee ampersand.  The yellow tab and green label are from the exclusive printable as well.


I just adore these Thickers!  There are so many...including two different sizes of upper case letters.  I mixed and matched here to spell my daughter's name.


I used a flower stamp, ink and vellum from my stash to create a few subtle flowers for layering here, and I also added in some tangled thread.  I love how the pretty light blue contrasts with the pinks, yellows and greens in the papers and my photo.


I love that the Pink Paislee ephemera pack contains die cuts and acetate pieces.  I paired this piece here with one of the puffy stickers.  I also added in one of the white exclusive doilies as a layering piece.


Here's a look at my process video if you'd like to see how I put this page together from start to finish.  I hope you find some inspiration!


Thanks so much for stopping by, and have a great day!

Missy :)

Sunday, January 17, 2016

Sunday Sketch with Missy Whidden

Hey there, Citrus Twist fans!  Missy here with you today, and I'm so excited to bring you this week's Sunday Sketch.  It's an awesome sketch, and this month's kits are just perfect to use for it.  I love the square photo, the layering, and those fun corner pieces.  Sketches are such a fun jumping off point to get your scrappy juices flowing!


Here is what I created based on this sketch.  I stayed pretty true to it.  I started with one of the Seven Paper sheets for my background.  I added a bit of white gesso and then some bright blue acrylic paint.  I used my Silhouette Cameo to cut some messy rectangular frames out of the Basic Grey paper and built my layers on top of that.  I used a lot of the Maggie Holmes papers for this as well as the fun printable cut-apart sheet.


I love all of these bright colors together!  I love layering bits and pieces around my photo.  I used one of the fun flair buttons, one of the Heidi Swapp scripty puffy stickers, one of the sentiments from the branding strip of the exclusive CTK papers, exclusive wood veneer...so many little details!  I used a foam brush to apply the acrylic paint.  I wanted a messy brush stroke effect.


I added some cord to the cut-apart tag here and layered it behind the photo.  I also added in some pink tangled thread behind the flair button.  That is a great way to add a pop of color and some fun texture to your page.


I fussy cut more pieces here and did lots of machine stitching.  I also used some of the exclusive CTK stamps on my layout.  They are super fun and can be used in so many ways!


Here's my process video if you'd like to see how this layout came together.  Thanks for watching!


Okie dokie...that is my layout!  I hope it has inspired you in some way.  I hope you use it to create something amazing!  If you do use the sketch, make sure you upload it to the Citrus Twist Gallery by next Saturday to be eligible for a $5 coupon to the store!  Be sure to add "1/17" to the title line so we know what sketch you're using.  I can't wait to see what everyone makes!

Have a fabulous day!

Missy :) 

Monday, January 4, 2016

January Kit Love with Missy

Hey there!  Missy here with my very first post as a Design Team Member!  I'm so excited to be here and working with these beautiful kits!  Today I'm sharing a video sharing all the awesome goodies in the January Main "Verona" Kit and the Sprinkles Kit.  I'm also sharing my first layout I created using just the Main Kit.

Here is what is included in the Main Kit and the Sprinkles Kit.  You can also see the layout I created at the end of the video.


Here is a layout I created using only the Main Kit.  I love adding paints and gelatos to my projects, and I used some aqua acrylic paints and a few shades of aqua gelatos to create a fun background.  I used a palette knife to smudge the acrylic paint on and then used a water brush to color on the gelatos.  I did use a bit of white gesso first to create a layer for the paint.

I love the fun summer colors of these papers, and I used a few different sized circle punches to create the circles.  My favorite part of this layout is the fun wood veneer "adventure."


I punched this piece from the Maggie Holmes cut apart sheet and then machine stitched through it.  I used some yellow paint to color that little wood veneer heart.  That is part of the exclusive wood veneer package this month.


Here's another exclusive wood veneer.  I used some pink paint and a pink gelato to give it some color.  You can really see the texture created here from the gesso.  It also serves as a whitening agent and acts as a barrier.  The blue gelato stayed true to its color against the yellow paper because of the gesso.


This piece here is from the exclusive cut apart sheet this month.  The colors are so pretty, and they matched perfectly with my summer page.  I added in some yellow thread from my stash.


This gorgeous sherbet colored paper is a Citrus Twist exclusive this month, and it's gorgeous.  I added a stamped sentiment here (also an CTK exclusive), some machine stitching and a Heidi Swapp puffy arrow sticker.  That cute yellow and white label is from the cut apart sheet.


Finally, here is a look at the Heidi Swapp wood veneer.  I used gelatos, acrylic paint and watercolors to give it this look.  I just love how it turned out!  I paired it with some of the Studio Calico Seven Paper puffy alpha stickers and one of the cut apart sentiments.  Altering wood veneer is so fun!


I hope this inspires you create something fun and unique with your January Kits!  I can't wait to see what you all come up with!

Have a great day!

Missy

Tuesday, July 14, 2015

Tuesday Tutorial

Happy Tuesday everyone! Missy here with you today and I am going to be sharing my process for creating a new layout featuring the July Main Kit.

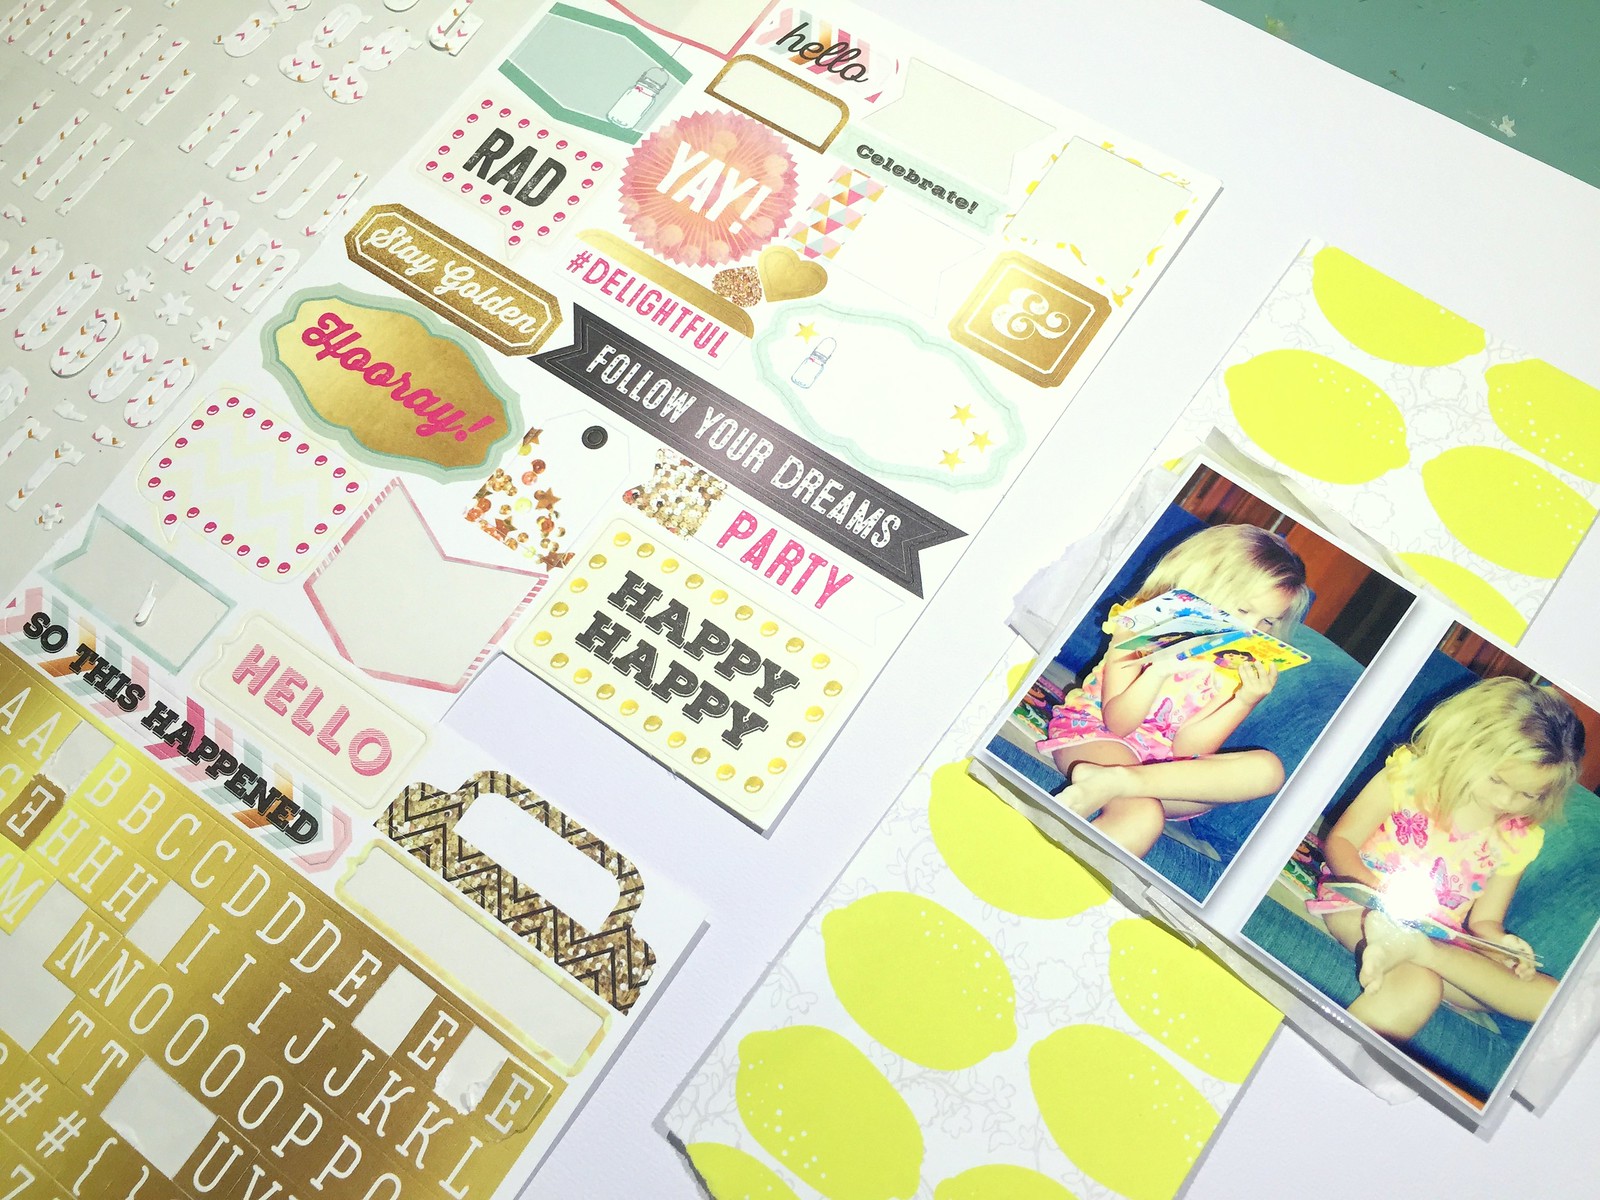
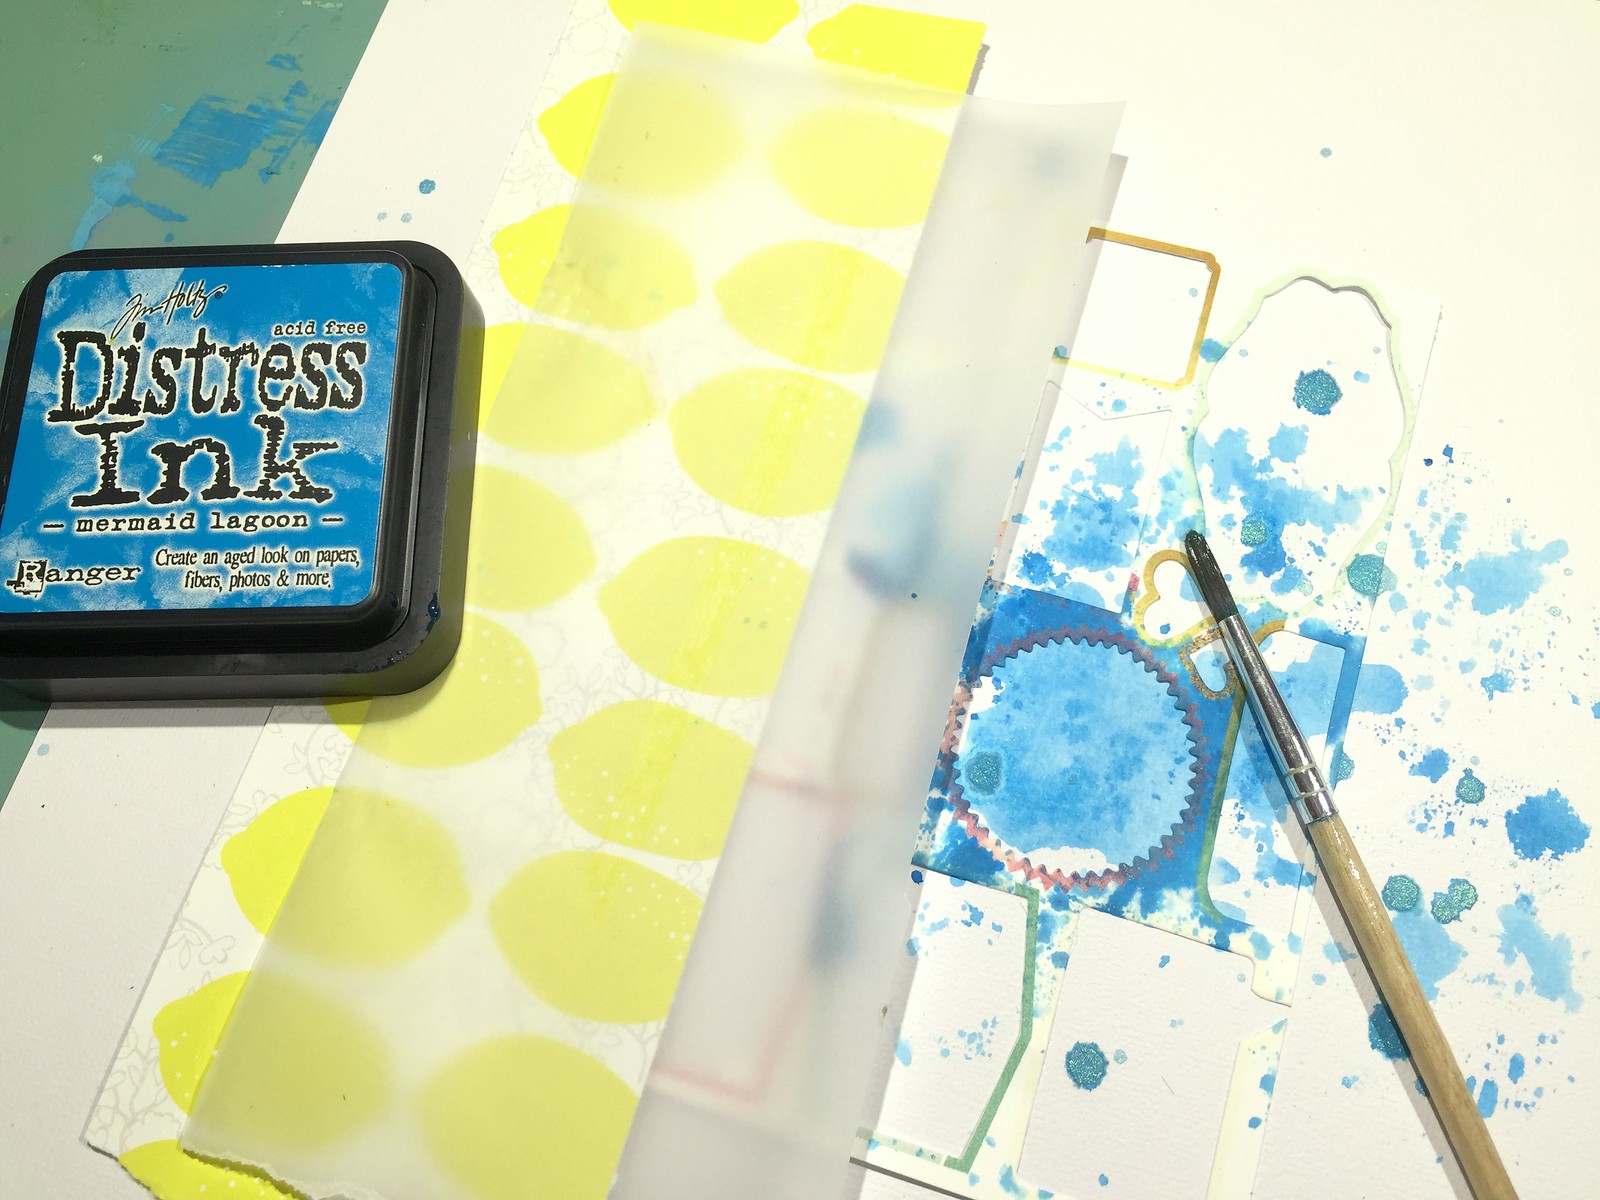
When putting this layout together, I really wanted us the backing of the Webster's Pages sticker sheet as part of my design. I really liked the different shapes created by the stickers.

Untitled

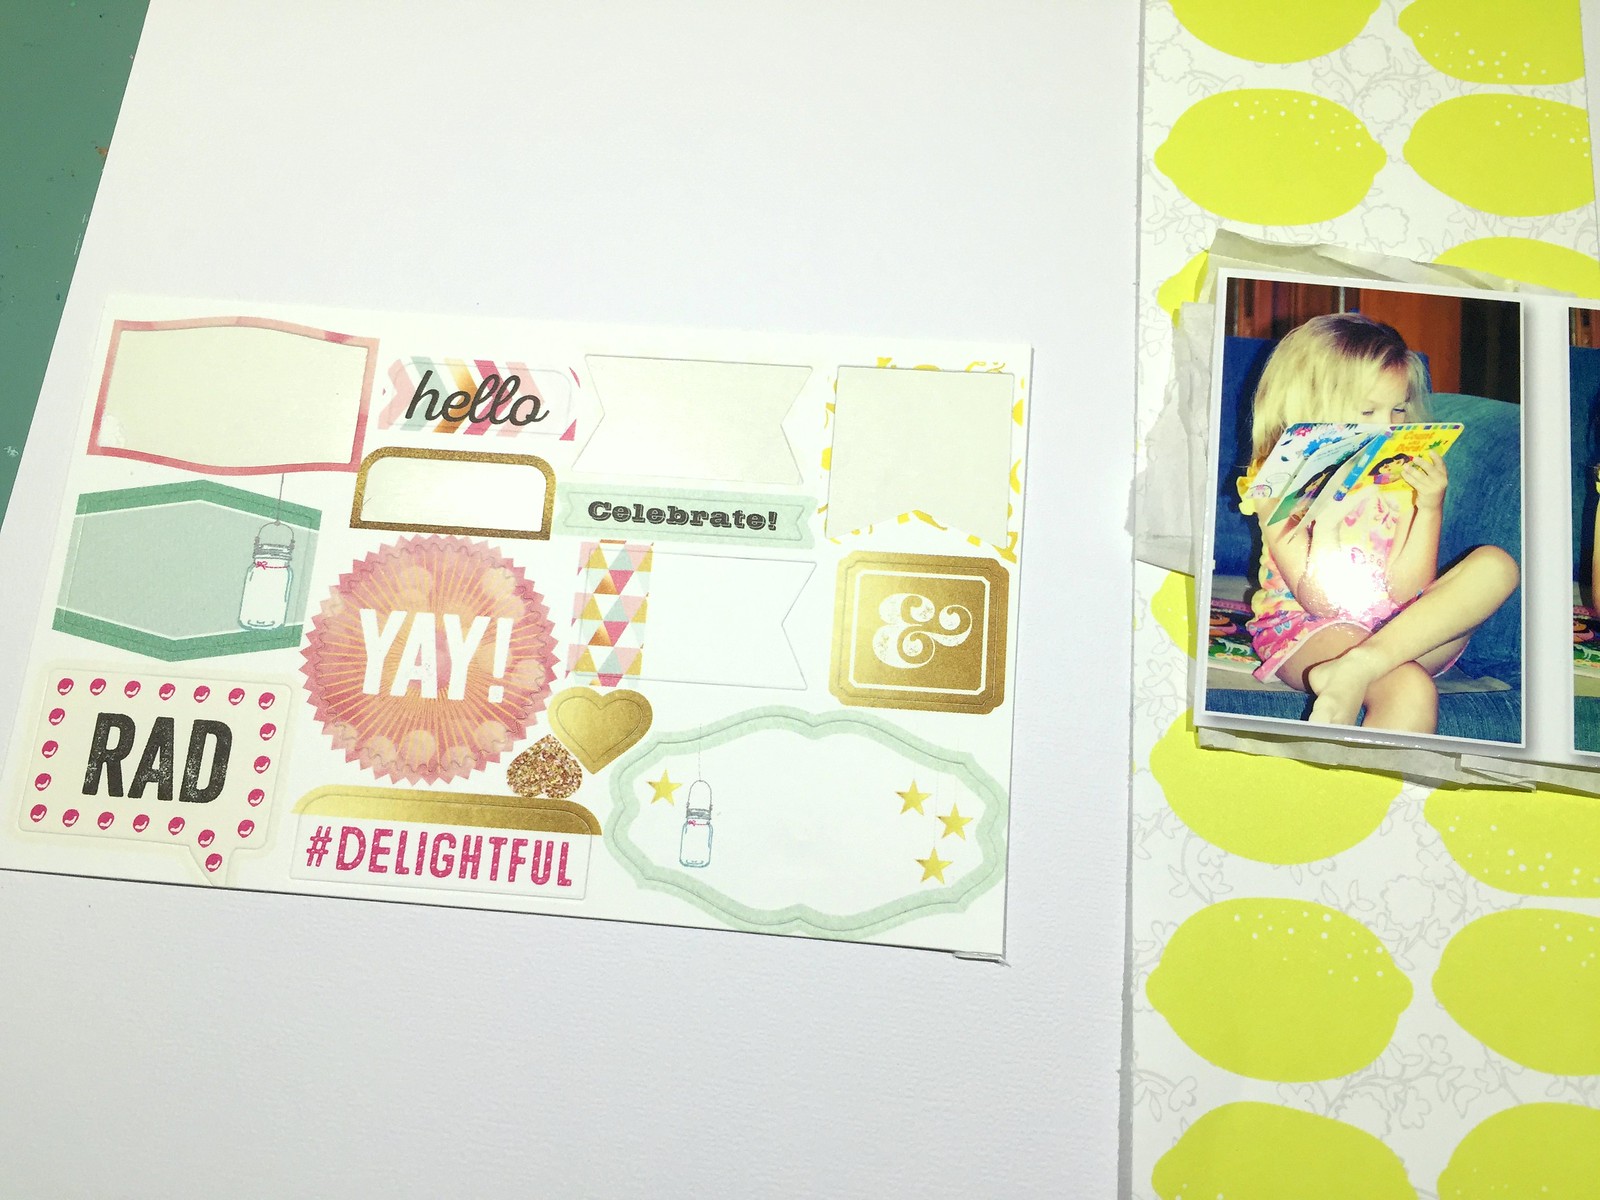
I didn't want to use the entire sheet, so I cut the part I wanted out of the larger sticker sheet. This is a good size for me to layer under my photo and patterned papers.


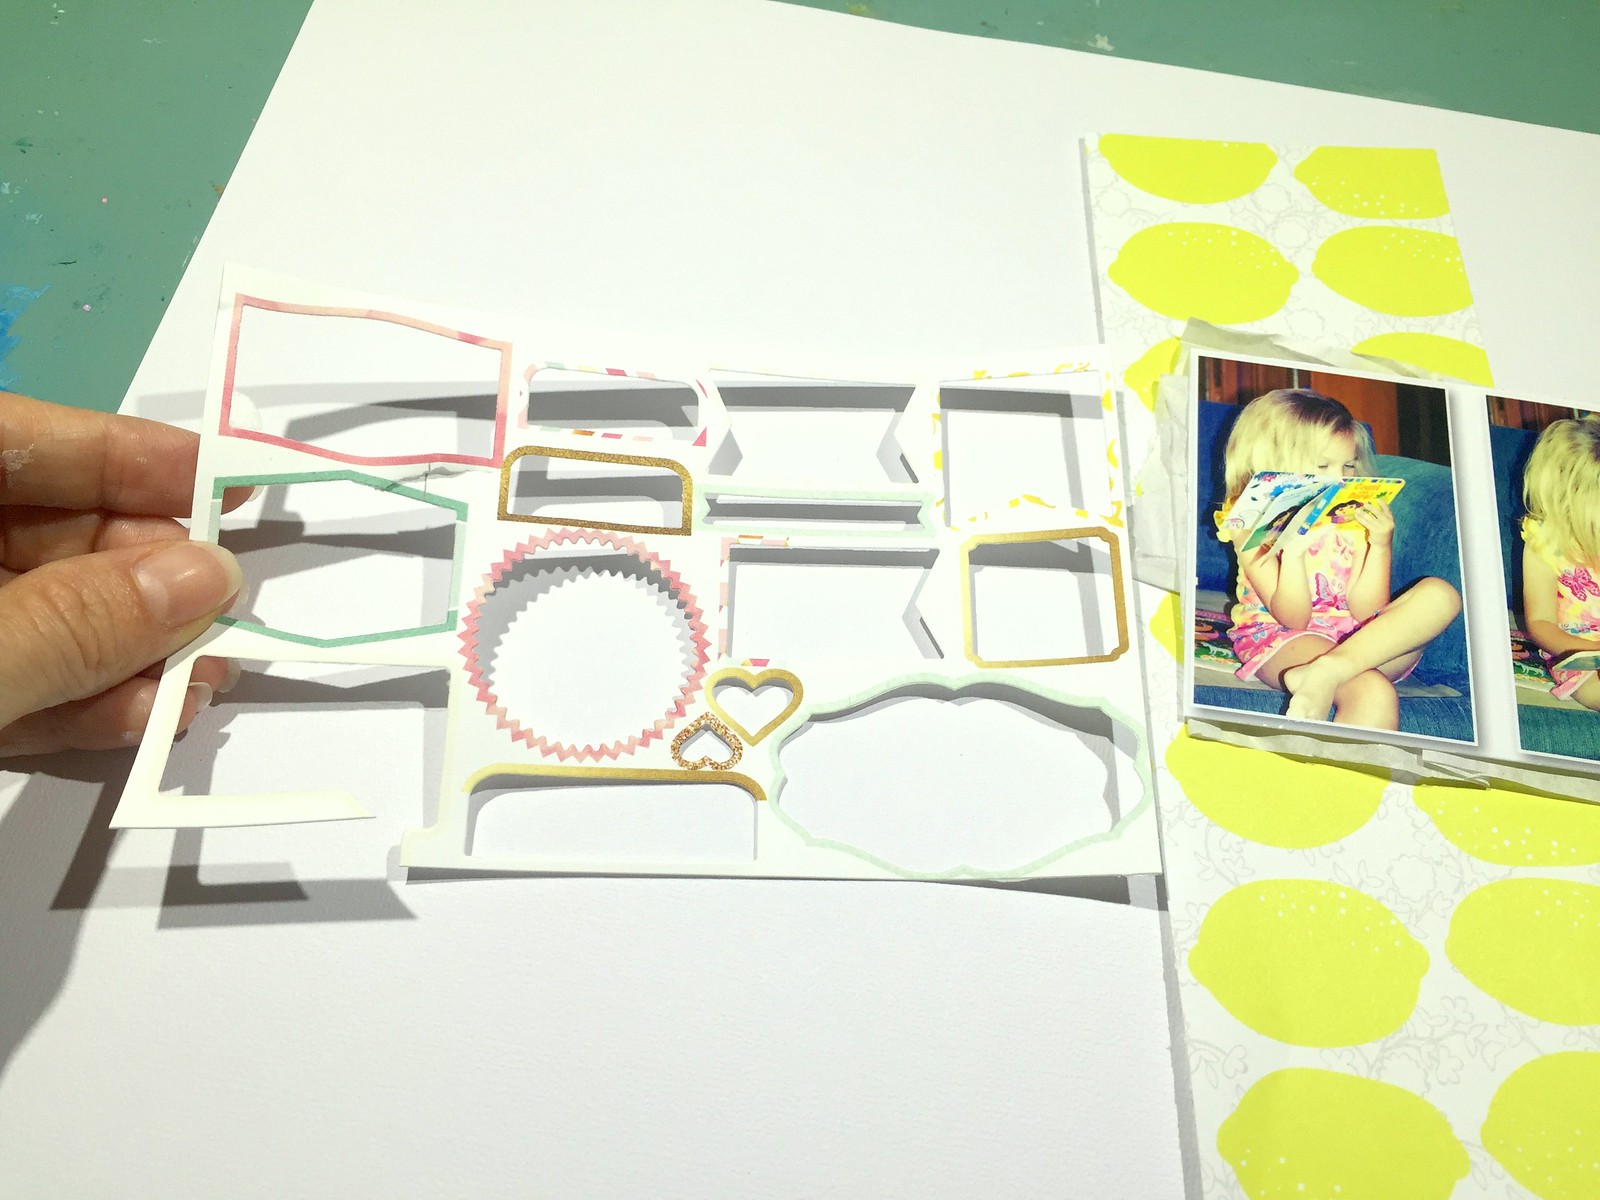
I simply peeled the backing from the sticker sheet leaving the actual stickers....I can use them on a future project.


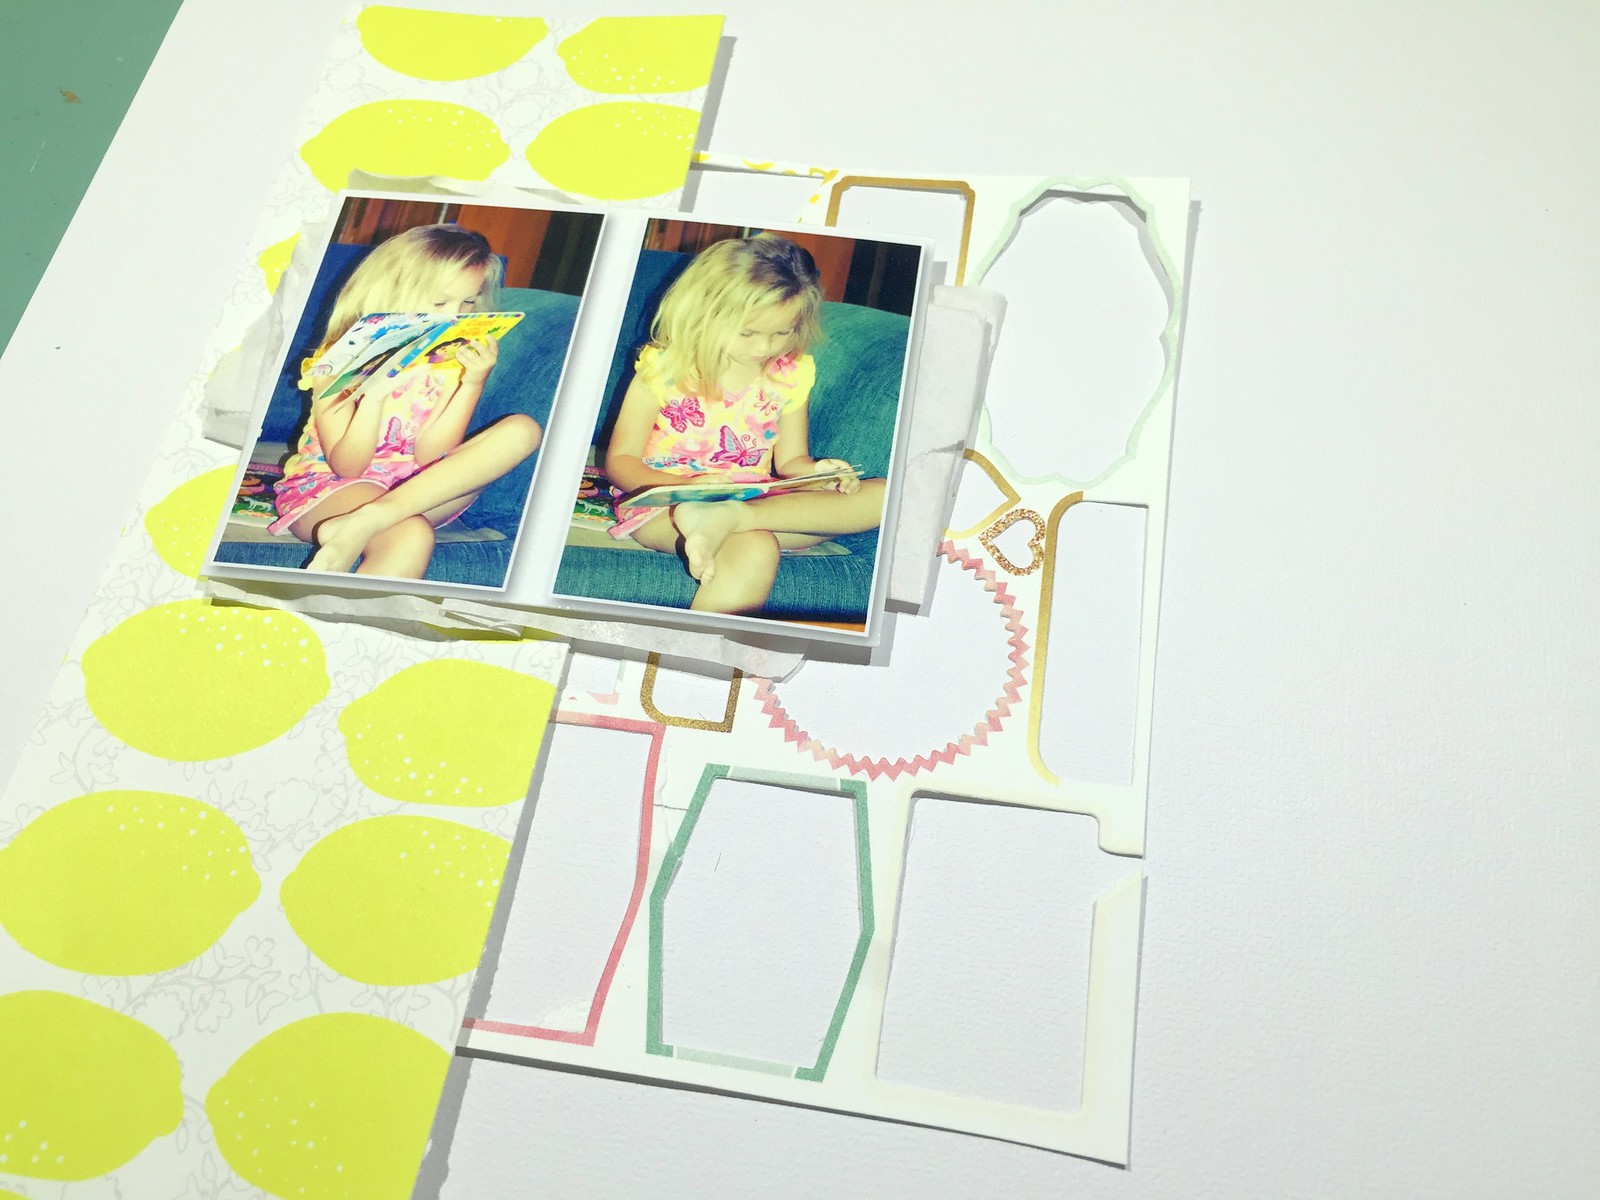
I played around with the design until I decided to use it vertically. I just stuck it down onto my cardstock so I could layer my photos right on top.


I came in with some Distress Ink, some water, and a paint brush to make a bit of watercolor splatter look. I love the texture, shapes, and interest that this sticker packaging creates.


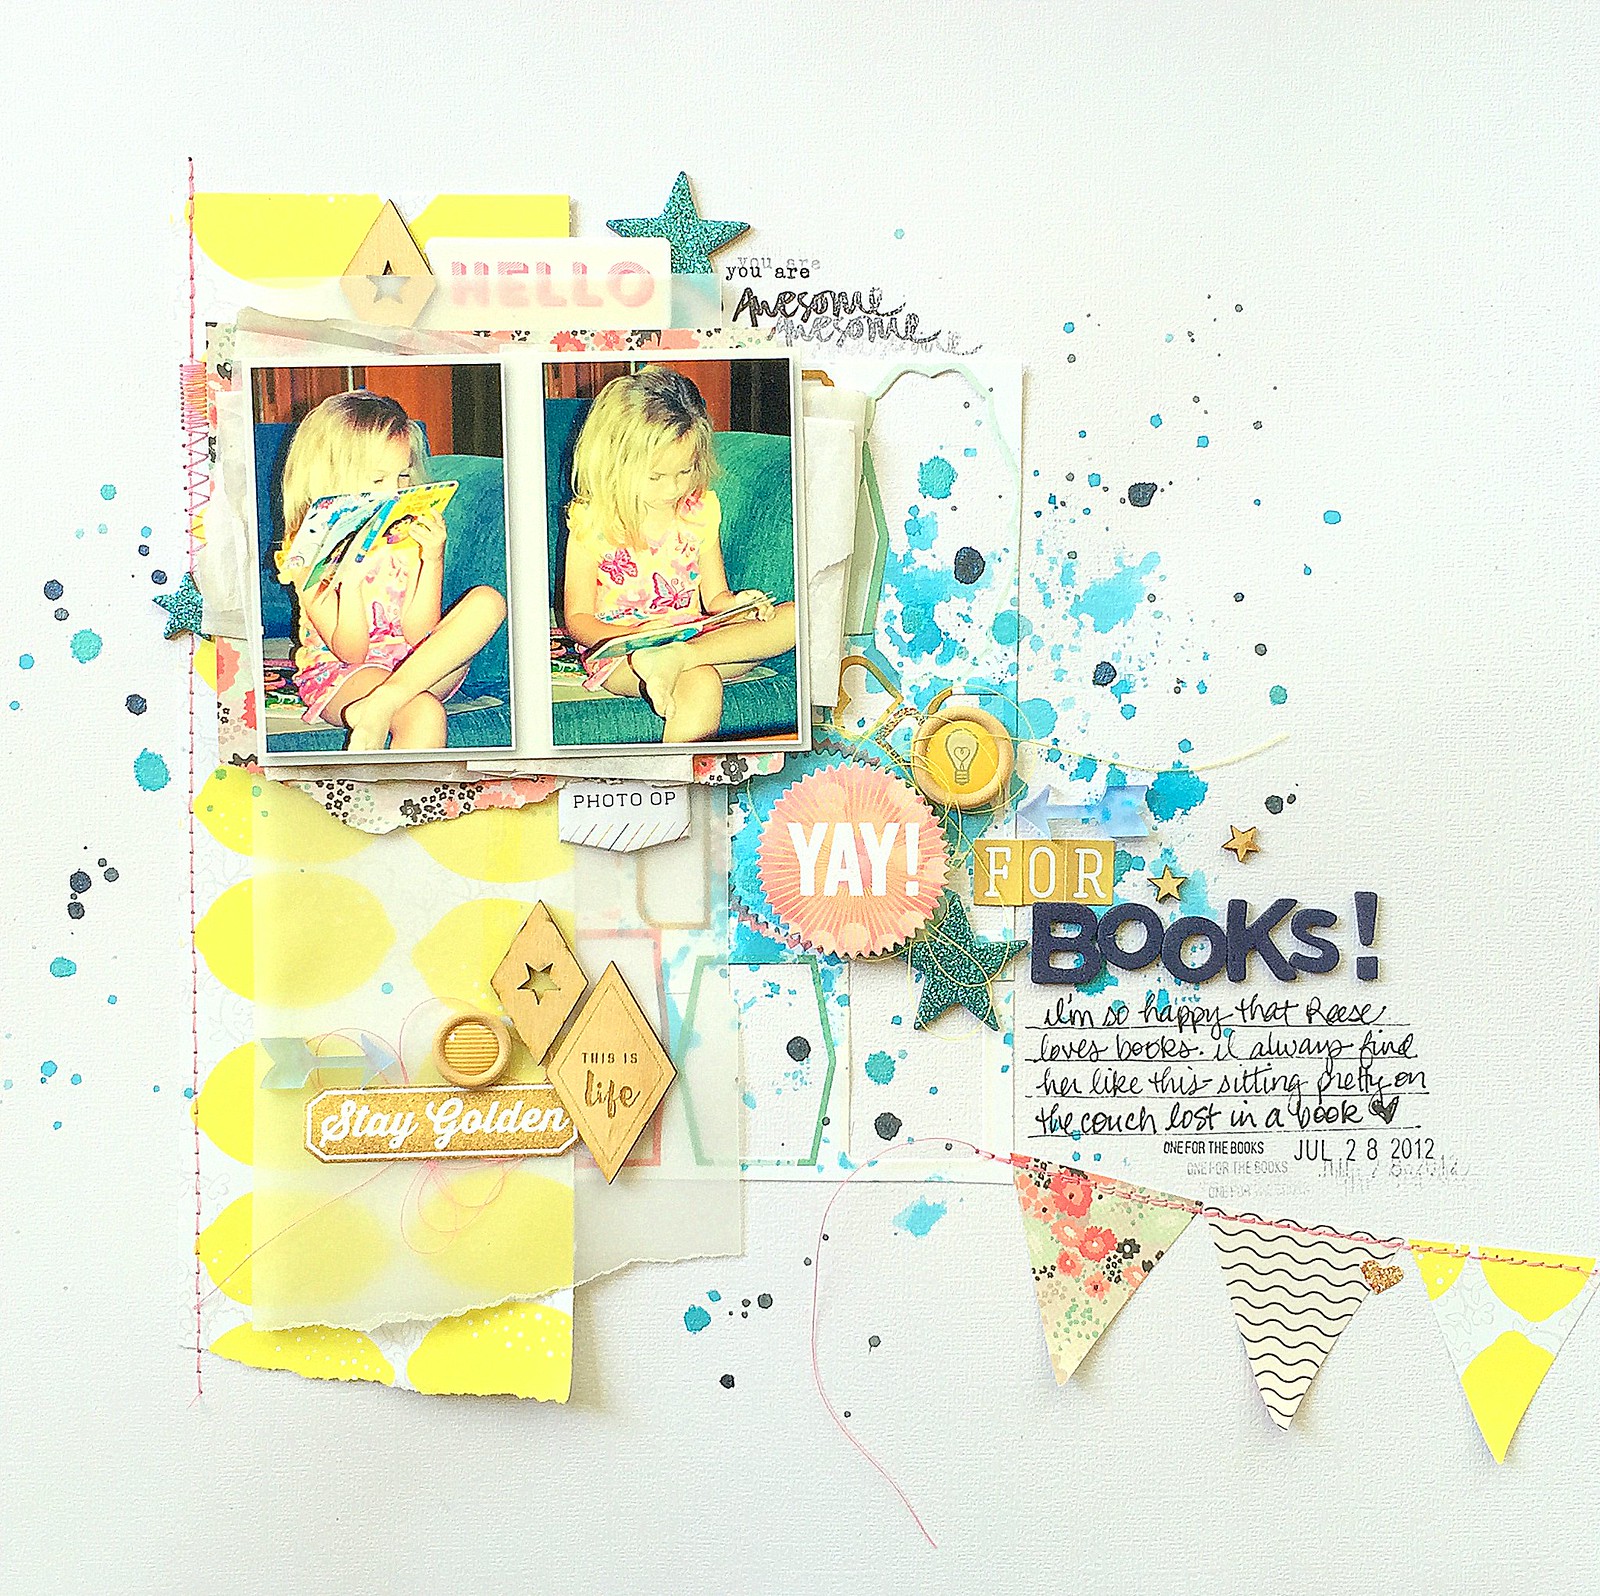
Here is a look at the final project:

. Untitled


Wishing you a great day!