
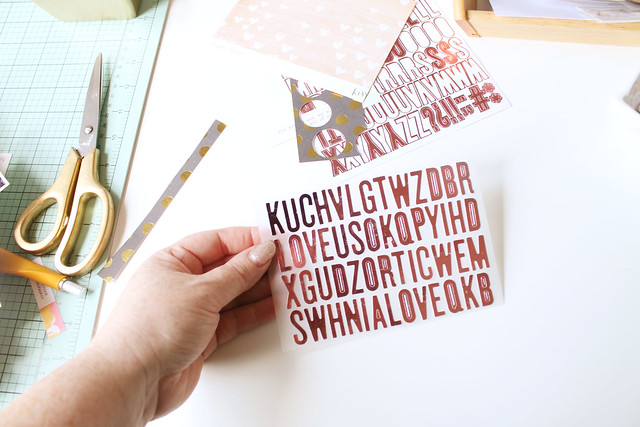
So, hands up if you are a hoarder of alpha’s?! That would be me. I have so many packs of Thickers and other assorted alpha’s that are partially used. This month’s kit contained some gorgeous rose gold alpha’s that didn’t seem to make their way onto a layout, so today I’d like to share an idea to use them up! I have to give credit to a dear friend (Hi Aimee!), one of her recent layouts did something very similar and it was a lightbulb moment.
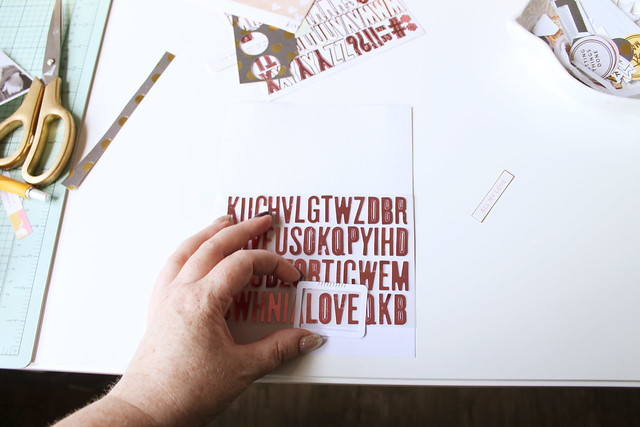
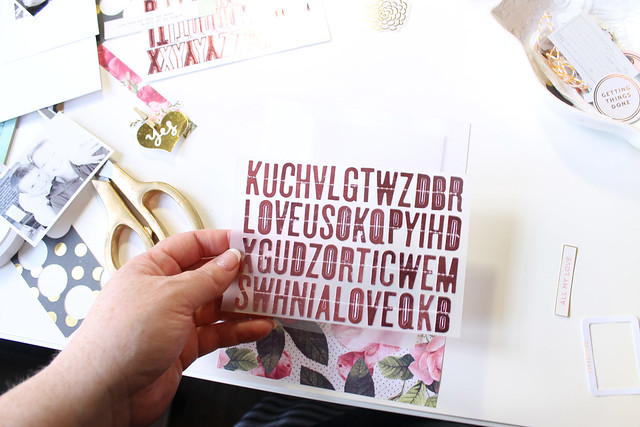
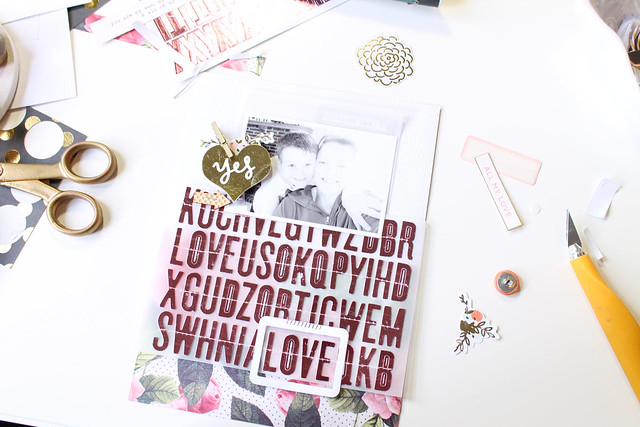
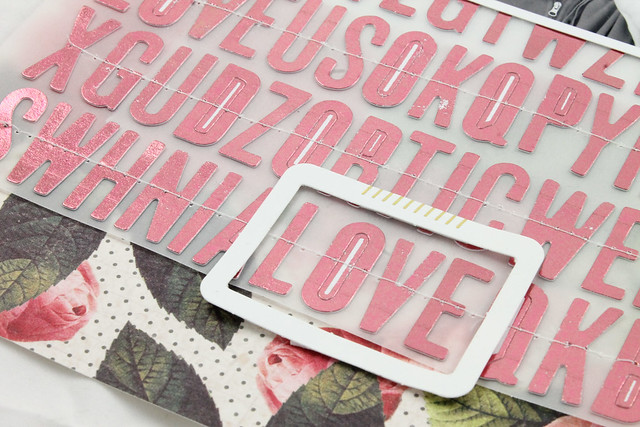
There are two things I use consistently on a layout, white cardstock and vellum. I love both. So for this I stuck the letters onto a piece of 6x4 vellum from my stash. I went with 4 lines of letters and tried to be random with the placement except for a few deliberate placements of the word “LOVE” (which I’ll help focus into my title later).
Admittedly I am not much of a planner when it comes to putting a layout together. I pick up things I like, pop them onto the page and keep rearranging things until I get something I am happy with. I usually have my layout pretty much done and then find a photo to suit too. So next up I just placed it on a piece of 6x8 cardstock (yes, I scrap 6x8!) and I played with one of those smaller frames from this month’s kits. If fit perfectly over one of the “LOVE” groupings!
Then it’s just a matter of picking up things and putting them on the page. At this stage nothing is stuck down so everything is easily changeable. I worked on this layout over two days so this is how I left it on the first night!

Next day I came back and first thing I wanted to do was sew those letters down! Sewing is another thing I include on almost every layout! I rarely use the sewing machine for anything fabric related…just paper :)

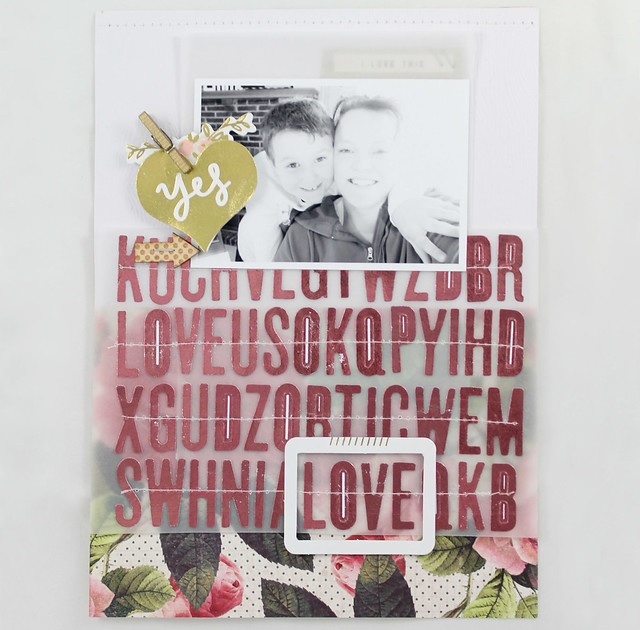
After the stitching was done I ended up changing the background paper. I wasn't happy with the plain white background, so I picked up the gorgeous flower paper and the white woodgrain paper and used them half/half (white woodgrain and top, flower on bottom).
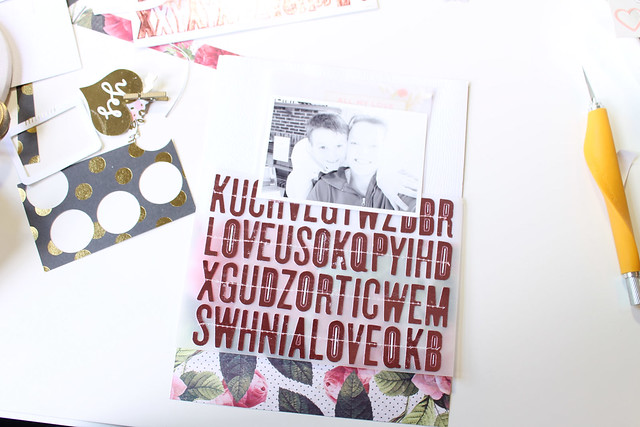
Then I started layering. More vellum underneath the letters and to help frame the photo (which I changed again, ha).
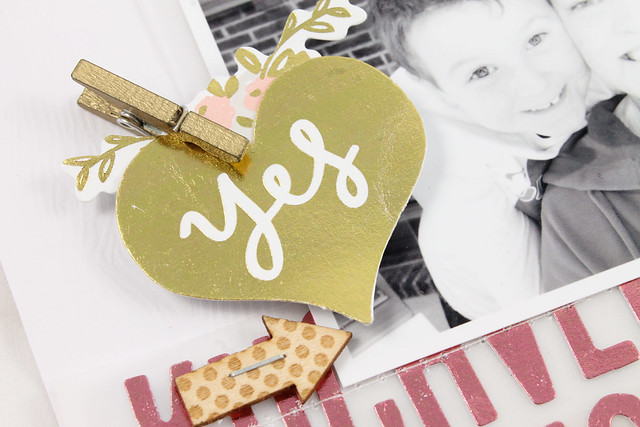
Once I was happy with the general layout I started sticking everything down in place! I added a few final embellishments to finish it off and used some foam pop dots behind the gold heart and the white frame to give the layout more dimension.
And this is the finished layout:


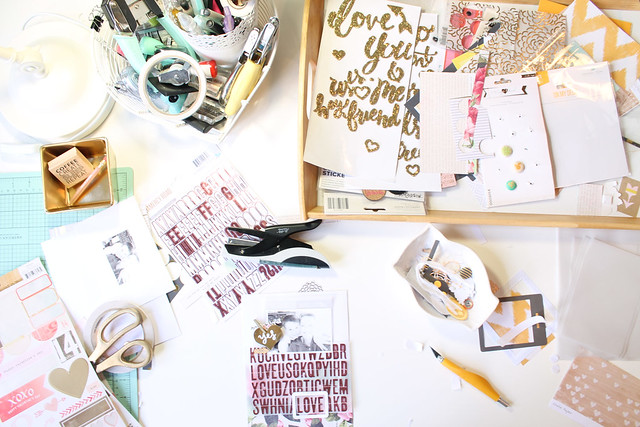
This is how my desk generally looks after I finish a layout – all those bits and pieces spread out over my desk. If I were to start work on another layout straight away I would have to clean this up! I have this thing whereby I have to start a layout with a clean desk. One of my many quirks ;)
To make life really easy I brought a few of these wooden serving trays from Ikea. They are big enough that everything fits on them and I can easily see what I have.
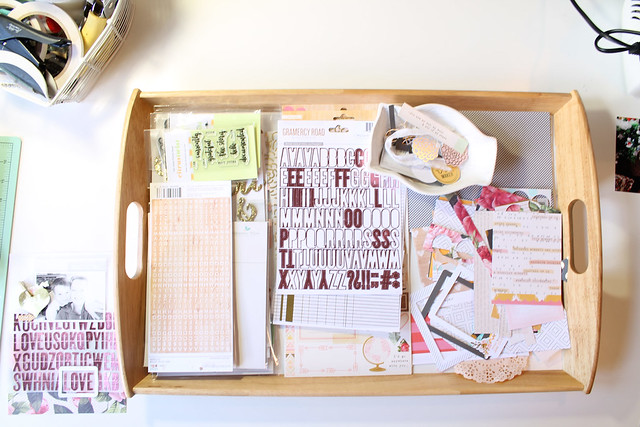
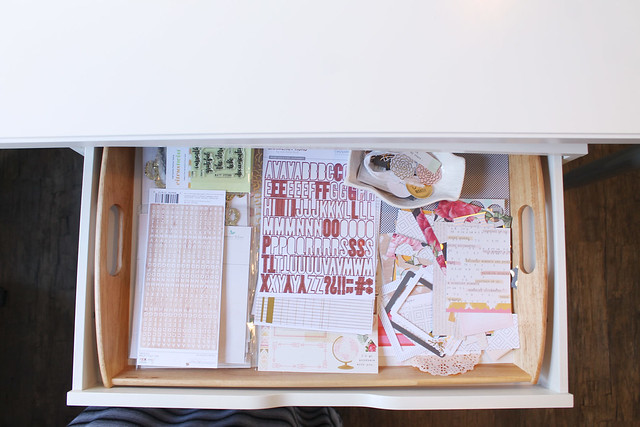
How do you store your kits each time? Do you split them up straight away and put them with everything else or keep it separated until it’s almost gone? My January kit will stay in this tray until next month’s kit arrives, filed away in the top shelf of my Alex drawers! Super easy to get out when I want to use it again.
Well if you've made it to the end, thank you so much for reading it all! Quite a novel :) I always enjoy looking at the process photo's of how a layout comes together (even if I don't read all the words) so I hope this was helpful and if there is anything you would like to know, or see in future, please let me know :)
Love your layout and the thought process behind it. I too, have to walk away and come back and rearrange things. The detail pictures are great and the finished layout is darling. TFS!
ReplyDeleteWhat a great way to use up those alpha stickers. May have to 'borrow' this idea. Loved this post!
ReplyDelete