
Hello! Kasia here today with some photography inspiration:) I love experimenting and trying new things with my camera and playing with bokeh is one of them. In case you don't know bokeh is the effect when the light source in the background instead of staying focused creates soft and blurred dots (I'm not a photographer and this is the basic way I can explain it, there might be many more proffessional ways to give bokeh's definition, for more detaile dinfo check good, old wikipedia:). Most of the time I use my old but still loved Nikon D5000 camera with a prime lens 50 mm f/1.8 which is gorgeous and bright and allows me to create lovely bokeh.

Here is how my setting looks like. I hang the light source (my christmas lights- I love those on light or transparent cables the most!) and create some free space between them and the object I photograph- the more space you give the bigger your bokeh will be. For the bright and sunny day I set up my camera to 200 ISO, time around 100-250 and aperture to f/1.8. I come close to my object, focus on it (you can choose manual or automatic focus- experiment and see what works best for you) and take a photo. The background should get blurred and the lights should create soft and beautiful bokeh like you can see below. Don't get doscouraged if you can't get perfect result at first- just keep experimenting :)
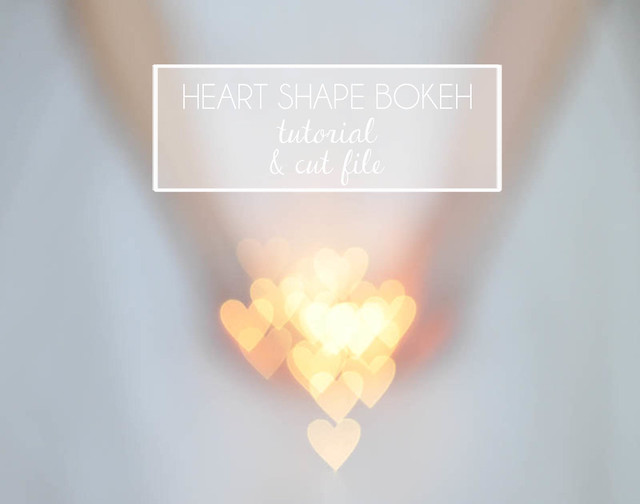
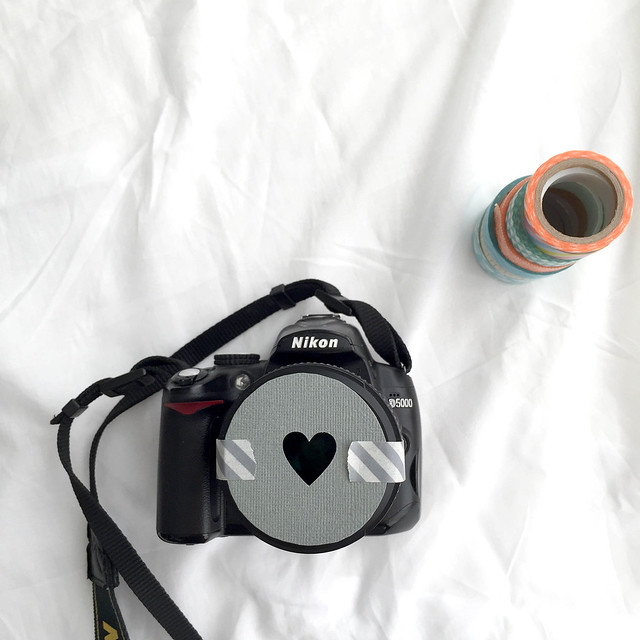
Now, let's get to the HEART of today's post. You know how to get bokeh in your pictures- that's great! Bring it to another level by creating a unique, shaped bokeh. You will need a paper circle with the symbol cut out in the middle. If you have a digital cutting machine you can download a bokeh cut file here. You can also just use a puncher, die or small scissors to cut your shape.
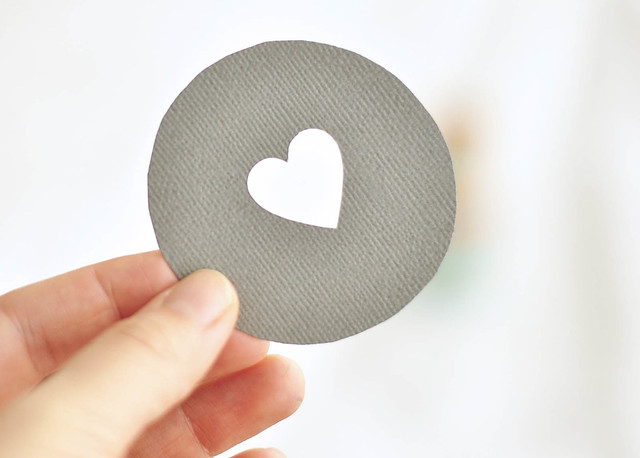
Attach the circle on the top of your lens using some washi tape, make sure that the cut out symbol is placed nicely in the middle and that it's centered with your lens.
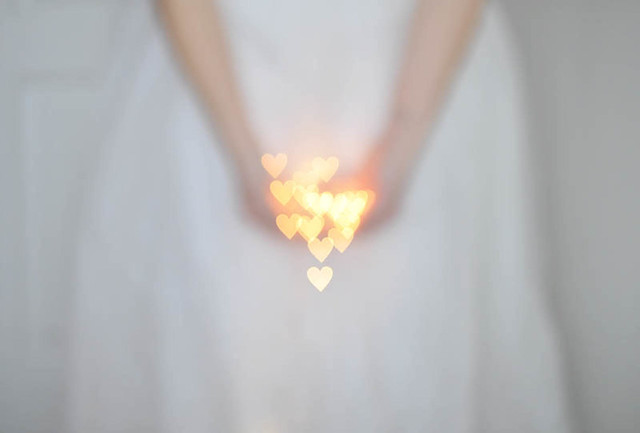
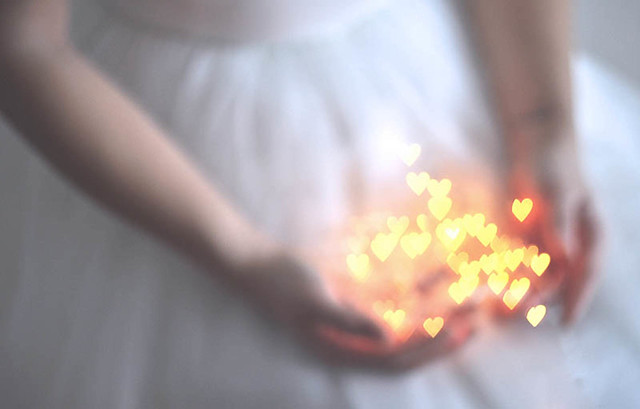
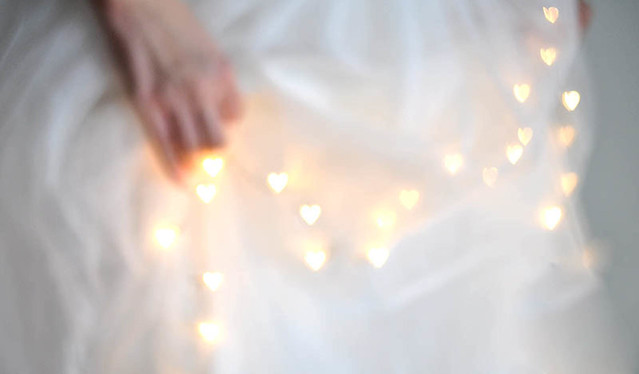
Follow exactly same steps as when you are taking regular bokeh photo. Focus, snap and.. can you see the magic which has just happened? Your bokeh got beautiful, dreamy heart shape!

Below you can see some more examples of pictures I took with my heart bokeh. I love the romantic effect of this photos and they always WOW other people! Have fun with your camera, learn new things and enjoy ecperimenting!
Wow thanks for sharing this awesome tips!!!
ReplyDelete