Showing posts with label Life Crafted Layout. Show all posts

Sunday, February 12, 2023

SUNDAY SKETCH with Marci


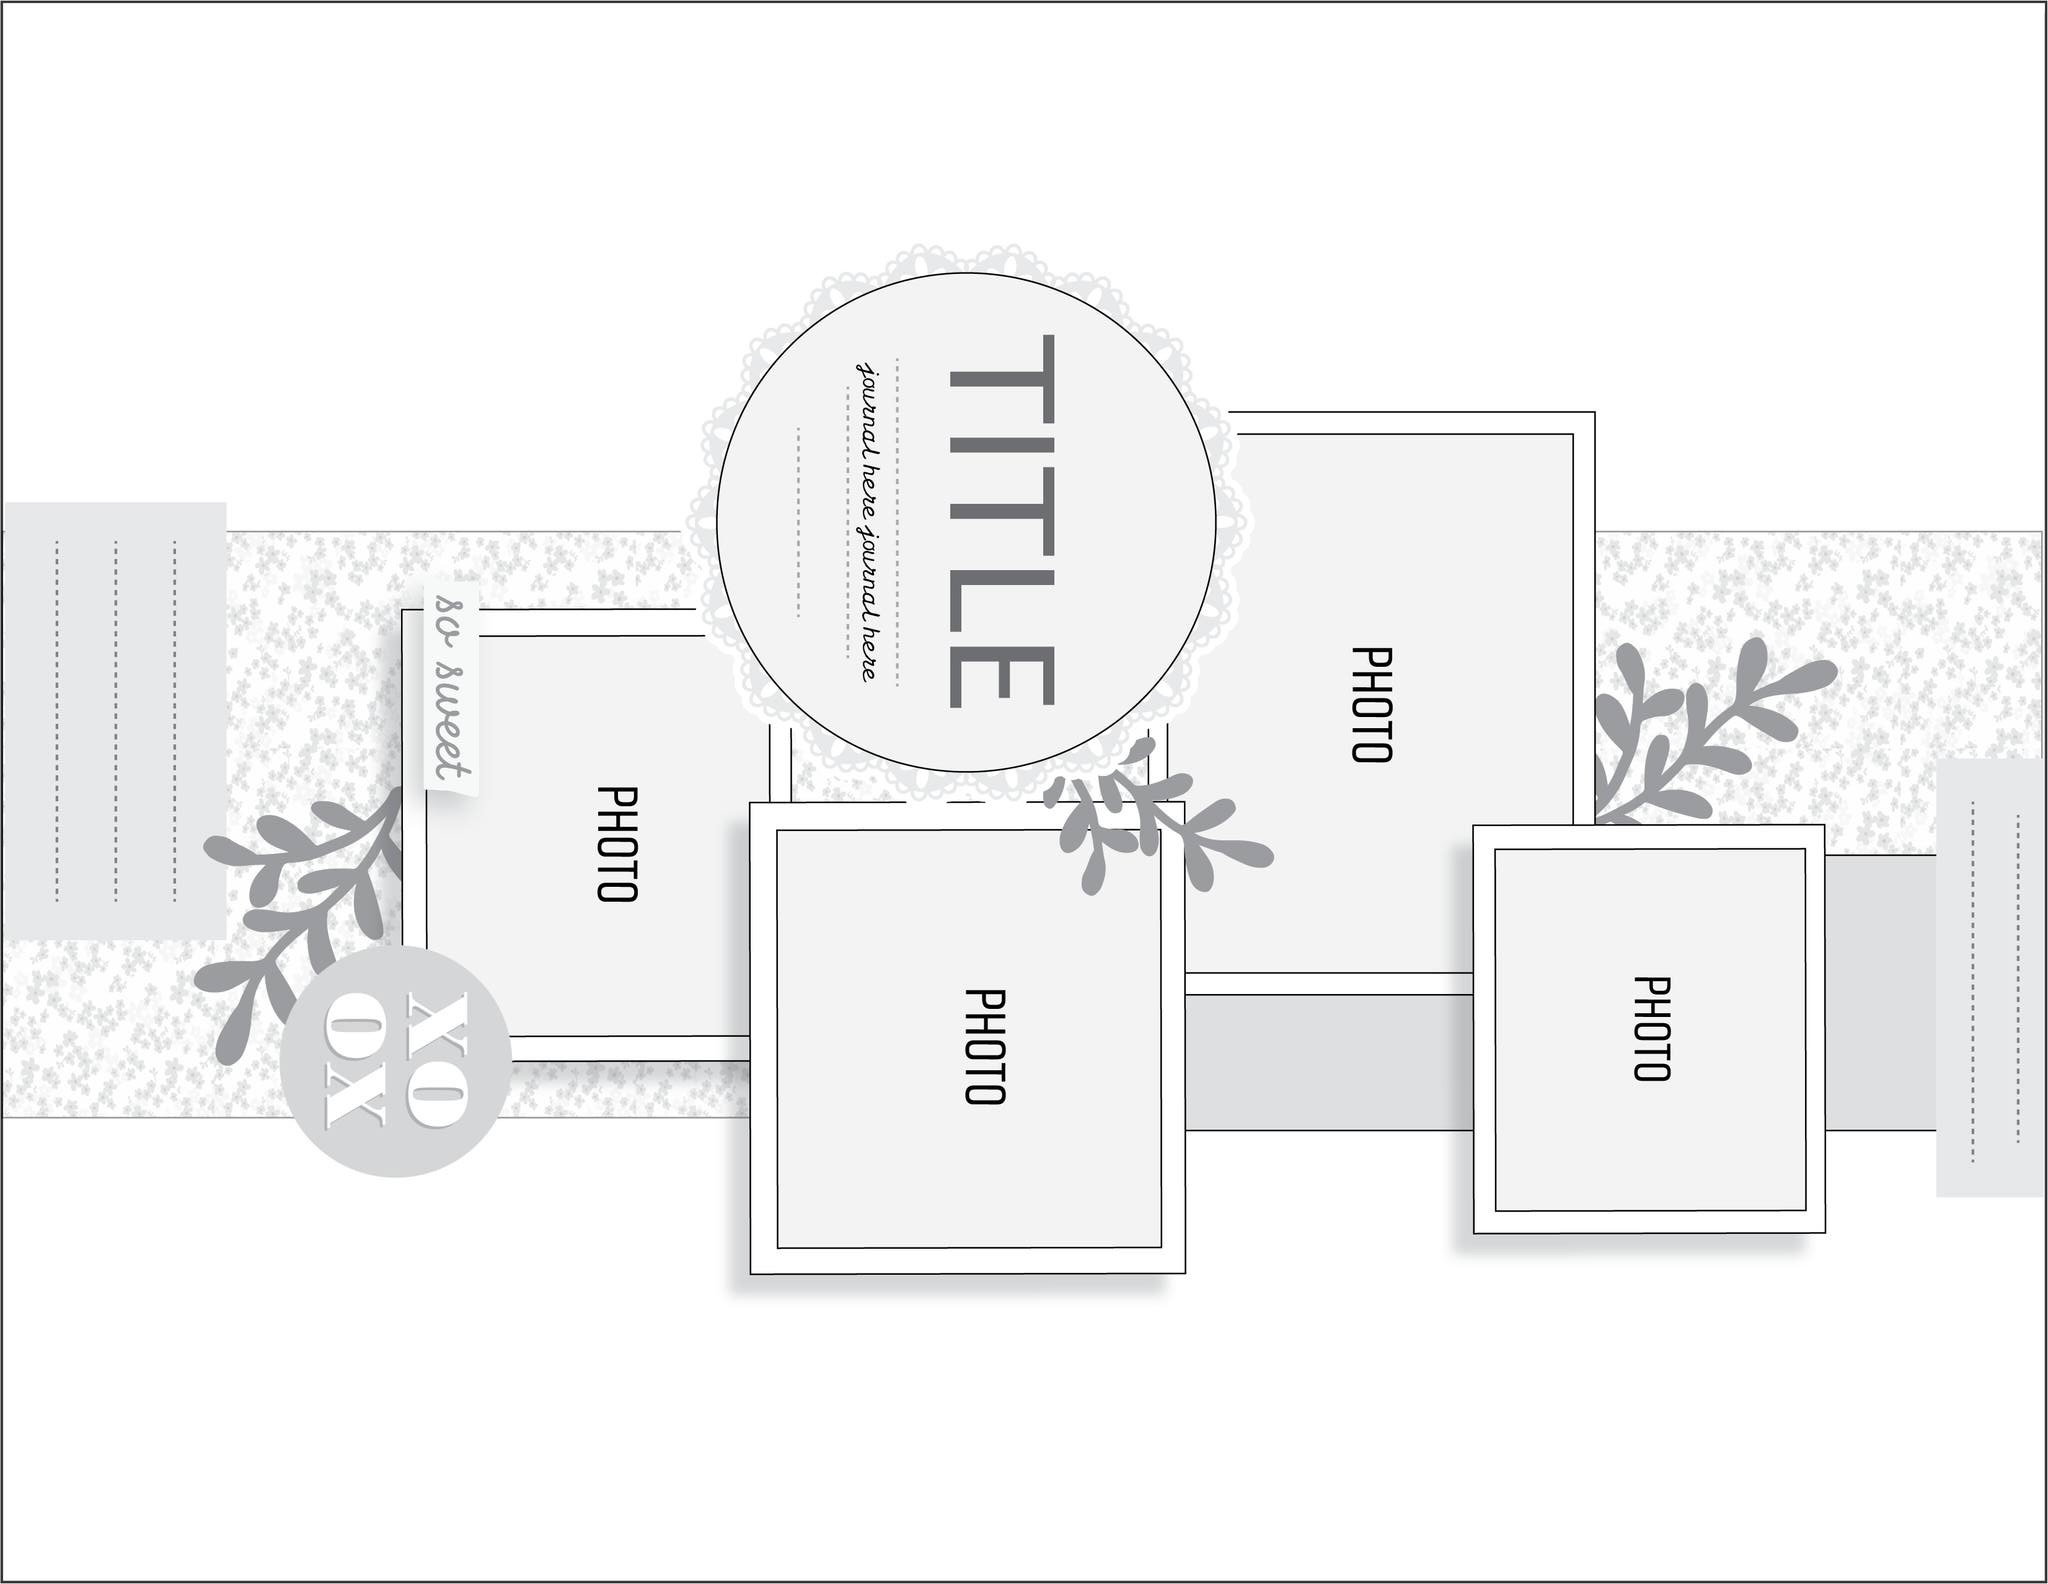
Hello Friends! It is Marci here. I am so excited to post my first Sunday Sketch Challenge for Citrus Twist Kits! Here is the sketch we are working with today. 


Sketches can be followed exactly as they are drawn or they can be used just as motivation to get you started. One great thing about sketches is that they can be turned in any direction which can give the viewer a completely different design. That is what I did today with this sketch. I turned it 90 degrees. By making the sketch horizontal rather then vertical, I now have a sketch with the same proportions as a life crafted, out of the page protector layout. 


Here is my final layout. 

I started with two pieces of textured, white card stock, cut to 5in wide by 8.25in tall. I knew I wanted to document a recent walk on the beach I took with my dog. It was a gorgeous day and the pictures came out with beautiful blue colors. The peach card stock dollie in the cherish ephemera pack paired beautifully with the blues in my photos. I started with this element first by placing it at the top of the left page, similar to the circle element in the sketch. Next, I wanted my largest photo to take center stage so I placed it also on the left side under the the area that would house the title. 


That left my three smaller photos. I placed them on the right side is a zig-zag pattern similar to the sketch’s placement. 


Another key element in the sketch is a wide piece of pattern paper that goes top to bottom in the original image or side to side in the rotated sketch. I started off using the dark blue cherish digital journal card and printing it as a long strip of paper. I like the dark blue paper with my water photos. I needed another paper to add interest to my page but not distract from the photos. I decided to use a light grey ink and stamp my own patterned paper. There is an elongated hexagon on the Cherish Stamp Set that reminded me of cobblestones. I thought that would work perfect. 


After placing all the large elements on my page I filled in some of the blank spaces with the blue and peach flowers from the ephemera pack as well as some hearts and dots from the Cherish puffy word, phrase and numbers snippet sheet.. Lastly, the sketch had dotted lines drawn at the top and bottom of the sketch. They made me think of stitch lines so I added some white stitching to some embellishments on each page. I think it give the layout some added interest and texture. 


Thank you for stopping by. I hope you find this sketch as fun as I did.  Have a great Sunday being creative! 


Saturday, August 7, 2021

3-to-Inspire Saturday


Hello there!

We are hoping that you are enjoying your weekend.  Today's 3-to-Inspire is a little bit different, as we are using one of our CT projects to issue this week's challenge.   We have chosen a gorgeous layout from Loredana as the inspiration for this week


There is so much to love on her spread, which made it so hard to choose only three prompts for inspiration.  But, we would love to see you use:
  1.  A large photo
  2. Create an insert
  3. A Large/Layered title


Check  how Loredana has used puffy phrase stickers and ephemera to create her title.  By layering the pieces, she is adding texture and interest to the page.   The  yellow of the puffy word just ties the elements of the page nicely together.


We love how Loredana has cut one of our Page Protector #2 to create the little insert in her project.   This has given her space to add more photos and her journal card,too.


The large photo on the left side of the spread is gorgeous, and requires  minimal embellishing to shine on the page.   


We  cannot wait to see how you use these three prompts to  inspire your next project.   Remember to share with us what you create!!


XO


Saturday, January 2, 2021

3 to Inspire with Shannon


Happy New Year, Citrus Twist friends! Shannon here to kick off 2021 with a 3 to Inspire recipe to help jump start your next page. I used some products from the January 2021 and December 2020 shop updates for this layout. The recipe?

1. Alpha stamp

2. Wood hearts

3. Make a grid

Let's look at how this played out on my layout.


I used the Felicity alphabet stamp on the left side to do repeated lettering for my title. This stamp has such a clean, graphic look and the thin letters lend themselves well to a large title. I did a bit of a test with uninked stamps down the side of the page to see how many rows I could make. I didn't want letters being cut off at the bottom so a little bit of pre-planning was necessary. I didn't draw lines to keep things straight and even but you could totally do that as well!


On the opposite page, I created my grid. I used 2x2 squares to form the grid. To maximize the amount of space I could get between each square horizontally, I aligned the top and bottom squares with the edge of the paper. The patterned paper that I used is from the Marigold and Sweet Story 6x8 paper packs. Although they're different lines with very different designs, some of the papers mix and match very well. 


I chose three wood veneer hearts from the Heartbeats Vol. 2 pack to add to the page. I was so excited to see these added to the shop! I've always been a fan of wood veneer pieces. I arranged them on my page in a visual triangle with each of my patterned paper squares. To bring a little more to the page, I added some ephemera from the Hearts & Such ephemera pack to each square as well. I chose pieces that had pink in them to keep a consistent feel to the page.


Finally, I wanted to share my new favorite way to add journaling to my page! I've discovered printing on clear sticker paper. I type up my journaling in Photoshop on a shape that's the same dimensions as where the journaling will ultimately go. In this case, I typed it onto two 2x2 squares that were on a 4x6 canvas. Before saving, I deleted the squares so the journaling was only on a transparent background. I save the file as a .png. This is important! Saving it as a .png will result in a clear background. Then, I open the file and print as normal. If you have any questions about this, pop into the Citrus Twist Kits Fan Page on Facebook and I'll be happy to answer!


I hope this recipe has given you a starting point for your next page. You could interpret it in so many ways. I can't wait to see what you create!