Showing posts with label October 2018 Kits. Show all posts

Tuesday, October 30, 2018

Tuesday Tutorial with Anna


Hi dear CTK friends! Anna with you today to share with you how you can use the negative pieces of your digital cut files. I love when nothing of the loveliness goes to waste :)

I've used the gorgeous Flower Cluster cut file (designed by Nathalie DeSousa), free from the CTK shop. It's so beautiful, both the "real" cut file and the negative of it as well. The papers and embellishments are bits and pieces from the October Sweater Weather  Add On kit and the October digital printables as the Cut Apart Sheet and the Little Things Journaling Cards.

I hope you are ready for some photo bombing now since here comes a few pics from my process doing this as well as a few pics of my finished page, Enjoy!

 Just unmount the "real" cut file from the cutting mat and you will have your negative image left, the pieces we will use for today's project.
Apply small dots of glue on each and every of the pieces and then place your cardstock ( this one is 12"x12") upon them. Make sure that your cardstock have contact with all of the small pieces. You might have to give it a little preassure with your hands. Then let it dry.
After drying a few minutes you can carefully start to peel off the cutting mat from your cardstock and if not every little piece is attached on the paper there is no panic, just glue them afterwords where it should be. Now you have your background to work with.

I was playing around with my photo and embellishments to get an idea of how my design would end up and then I put them aside and had a blast plyaing with some color mists using a plastic bag and made some splatters. After drying I started to mount my embellishment and layers of paper plus photo.
Actually my title is another negative from yet another of our lovely CTK October cut files, "Falling". Nothing goes to waste, lol!


And here's my finished page, I'm so happy how it turned out! 
Hopefully I have inspired you to give your negatives a go and just not let them go to the trash bin.


Thanks for stopping by here with me today! Don't forget to head over to our website to buy a kit or why not sign up for a subscription?  Also be sure to join us on our Facebook page, CTK Fan Page and share your creations with us, we would love to see what's going on at your crafty space.
And last, but not least, have a look at our lovely weekly challenges up on our blog, as the Saturdays "3-to-inspire" and the Sundays "Sunday Sketch", they are both super fun challenges!

Until next time! Hugs Anna xo


Monday, October 29, 2018

Mixed Media Time with Adele


Time to get painty peeps!

Today I am challenging you to pull out some sort or messy, painty supply and add it to your next layout. I am pairing some modelling paste, a large stencil and some watercolours from my stash with the gorgeous October Main Kit today to create a layout that's very close to my heart.


I have also created a process video so you can see the mixed media techniques I used from start to finish, which will be at the end of this post.


I began by spreading a thin layer of modelling paste through my stencil and allowing it to dry COMPLETELY. You do not want to add any watercolour until your modelling paste is dry as it will end up a bit of a smudgy mess...trust me, I learnt the hard way previous hehe!


I used a combo of this month's alpha stickers and my brush lettering to create a soft and subtle title. I paired this with some strips of journaling below my photo.


I loved adding the little puffy hearts and some splatters to add those finishing touches to this precious photo of my Mum, Nanna and I.


If you're not a fan of mixed media, this is a great technique to try because you don't need to be precise with your watercolouring and can make it as subtle or bold as you like depending on what colours you use. Have fun!

Adele


Friday, October 26, 2018

Travelers Notebook Challenge with Sarah


Hey there, CTK friends!  Today I have a TN challenge for you that involves using a bunch of frames to create an interesting background.  If you don't already have some frames that you want to use, that's totally okay because we are going to be making our own by cutting up some patterned paper!


If you've never tried using frames for a background, I'd love to encourage you to try it out.  Frames add such a fun pattern and shape element, and you can get really creative with different colors and textures to make it your own.


For this page I used some pattern papers from the "Little Things" Scrapbooking kit to cut out my frames.  Using my Exacto knife, scissors, and paper trimmer, I cut out some rectangles and circles of various sizes and patterns.

Once I had all of my frames ready I played around with their placement on the page, making sure that I didn't have any floating elements.  I had some frames go off the page and the rest of the frames connect to each other.


I didn't need to do a lot to embellish this page since I already had a lot going on with the colors and patterns on the frames, but I did add a title and a few small die cut pieces to finish off my page.

There's a video below if you'd like to see how this page came together.


I'd love for you to give this a try!  There are so many possibilities with frames so you can get super creative and make it your own.

Happy Crafting!
Sarah


Wednesday, October 24, 2018

Let's Get Digital | Amanda Baldwin


Hi CTK Friends! 

Amanda here, sharing a super fun Fall layout for today's Let's Get Digital post!
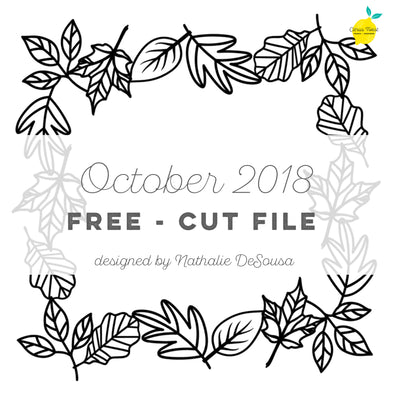
I have used the FREE Leaf Frame file with my Silhouette Sketch Pens for a really fabulous mixed media look! 
Here's what I created....

"Small Things, Great Love" 


Isn't this gor-jus?!! All the Fall fabulousness here! 
I have featured the Little Things Pocket Life Kit, and combined it with wood veneer from the Little Things Scrapbook Kit, as well as fussy cut butterflies from the Vicki Boutin paper in the Pattern Paper Play Kit. 
But it's the Leaf Frame File that really makes this layout! 
The Leaf Frame file has been designed by our very talented Nathalie DeSousa, 
& looks like this....


Cut file - FREE - Leaf Frame - October 2018
So awesome!!!
You can download the Leaf Frame Digital Cut File from the CTK Store HERE. 

I enlarged this file so it would frame around edge of my 12 x 12" cardstock base, & then used Silhouette Sketch Pens (Orange & Red ) to draw the enlarged digital file.
I loosely paint the leaves with the fabulous Pinkfresh Studio Liquid Watercolors in Candy Apple, Clementine, Sunshine & even a tiny amount of Lavender! I love the flow and vibrancy of these liquid watercolors! 
Here's a closer look for you.....


Sketch Pens are water soluble, so I use this 'ink bleeding' to my advantage,  & blend to create a little tone within my messy water coloring. I also add a few inky splatters for good measure. So cool! 
Here's another view for you....


Sketch Pens are really good fun, and combined with the Pinkfresh Studio Liquid Watercolors, they're super effective too! 
Those fussy cut butterflies are such a pretty adornment too! 
The laugh veneer from the Scrapbook Kit coordinates perfectly with both the Fall, outdoorsy theme of my layout.


It's also a pretty accurate descriptor of the story in my photo too! Aren't they just the cutest?!

I layer my favorite Fall photo onto that exclusive PL journal card, and then layer die cuts and 6 x 8 pattern paper beneath it all. 
Super simple creating that's tons of fun, and looks super effective! 

And there you have it! My fun take on this month's Let's Get Digital highlight! 
I hope you'll download this FREE file (and more) from the CTK shop HERE, and get a little creative too! 

Thanks so much for visiting, 
til next time, 


Tuesday, October 23, 2018

Tutorial Tuesday with Andrea


Hello friens! Andrea here to share a tutorial with you on this fine Tuesday! Who's ready to get stampy? Today we are going to create a whole page of stamped sentiments and it's going to be easy! I'm sure you've experienced the frustration of having this beautiful cluster just the way you want it, and then you basically have to take it apart to adhere it all back together. Well I like to avoid frustration in my scrapbooking so I found this stamping trick to be super handy when stamping multiple on the same page.


Start by selecting all of the stamps you want and place them down (the right way, with the backs facing up), arranging them to your taste and design idea. My idea here was a collage look with variety in the sizes but being careful to spread out larger stamps evenly so it didn't feel cramped. I used all stamps from the Badge Maker set and the Little Things set.

Once I had all the stamps down where I wanted them, I grabbed my acrylic block that was big enough to cover all the stamps. If you don't have a block big enough for your design, then do these next steps in smaller sections.

Lay the acrylic block down on top of the stamps and press firmly in order to get each one to grasp the block.


Carefully pull up the block and all the stamps should come along for the ride! Now you have a block with all the stamps exactly how you wanted them!


Even though I photographed this next step with the stamp pad on the desk and the stamp block on top, I would recommend the opposite. Lay the acrylic block on the back side down on your table and press the ink pad onto the exposed stamps. This will allow you to see the ink coverage better so you make sure that all the stamps are inked evenly.

Depending on the ink pad you're using, and how big your overall design is, you might have to work quickly. I use staz-on and it dries fairly fast so I had to ink-ink-ink super quick to get it all covered.


At this point you can stamp it down. I always eye ball stuff but you can pencil out a frame to guide you or make little markers with washi so you remember where exactly you wanted to stamp.


That's it for the stamping portion - now it's time to decorate! I added puffy hearts and die cuts to the stamped page to add color and fun! 


On the opposite page I built a fun photo cluster using cards and die cuts from the gorgeous Little Things kits! The wood grain background is from the 6x8 papers and I basically want all my backgrounds to be this pattern!


Here's another look at how the two pages work together. I feel like the open feeling of the stamped page balances out the heavy cluster on the left page. And because I used coordinating colors and shapes on both pages, it pulls off that balanced look.


Thank you so much for joining me today for this fun tutorial. I hope to see how you create your own stamped collage! Until next time, happy scrapping!


Sunday, October 21, 2018

Sunday Sketch with Anna


Hello CTK friends! It's Anna here today with today's super fun Sunday Sketch!

And here's what it looks like...


Ingen automatisk text tillgänglig.

There's no secret that I love working with sketches and this one is just awesome. For me a sketch is a kick starter and saves me a lot of time to decide where to start when crafting. And there's no right or wrong when you interprets a sketch, you can let loose your inner artist and just enjoy the journey.

For this one I decided to turn the sketch upside down, and here's what I came up with using the October Little Things Scrapbook Kit.


My background is prepared with some color mist. I use a small plain plastic bag for this, just make a little "hole" and spray some mist in it and then apply and repeat until you are satisfied :) I've also made some splatters of ink. After drying I arrange my papers and embellishments (and photo of course)


I thought the header for my vintage page was perfect for my page so I cutted it to fit in with my photo and layers of papers. And have you seen these small foxes from the Maggie Holmes Willow Lane collection? Sooo CUUTE! :)


This little die-cut cloud (from the Pinkfresh Indigo Hills 2 ephemeras) is so cute! I just had to use it here on this page with my little man.


Another favorite from this months Scrapbook kit is those Wood Veneeer words, I've used the "Go" here.


Talk about favourites, here's yet another one! These puffy hearts from the Amy Tangerine Shine On collection, to die for, for real!


I do really love how easy this layout came together by having the sketch as a basis for my page, using this months "Little Things" Scrapbook kit. 
Needing these October kits? You find them all here! 

Now it's your turn - we can't wait to see how you interpret this weeks Sunday Sketch. Remember to share them with us in the CTK Facebeook Fan Page!

Thanks for stopping by! Anna xo


Friday, October 19, 2018

PL Challenge with Adele


Hi scrappy peeps!

Today I have a fun DOUBLE PL challenge for you to try!

My first challenge is to use the Main Kit for your PL page, including trimming the 12x12 papers down for your journaling cards. Secondly, I also challenge you to use some product packaging in your layout.


I really enjoyed choosing the different papers for this layout, as well as incorporating the three different types of packaging into layering and embellishment details. 


I love using the CT packaging card from the Main Kit as one of my journaling cards each month. All you need is a handy label or sticker to cover the text and BAM journaling card complete!


I have also created a process video talking a little more about my creative decisions on this page - hope you enjoy!

Adele :)