Showing posts with label January 2016 Pocket Life. Show all posts

Friday, July 1, 2016

July Pocket Life Sketch

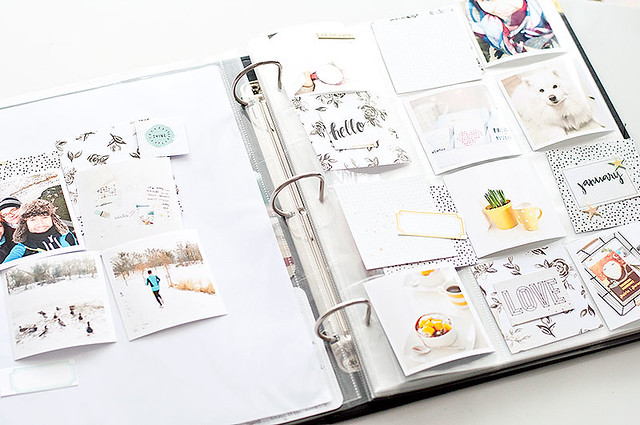
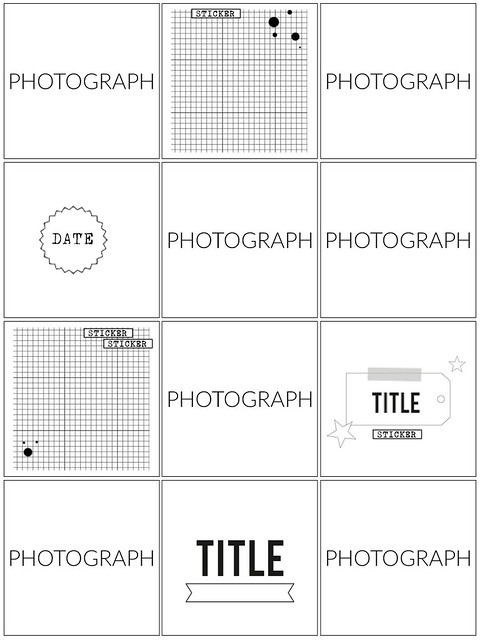
Elizabeth here today to share my latest PL sketch with you. I apologize for the quality of this.. I actually do "sketch" my sketches when creating, so this is pretty true to me! This month I wanted to challenge you to use several smaller photos on your spread. I love the trick of continuing the photos across the span of pockets. Such a unique look and way to include lots of photos for those busier weeks.


and here is the sketch translated into actual scrapping..


here is the page's counterpart...


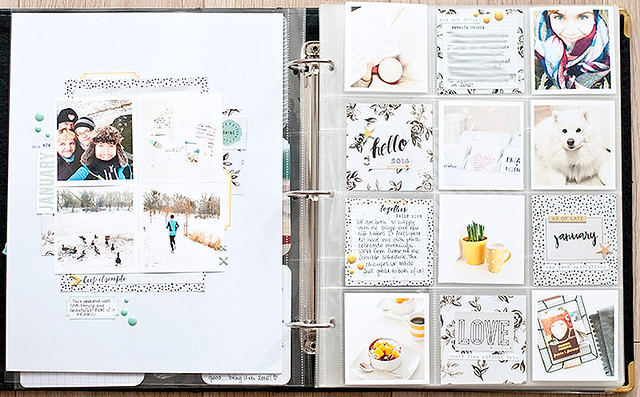
and the entire spread..


You've probably noticed by now that I am a big fan of the small photos! Thanks for stopping by today. I can't wait to see what you all make using my very sketchy sketch. Aren't these July kits just to die for?!


Friday, January 22, 2016

Pocket Life Sketch Friday with Mira

Hello!
It's Mira with Pocket Life Sketch Friday!
I prepared a whole-page sketch today, but You can choose only one of the cards (or a few) to get inspired! Here You go:


And my pink page - all about my sweet daughter and her lovely faces. I especially love those exclusive stickers by CTK: "stop expecting normal" and the second one "consider it done" from January PL Kit. They are in a great dialog wth what's going on in our life right now :)

And the main theme in this spread - diamonds, cause She shines indeed! Every day!


Ok, now it's Your turn! I really can't wait to see where those sketches will take You!
For your chance to win, create a layout based on the sketches in this blog post, post your layout to our Gallery or our Facebook Fan Page by Friday, January 29th. Be sure to include PL 01/22 in the title!
Thanks for visiting Pocket Life Friday!

Have a fantastic weekend!

Friday, January 15, 2016

Pocket Life sketch Friday with Kasia

ProjectLife_album_na_zdjecia7


Hello and welcome in 2016! It's Kasia here with some Project Life inspiration (and brand new sketches!) for you!

Start of the year makes me very excited- finally I could play with my new album from Citrus Twist Kits store- I immediately fell in love with the 9x12 size, it's not too big, practical and ideal for my weekly spreads. Before I show you my pages, let me share with you my approach to this year's album:

- I'll be making spreads few times a month-without numbering the weeks,
- I want to keep my album fairly simple and minimalistic - less is more,
- I'm going to use lots of instagram photos (therefore I'm in love with the square pockets page design!)
- I'll keep adding handwritten journaling,
- My goal is to work on the album consistently through the year.

I believe that setting some goals and having an overal idea how we are going to approach PL album is a key to success and staying commited through the months to come :)


ProjectLife_album_na_zdjecia3

Ok! Now time to show you how I made this weeks entry with CTK January kit! I will also share with you few easy steps on how to make bright and light spreads in PL album, so... stay tuned!

odbitki_instagram

STEP 1- PHOTOS

To keep the album bright and airy your photos should be... light! Aim for taking photos during the day, use the daylight whenever you can. Edit pictures before printing- increase the brightness, play with contrast, decrease the shadows and let the highlights pop a bit. You can also add a little white frame around your pictures- this way even the darker photograph will appear lighter in the album.

CTK_styczniowe_kity_do_Project_Life

STEP 2 - MATERIALS

I love to use lots of neutrals to build a base of my pages and than add some happy, bright pops of color. I try to limit these to 2-3 shades per spread to avoid visual chaos. I found that these tricks help me achieve the look of pages that I love- balanced and bright, with photographs in focal point.

ProjectLife_album_na_zdjecia

STEP 3 - COMPOSITION

Before I glue anything down I like to play with composition of my page. I move the things around until I'm satisfied with the final arrangment, than I stick the elements together. At the end I write my journaling and add some stamping here and there.

Here is the final look of my pages. If you like it, you can easily recreate it using the sketches I attached below for you.

ProjectLife_album


And a sketch for you... do you know my favourite trick regarding sketches? Rotate or flip them! This way one sketch can provide you lots of beautiful (and different!) layouts each time you work with it!

SKETCH CTK

Have a lovely Friday and even better weekend! I'm looking forward to seeing your spreads in 2016 :)

Thursday, January 14, 2016

Let's get digital with Mira

Hey Guys!
It's Mira here with new edition of Let's get digital!
I prepared a cutting file for You to download from Citrus Twist Kits Facebook Fan Page! And I used it as a title for my layout. This page is also a part of my 2016 Pocket Life Album opening chapter (I call it opening chapter because it's much more than one title page :P)

Here's what You can download this month:


And here's the Layout that I made with "family" file:
This is a picture of my Family that I took on January 1st, right after I jumped out of the bed at 11 AM :D Real life (I am in the PJs) documented in my newest PL album! I really love how our daughter is looking at us when we are kissing. I feel like this is going to be my favorite picture of us in 2016 :D Great beginning of the year! Great!

Here are more details:


It was made mostly with goodies coming from January "Verona" PL kit. And I took those lovely pink sequins from "So Lovely" embellishment kit to spice things up a little bit :) (they are absolutely gorgeous since You don't need any glue to adhere them to Your work - perfect idea!) I hope You like today's inspiration!

I am waiting for Your creative use of the freebies! Have fun playing with them!
Hugs,
Mira

Saturday, January 9, 2016

3 To Inspire with Emma


Hi everyone!  Emma here to share this week's 3 To Inspire challenge!  I'm a big fan of these recipe challenges and this week I would love for you to join me using the following prompts:

1 - Use 4 (or more) pattern papers.  Bonus points if you use them to make/fill a shape of some sort!
2 - Use two different alpha's on your page
3 - Include at least 3 photo's!

As a reminder, your project can be a Project Life page or a scrapbook page but it must include all three (3) prompts on it!

Here's my take using the January kits:


I usually struggle with multiple photo's on my pages - but this photostrip was perfect for the four photo's as I was able to keep it on a smaller scale without them looking too small.

For my pattern paper I cut a few stars (my favourite!) using my trusty BigShot then cut small pieces of pattern paper to fill the shape in.  I admit it may have been a little tedious but, oddly enough, I enjoyed it ;)    Another easy idea for including multiple pattern papers to form a shape is creating a pie-chart (circle shape + different papers for each "section"). 


For my title I used one of the words from the Project Life Puffy Phrase Stickers (Heidi Swapp) that are in this month's Main kit and added the Elliot Tiny Alphabet Stickers from the Pocket Life kit underneath.  Those little alpha's are adorable, wish I had a few more packs :)


Now it's your turn! Use the three prompts to create your own projects and share them with us here in the gallery and/or our Facebook Forum.  I can't wait to see your pages!

Thanks, Em xo

Thursday, January 7, 2016

2016 Pocket Life Intro Page Inspiration


Hi guys! This is Pam Baldwin and I'm so happy to be here in my very first Citrus Twist Blog post :) Those lovely fussy cut numbers...don't they make you so happy?! (They didn't make it into my spread, but I really REALLY love them. I'll have to get them onto a layout some other time).


Today, I thought I'd share my 2016 Pocket Life intro page. I think sometimes covers can really stress people out, not knowing what to include or wanting it to be "just right". I don't really have a formula but for me, my intro page MUST include a photo of our family, whether it's a group shot or individual ones, and the year....and that's pretty much it. The rest of the page is an opportunity to play and challenge myself creatively, because so much of the focus on the rest of my album is on making sure the stories and photos I treasure most are the stars.


I've totally got a thing for tags and I think they're a really fun element to include in a pocket page spread. I decided to go with photo tags for my intro page, one for each member of my little family. (I had to bribe them with brownies and promises of crafty/stamping time (for my littlest daughter...that's my girl!) to get them to let me take their photos. Small price to pay really :) )


Photo tags are super easy to make. Here's a quick run down on how they came together...


1) You're going to want to get a few basic supplies. I cropped the photos down to about 2.75 x 4 (because 3 x 4 didn't really give me the long looking tag I was hoping for). You'll want to grab a real shipping tag if you've got one handy, some scissors, a small circle punch, a standard hole punch, adhesive, some twine or rope and whatever embellishments and patterned paper you like to pretty up your tag.


2) It's a bit tricky to see in this photo, but I used the shipping tag as a template to be able to cut the photo to the correct shape.


3) I used the small circle punch to make the hole reinforcement for the top (because I wanted it to be black and I couldn't find any black hole reinforcements locally...but you could totally use a self adhesive hole reinforcement instead OR patterned paper would be really cute).


4) Adhere your little punched circle to the top of the tag with whatever kind of adhesive you have handy (just make sure you get some near the edges too or it will get punched out at the end and fall off your photo tag).


5) Use a standard size hole punch to punch through the reinforcement and photo.


6) Loop through your twine and decorate away! The twine in this picture is from the kit packaging, but I actually used the cord from the muslin bag for my intro page tags. I also added some patterned paper and little number stickers for our ages and the wood veneer letters for our first initials :) I totally lucked out that the correct letter was there for each of us!!


So that was the photos taken care of. Then it was time to play around with some fun ideas for the filler cards.


I used a variety of elements from the January Pocket Life kit and the January Embellishment kit, but my FAVOURITE might just be the canvas tag in the middle :) I loved opening my box this month and seeing that "A New Year" patch stitched onto the bag and I reeeeeaally wanted to use it in my album.


Here's how I did it:


1) I used one of the cards from the kit as a template and a pencil to trace the 3x4 card onto the muslin bag.


2) Cut it out with a  good sharp pair of scissors...


3) Pick a stamp and start stamping!! "2016" was perfect for my intro page, but ANY of them would be so awesome to include in your album :)


4) I repeated the pattern to fill in the entire 3x4 canvas and used foam dots to attach the "A New Year" patch to the middle of the card. I think it turned out really really cool :)


That muslin bag came in super handy!! I used it to embellish a few other projects this month as well:


A giant letter "P" cut from the bag and stitched onto patterned paper worked wonderfully in this 3x4 pocket.


I did some more stamping to create a canvas "together" banner, which I think is a lovely little embellishment on the journaling card for this story :)


And just one more piece of packaging inspiration...I totally cut a card out of the kraft paper bag for my intro page because the neutral colours were exactly what I was looking for. "Make it work for you!" is one of my favourite pieces of advice in all things crafty.


Thank you so much for stopping by today and I'm really looking forward to sharing more from my album throughout the year!


Pam


Wednesday, January 6, 2016

Keeping it simple, getting it done.

As we start 2016, I am still busy trying to get my 2015 album finished and I bet I'm not alone! (I'm not alone, right?) I think one of the best ways to get it done is to keep it simple. And using the coordinating kits from Citrus Twist Kits is a great way to do that.


This spread came together really quickly using minimal stamping, embellishing and cards. The page is kept cohesively using pops of pink throughout. Pink sequins, pink tiny stickers and pink patterns. I haven't added any journalling but it would be a simple addition if needed.


Here is the process video of how this layout came together...

Tuesday, January 5, 2016

Pocket Life 2016: Tips, Tricks, PL Title Cards (+ a Cut File)

Happy New Year to everyone. We want to share a few Pocket Life tips from some of our designers to help get you off to a great year of PL. Everyone here is sharing a "title page" PL card to title their pocket page.

Karen Baker

I love a New Year, it's a chance to start fresh, an empty album full of creative possibilities! For 2016 I decided to create a full page layout in my pocket pages album, keeping it as simple as I could. That would be my 1st tip: keep it simple. This way you're more likely to stay up to date. My 2nd tip is: take one photo every day. You might not use it in your weekly layout but you've got seven options at the end of the week. 3rd tip: if you're camera shy like me, take a photo of your hands doing the work or what ever you're doing, take photos of things you want to remember one day, it can be as simple as what's in your handbag! Documenting your life doesn't mean you have to 'stage or create the memories' if you spent the day cleaning, take a before and after shot. Remember it's YOUR real life you're documenting, not one that looks good just for the cameras and albums. 

  1. keep it simple
  2. take one photo every day
  3. If you're camera shy like me, take a photo of your hands doing the work or what ever you're doing.
Here are some pictures of my Title Card layout page with a little flip book treatment:


Marie-Pierre Capistran

My tip for 2016 would be to get a blank note book and to write, each day, the date, one story and maybe a picture you want to include in your PL. At the end of the week you'll get at least 7 stories to tell. You don't have to include them all, of course. But if you get a little behind on your album, you'll have all this material to get started with.


Trina Craig

Happy New Year! I started my first PL in January of 2012 and quickly became overwhelmed (and got behind) with my 12x12 album. By mid 2012 I made the switch to a more manageable 6x8 size. I am not a weekly (or a daily) pocket page scrapbooker. I have melded my scrapbooking into my PL and make pages of anything that strikes my fancy.

My tips for you in 2016 are:

  1. Take lots of photos. If one of those photos (or a series of photos) move you, make a page. I only print the photos I love. (Gone are the days where I printed them all!)
  2. Don't get caught up in guilt if you get behind. The best place to start is today.
  3. Don't have any current photos to use? Include favorite photos from past events/years as "flashback" pages in your pocket life. Remember to date the flashbacks. (I love the 1980s-2000s October Afternoon date stamps for this.) It is fun to see the old photos mixed in with the new.
We had our first snow of 2016 this week. Our little, crazy cat (a kitten at heart) went crazy in a good way in the snow. We were laughing so hard at her antics, that I grabbed the camera and sat right down to create a PL page. Here is the title card for that page:


Elizabeth Gardner

Set yourself up for success: have your supplies organized and ready to go in one accessible place.
  1. Decide what you want from this project. Do you want it to be very quick & basic, just photos and cards? Do you want to embellish and make more room for incorporating creative elements?
  2. Do what works for you. Working weekly on Project Life is not realistic for me. Instead I take photos regularly throughout the month and jot down notes on things I may want to include in my planner. That way I can remember the details later. At the end of each month I go through my camera roll and print photos. I grab my kit and set to work on the past 4 weeks. I can usually piece together the month in one sitting. Maybe for you it will be easier to stick with a weekly approach. It’s your project, you dictate the best way to move forward.
  3. Cut yourself a break. I think the key to success with this is going with the flow. I don't really believe in “being behind.” If you miss a week, or even a month here and there, no biggie! Seriously! It doesn’t have to be this big thing hanging over your head that you keep "falling behind" on. Just pick up with the week you’re in and go from there. No pressure makes this process a lot more enjoyable. 

Mira Jurecka

The most important thing that I can share about my PL approach that would be useful is how I plan my spreads design. 

What I find really practical is printing pictures very often - almost on a regular basis. For example - I have a moment of free time during the weekend, so I sit down in front of my computer, develop the most recent photos, choose some of my favorites and print them immediately. Then I fit them into the pockets. Obviously I leave some of the pockets empty for cards and other memorabilia. All of this allows me to think of what I want to accomplish in the end. It allows me to imagine the general design of each spread. This way, when my Pocket Life Kit arrives I am ready to create right away! I simply play with papers and embellishments and my pages are finished in a blink of an eye. 

For those of you who print your pictures in a lab, I think developing pictures regularly and putting them in a specific folder (or envelopes or files by your crafting space) on your computer could do a similar job!


One more thing: since I write our family stories on the computer I have a similar process of printing my journaling. I really hope that some of You will find this planning concept useful in Your PL approach!

  1. Print your pictures often.
  2. Fit the pictures into your pockets, leaving some empty pockets for journaling and other memorabilia.
  3. Store photos by date/event in files on your computer or in an envelope or file system in your creative space. 


Tara Rice

Hi there! Since we are expecting our fifth family member any day now, I wanted to capture it on my title page for 2016. This will be my second year doing PL.
  1. I'm keeping it simple! It's so easy to overwhelm myself with ideas but i'm committed to doing what works for me.
  2. Have a routine. Last year I fell behind (I still am!) because I didn't establish a good routine. I'll be printing photos weekly and creating often. That way I won't have to choose from tons of photos and doing spreads on a regular basis makes them more manageable.
  3. If something isn't working, try something different! I won't be afraid to mix it up if one routine isn't working. Remember we all have our own way of doing things! Don't compare yourself to others and most importantly have fun.
Xxo,
Tara

Diane Williams


  1. Progress not perfection. You can spend forever trying to make a page feel right but sometimes it is better to call it done and move on.
  2. Don't worry about what everyone else is doing, make it work for you and your life.
  3. Even if you think your life is ordinary or boring, it is 100% worth documenting.


Here are your free cut file designs:


To download these cut file designs (designed by the lovely Mira Jurecka), join the Facebook Citrus Twist Kits Fan Page where we post digital files every month, free for our fans. 

Happy New Year!