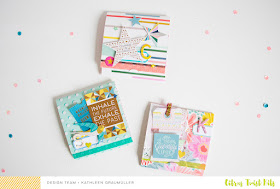
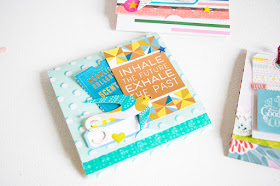
For this week's Tuesday Tutorial edition I'm bringing you three cute customised notebooks which would be great as little gifts. Because they are so quick and easy to make, they'd also be perfect for a craft session with your kids or at a birthday party for your littles.
For my notebooks I used the October "Good Vibes" Scrapbook Main kit and the October Embellishment kit and here's how I made them:
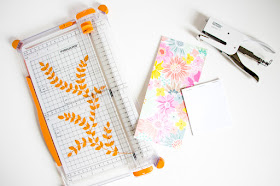
First I gathered my supplies. You will need some patterned paper, regular white printer paper and some things to embellish your notebooks (like alpha stickers, ephemera and other bits and pieces).
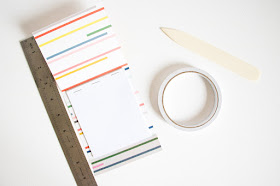
1. Per notebook I used three sheets of printer paper which I cut into six equal parts (about 3.5"x4.25"), that makes 18 pages per notebook. I used my stapler to staple them all together at the top edge. (You could use more pages, but keep in mind not to make it too thick because you will need to still be able to staple them together.)
2. For the cover I cut down a sheet of patterned paper to 4" wide and 9" long.
3. I then scored that piece of patterned paper at 3.75" and 8.25" and adhered the stack of printer paper with a strip of double sided tape to the middle part. To cover the staple needles, I used a small strip of paterned paper and adhered it on top (see second photo in this post).
4. Now the fun part begins: embellishing your notebooks! I used the October Scrapbook Main and Embellishment kit for this. When I was done embellishing them, I also added the initial of the person I made it for on the cover.
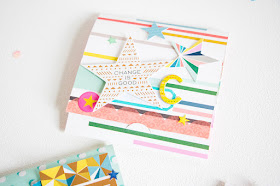
Tip: To easily keep the notebooks closed, you can use an envelope notcher on the bottom flap so you can slide the top flap into it (I hope I'm making sense, haha :D ). I don't own such a tool, so I just used my craft knife.
And here's a closer look at the other notebooks I made:
Kathleen




They are so beautiful!! Such a lovely idea!! Thanks so much for the great inspiration!! Anna xo
ReplyDeleteThank you, Anna!! You are the sweetest :)
DeleteThese are completely incredible!!! Thank you so much!!!! I am totally making these.
ReplyDeleteThanks so much, Donna!! Glad you like them! :) I would love to see your take on these in the FB group!!
DeleteGerade die kleinen Sachen machen oft was her. Sehr schön und die Farben...
ReplyDeleteDankeschön, liebe Tanja! :)
DeleteThis comment has been removed by the author.
ReplyDeleteExcellent image you have been posted. It is a very useful blog for me.
ReplyDeleteWholesaler of Notebooks